
The visual appeal of a website plays a critical role in attracting and retaining visitors. One effective way to make your website visually appealing is by creating a slider carousel. A slider carousel is a powerful tool that enables you to display multiple images, videos, or content in a single area of your website, making it a popular feature on many WordPress sites.
With the right approach, creating a slider carousel on your WordPress website can be easy, efficient, and effective.
In this guide, we will take you through the process of creating a slider carousel step-by-step, covering everything from choosing the right plugin, to designing your carousel and adding it to your website. By the end of this tutorial, you will have a slider carousel that enhances your website’s visual appeal and engages your visitors, making them want to explore your site further.
Benefits of Creating Google Drive Slider Carousel
Creating a Google Drive slider carousel in your WordPress website offers several benefits that can enhance the overall user experience and help your site stand out from the crowd. Here are some of the key benefits:
Improved user engagement: Slider carousels provide an interactive and engaging way to showcase your website’s content, attracting and retaining visitors to your site for longer periods.
Maximizes screen real estate: With a slider carousel, you can display multiple images or pieces of content in a single area, making the most of the available screen real estate.
Easy to navigate: Slider carousels are typically designed to be easy to navigate, allowing users to click or swipe through the different images or content without having to leave the page.

Versatile: Slider carousels can be used to display various types of content, including images, videos, and text, making them a versatile feature for any type of website.
Showcases your best content: Slider carousels are an excellent way to showcase your best or most important content, drawing attention to it and increasing the chances that visitors will engage with it.
Increases pageviews: By showcasing multiple pieces of content in a single area, slider carousels can encourage visitors to explore your site further, leading to increased pageviews and a lower bounce rate.
Mobile-friendly: Most slider carousel plugins are mobile-friendly, ensuring that your website looks great and functions properly on all devices, including smartphones and tablets.
Increases conversions: Slider carousels can be used to highlight products, services, or other offerings, leading to increased conversions and sales.
How to Create a Google Drive Carousel on WordPress?
To create Slide Carousel & display it on your WordPress website follow the below steps:
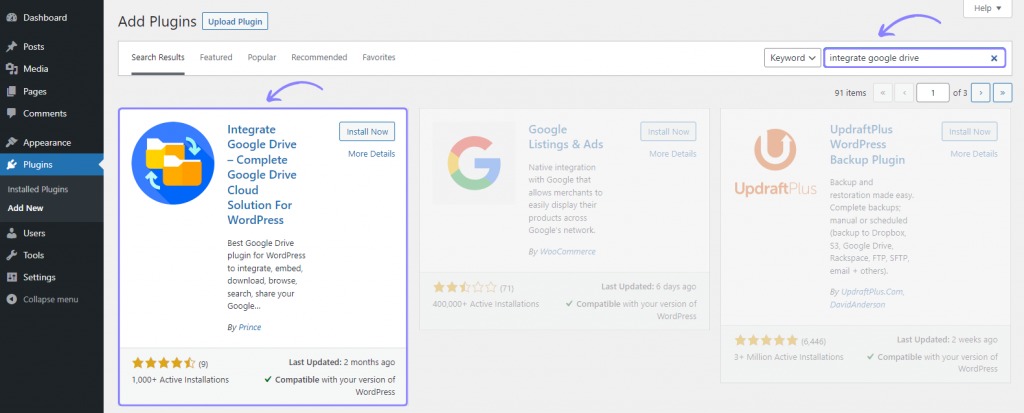
Step-1: Install & Activate Integrate Google Drive Plugin
To create a stunning slider carousel on your WordPress website you have to take help from a plugin called Integrate Google Drive. This plugin lets you create a Google Drive photo or video carousel without wasting your hosting space.
To install Integrate Google Drive plugin navigate to Plugins > Add New > Search Integrate Google Drive > Install & Activate the plugin.
Step-2: Link Google Drive Account
You must need to link your Google Account to create a slider carousel. To link a Google Drive account, click Google Drive > Settings > Add Account > Click Google Account You want to Add > Allow necessary permissions.

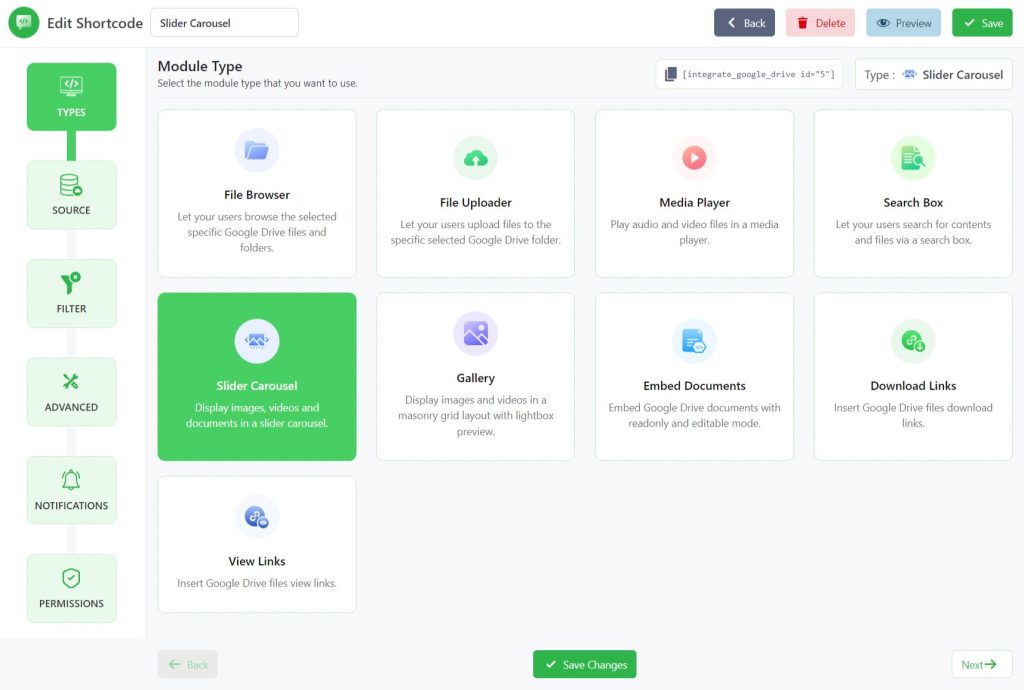
Step-3: Create Slider Carousel Module
To create a Slider Carousel module navigate to Google Drive > Shortcode Builder > Add new shortcode > Select Slider Carousel from Sources Tab > Give Shortcode Title (if required).
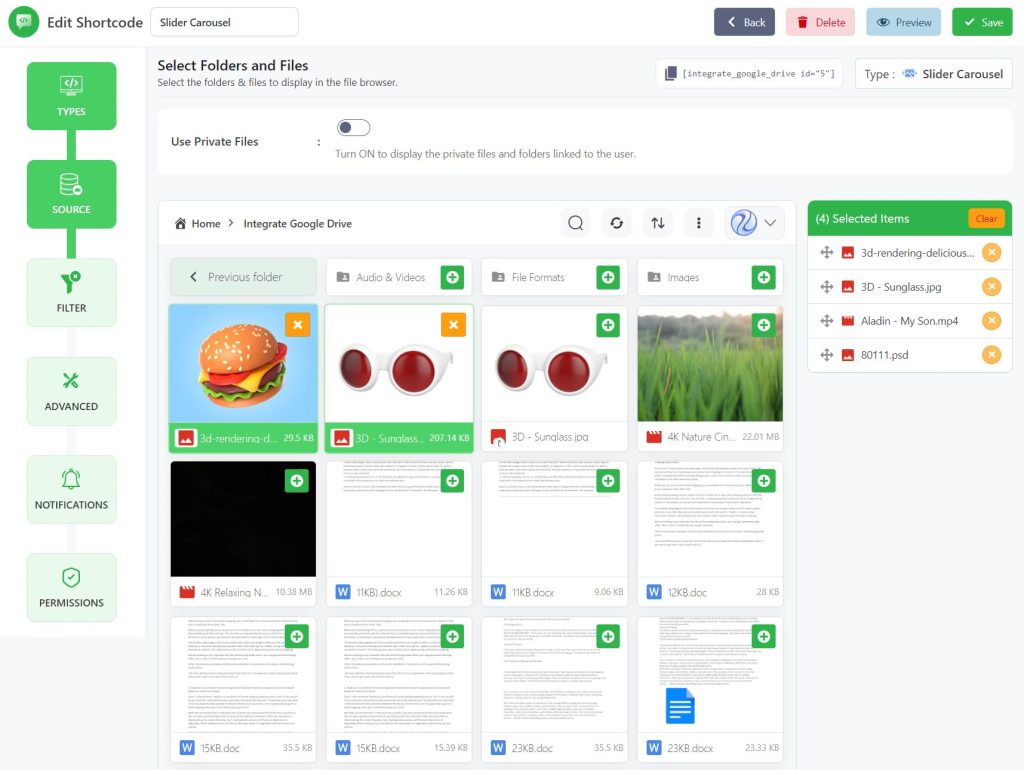
Step-4: Select Folders & Files
Select the folders & files you want to display in the slider carousel from your Google Drive account.
Use Private Files: Turn ON to use the private files and folders linked to the current user.
Create Private Folder: Turn ON to create and link a folder automatically to the user who has not connected any folder yet while the user views the module.
Naming Template: Set the folder name template for the automatically created private folders. You can insert from pre-made templates.
Parent Folder: Select the parent folder where the automatically created private folders will be created.
Template Folder: Select the template folder that will be copied to the new private folder.
Click Next.
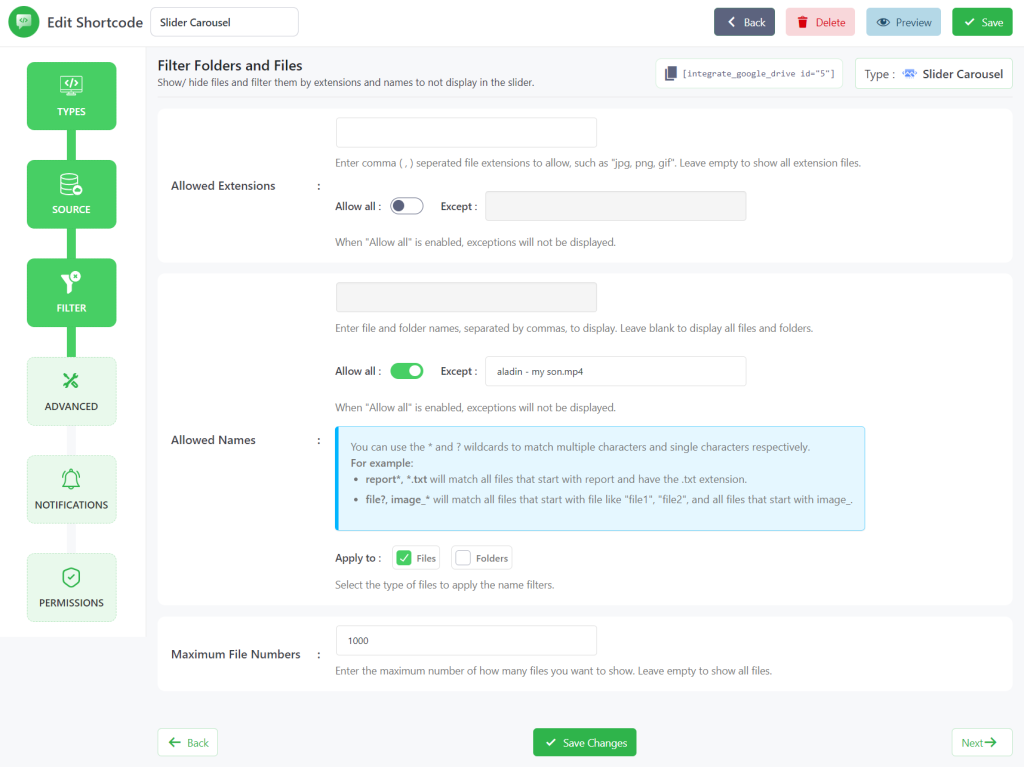
Step-5: Filter Elements
From the Filter Tab you can include/ exclude any files & folders and work on some other exclusions.
Exclude Extensions: Add comma (,) separated extensions to exclude. e.g (jpg, png, gif). Leave empty to show all extension files.
Exclude Names: Add comma (,) separate file and folder names to exclude. Leave empty to show all files and folders.
Max File Numbers to Show: Enter the number of how many files you want to show. Leave empty to show all files.
Click Next.
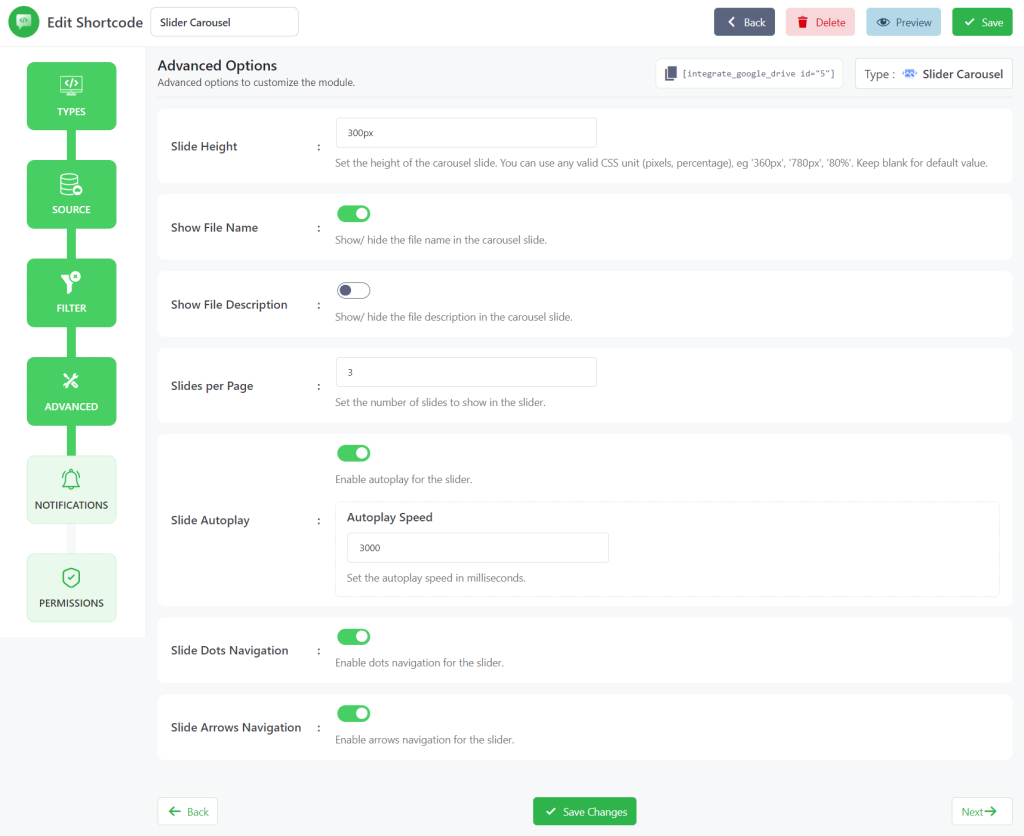
Step-6: Advanced Customization
From the advanced tab, you can customize the module more in advance. This will improve the module’s look, functionality, and others.
Slide Height: Set the height of the carousel slide. You can use any valid CSS unit (pixels, percentage), eg ‘360px’, ‘780px’, ‘80%’. Keep blank for a default value.
Show File Name: Show/ hide the file name in the carousel slide.
Show File Description: Show/ hide the file description in the carousel slide.
Slides per Page: Set the number of slides to show in the slider.
Slide Autoplay: Enable autoplay for the slider.
Slide Dots Navigation: Enable dots navigation for the slider.
Slide Arrows Navigation: Enable arrows navigation for the slider.
Click Next.
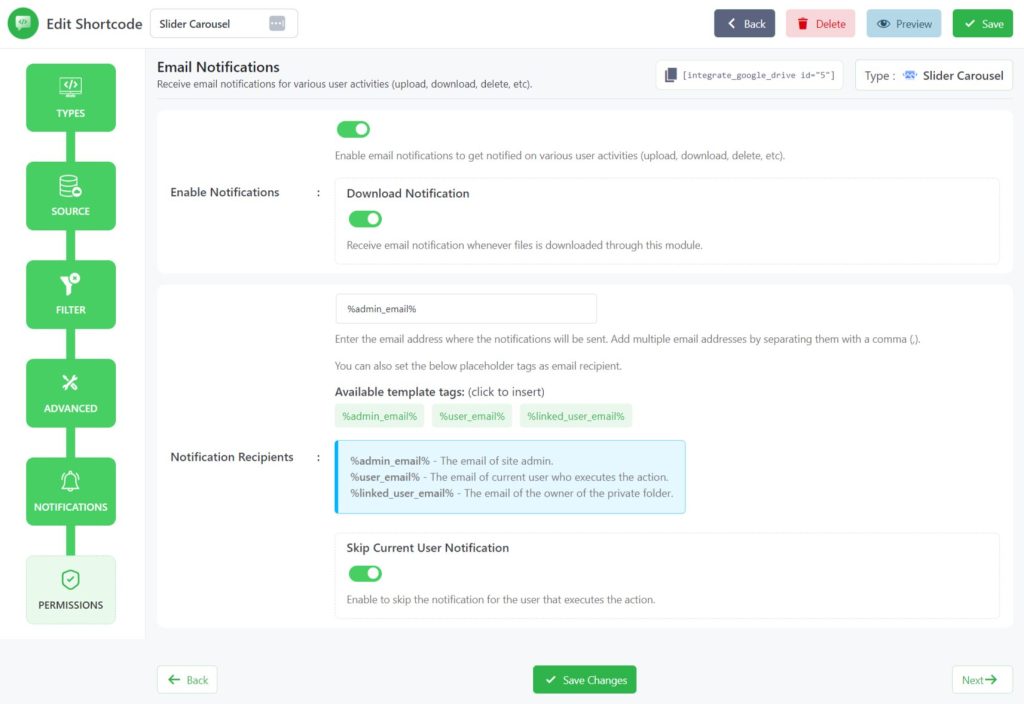
Step-7: Notifications Settings
From the Notifications Tab, you will mostly work on notification-related tasks. Ex: Email Notification, Upload Notification, and others.
Email Notification: Enable email notifications to get notified on various user activities (upload, download, delete, etc.).
Download Notification: Receive email notification whenever files are downloaded through this module.
Upload Notification: Receive email notifications whenever someone uploads files through this module.
Delete Notification: Receive email notifications whenever someone deletes files through this module.
Search Notification: Receive email notifications whenever someone searches for files through this module.
Notification Recipients: Enter the email address where the notifications will be sent. Add multiple email addresses by separating them with a comma (,). You can also set the below placeholder tags as email recipients. %admin_email%, %user_email%, %linked_user_email%
Skip Current User Notification: Enable to skip the notification for the user that executes the action.
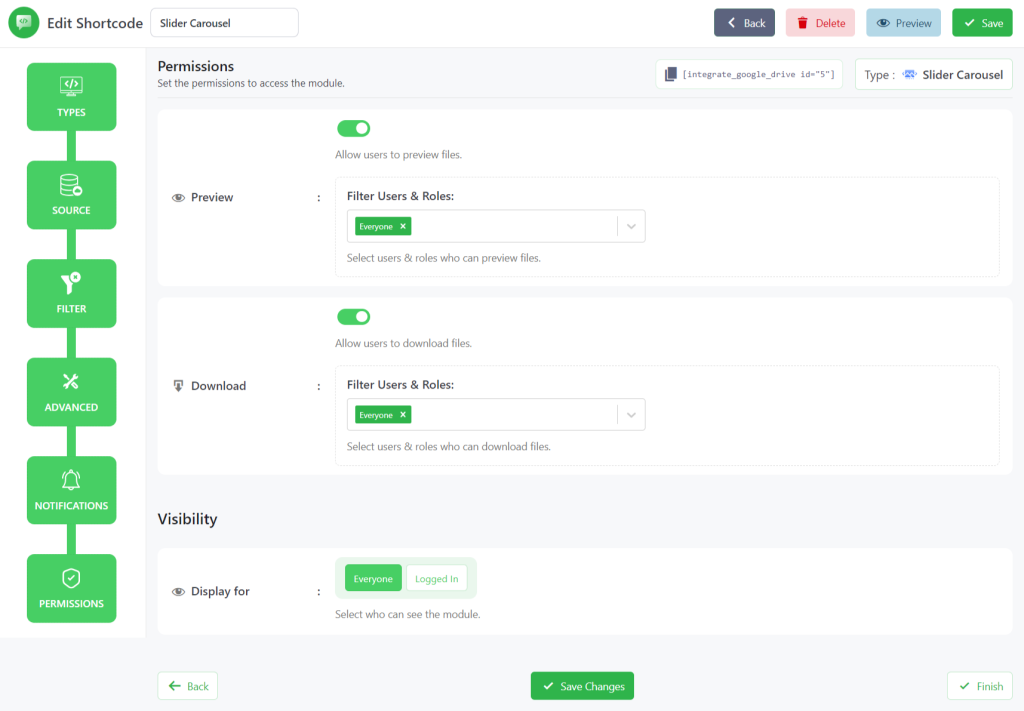
Step-8: Permissions Settings
Set the permissions settings to access the Slider Carousel module from the permissions tab.
Preview: Allow users to preview files by users & roles.
Download: Allow users to download files by users & roles.
Display for: Select who can see the module by users & roles.
Click Save Changes.
Step-9: Display Slider Carousel Module
You can display the slider carousel module on any page or post on your WordPress website. To display the module, copy the shortcode > paste where you want to display the module. The below screenshot represents how the Slider Carousel module will look like.

Read Also: How To Create Google Drive Video Gallery
Conclusion
Creating a slider carousel on a WordPress website can have a positive impact on user engagement, and increase pageviews & conversions. Using a plugin like Integrate Google Drive can make it easy and efficient to create a slider carousel.
All in all, creating a slider carousel for Google Drive files & folders saves lots of space of your hosting. That’s what you might be looking for years. If you have followed the process properly, now you are up to creating a professional-looking carousel for your WordPress website and displaying it anywhere you want.
Video Tutorial
FAQs & Answers
Here are some frequently asked questions and answers people mostly asked while they are creating the slider carousel:
What is a slider carousel in WordPress?
A slider carousel is a visual feature that allows WordPress website owners to display multiple images, videos, or content in a single area. It is a popular feature on many WordPress sites as it enhances the website’s visual appeal, maximizes screen real estate, and encourages visitors to explore the site further.
What plugin is required to create a slider carousel in WordPress?
To create a slider carousel in WordPress, you need to install and activate the “Integrate Google Drive” plugin for a professional-looking slider carousel.
Can I exclude any files or folders from my slider carousel module?
Yes, you can exclude any files or folders from your slider carousel module by clicking on the “Excludes Tab” and adding comma-separated extensions or file and folder names to exclude.
How can I display the slider carousel module on my WordPress website?
You can display the slider carousel module on your WordPress website by copying the shortcode and pasting it into the page, post, or widget where you want to display the slider carousel.
How many images or pieces of content can I display in a slider carousel?
You can display as many images or pieces of content as you want in a slider carousel. However, it’s important to keep in mind that too many items in the carousel can make it slow to load and potentially overwhelm the user. It’s usually best to limit the number of items to around 5-7.
Can I add a slider carousel to any page or post on my WordPress website?
Yes, you can add a slider carousel to any page or post on your WordPress website. Most slider carousel plugins provide you with a shortcode that you can insert into any post or page to display the carousel.
No Comments yet!
Leave a reply