In today’s fast-paced digital world, sharing and reviewing photos has become an essential part of various industries, from photography and design to marketing and advertising.
Whether you’re a photographer seeking client approval or a creative professional collaborating on a project, an efficient and user-friendly photo-proofing process is crucial.
This is where Integrate Google Drive plugin comes into play, offering a seamless solution that simplifies photo proofing and enhances collaboration inside your WordPress website.
In this article, we will walk you through the step-by-step process of setting up photo proofing using Integrate Google Drive and let users or visitors send photos via your email.
What Does Photo Proofing Do?
Photo proofing especially in Gallery plays a vital role. If you carefully follow the below notes, you will indeed have a clear picture.
- Share images with clients or collaborators
- Gather feedback and comments on specific areas of the photos
- Collaborate in real-time, enhancing communication
- Make annotations directly on the images
- Keep track of version history and changes
- Streamline the review and approval process
- Ensure accurate and effective communication
- Enhance client satisfaction and project outcomes
- Maintain an organized record of feedback and decisions
How to Create Photo Proofing on WordPress Website?
Creating a photo proofing feature on your website is none but like bread and butter. Anyone who has days of skills handling WordPress websites can do it easily. How? Let’s find out!
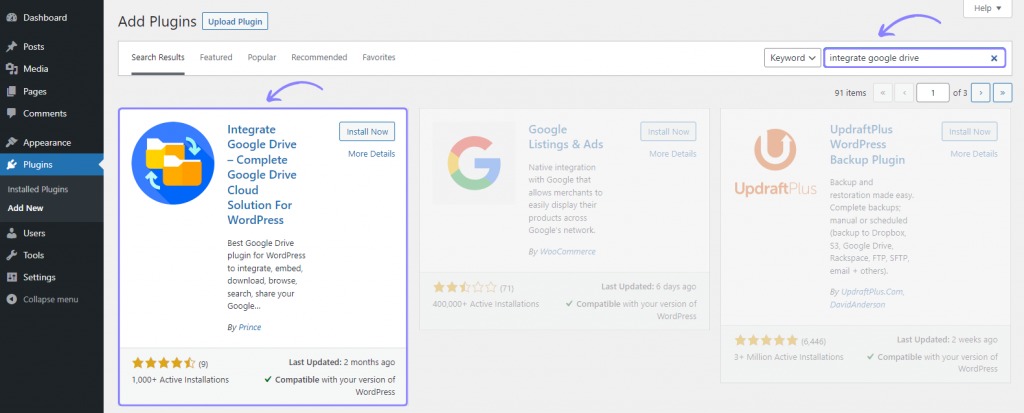
Step-1: Install & Activate Integrate Google Drive Plugin
- Navigate to “Plugins” > “Add New.” (from the WordPress dashboard)
- Search for the “Integrate Google Drive” plugin and click on “Install.”
- Once the installation is complete, activate the plugin.
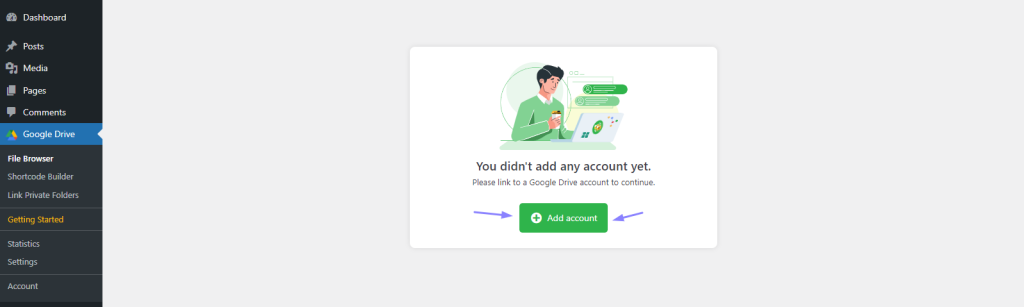
Step-2: Connect Google Drive Account
- Navigate to “Google Drive” from the WordPress dashboard.
- Look for the “Settings” option and click it.
- In the settings menu, locate and select the “Accounts” section. This is where you manage account-related configurations.
- Within the “Accounts” section, you’ll find an option labeled “Add New Account”. Click on this option to initiate the process of adding a new Google account.
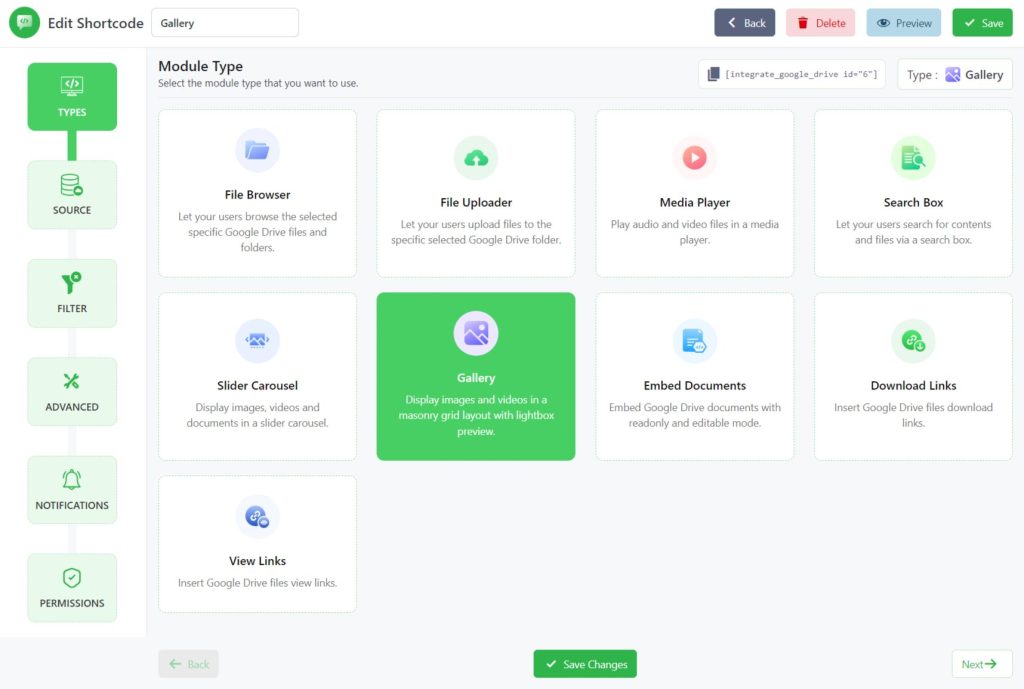
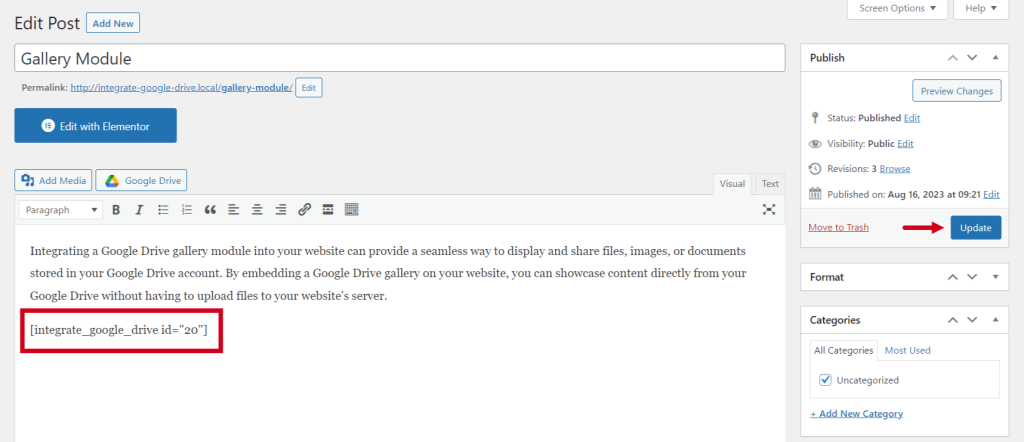
Step-3: Create Gallery Module
- Navigate to “Google Drive” from the WordPress dashboard.
- Look for “Shortcode Builder.” This is where you can generate custom shortcodes to embed content on your website.
- Inside the Shortcode Builder, locate and click on the “Add New Shortcode” button.
- Within the shortcode creation interface, Choose the “Gallery” module.
- Perform other customizations as per your need.
Step-4: Setup Photo Proofing Feature
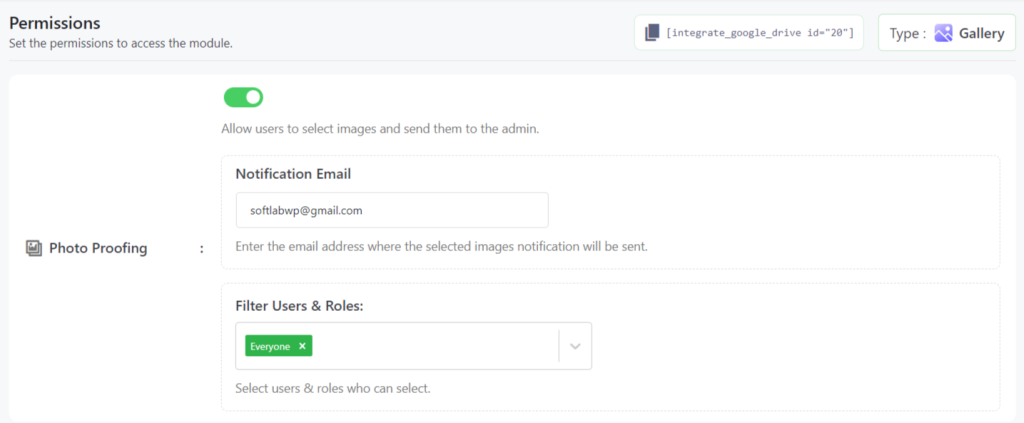
While configuring the Gallery module you will notice multiple tabs on the left side. Navigate to the “Permissions” tab where you will discover “Photo Proofing” settings.
- Photo Proofing: Allow users to select images and send them to the admin.
- Notification Email: Enter the email address where the selected image notification will be sent.
- Filter Users & Roles: Select users & roles who can select.
Step-5: Display Gallery Module
- Determine where you want to display the photo proofing gallery on your website (e.g., a specific page or post).
- Copy the shortcode or widget code provided by the plugin for the gallery module.
- Paste the shortcode into the desired location within your website’s content management system.
- Save or publish the changes to make the gallery module visible on your website.
Congratulations! You’ve successfully set up a photo-proofing system integrated into your WordPress website. Clients and collaborators can now access the gallery, view images, and provide feedback, for your creative projects.
Now, once users send files, the admin will get an email notification to the given email address. As an admin, you also download submissions by clicking on the “Download CSV” button.
Conclusion
Now it’s time to Embrace the power of Google Drive to revolutionize the way you approach photo proofing, making the experience efficient, engaging, and hassle-free for everyone involved.
Get yourself into play with this feature add take your business or profession to the next level.