If you’re looking to make your Contact Form 7 more dynamic and user-friendly, conditional fields are a game changer. Unfortunately, Contact Form 7 doesn’t offer this feature out of the box.
But don’t worry—there’s an easy workaround! Using a third-party plugin, you can add conditional logic to your forms, making them adapt based on user inputs.
Whether you’re aiming for a more personalized user experience or just want to simplify your forms, this guide will walk you through the process step by step.
Let’s dive in and learn how to set up conditional fields in Contact Form 7!
Table of Contents
What Are Conditional Fields?
Conditional fields are form fields that appear or change based on the user’s previous selections or inputs. In other words, these fields are shown or hidden depending on certain conditions being met.
For example, if a user selects a specific option from a dropdown, additional fields related to that choice may appear, while others may be hidden.
This helps create a more personalized and streamlined form experience, only displaying relevant questions based on user interactions.
Conditional fields can improve form clarity and user engagement by asking the right questions at the right time.
Why is Conditional Field Important in Contact Form 7?
Conditional fields in Contact Form 7 are crucial for creating personalized, streamlined forms. They enhance user experience by displaying only relevant fields based on user input.
- Increases Form Completion Rates: When forms are more intuitive and concise, users are more likely to complete them, leading to higher submission rates.
- Boosts Data Accuracy: Conditional fields ensure that only pertinent information is collected, reducing the chances of irrelevant or incorrect data being submitted.
- Enhances Form Efficiency: With conditional logic, you can reduce the number of fields shown, streamlining the process and making it quicker for users to fill out the form.
- Personalizes User Interactions: By tailoring the form based on user input, you can deliver a more customized experience, making users feel that their needs are being prioritized.
- Simplifies Complex Forms: For forms with multiple sections or questions, conditional fields help organize them logically, making the form easier to navigate and understand.
Must-Have Plugins to Setup Conditional Fields?
How to Add Conditional Fields in Contact Form 7?
Adding conditional fields to Contact Form 7 might seem tricky at first, but with the right tools, it’s a breeze. In this section, we’ll show you exactly how to implement conditional logic step-by-step, so you can start customizing your forms today!
Enable Conditional Logic
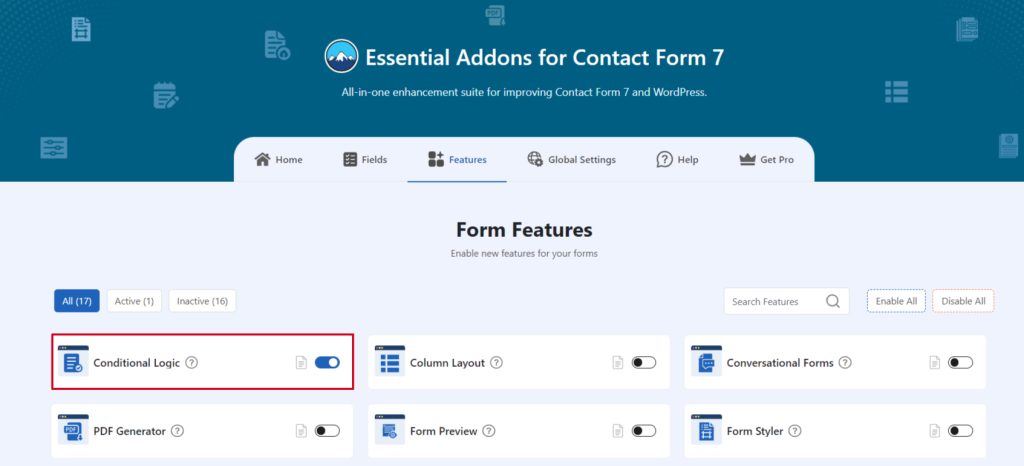
You must enable the conditional Logic feature to implement custom conditions for Contact Form 7. To do that, follow the below steps:
- Navigate to the Contact Form 7 menu.
- Essential Addons.
- From the Features tab enable the Conditional Logic.
Add Conditional Logic Tag
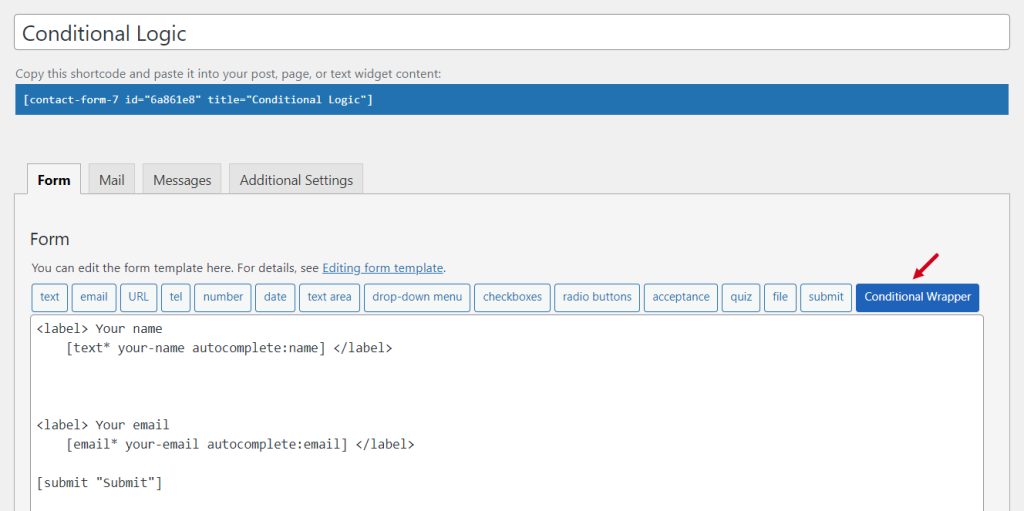
To implement the Conditional Logic in your contact form follow the below steps:
- Navigate to any existing form or create a new one.
- Add the Conditional Wrapper tag where you want to display it in your form.
Configure Conditional Logic
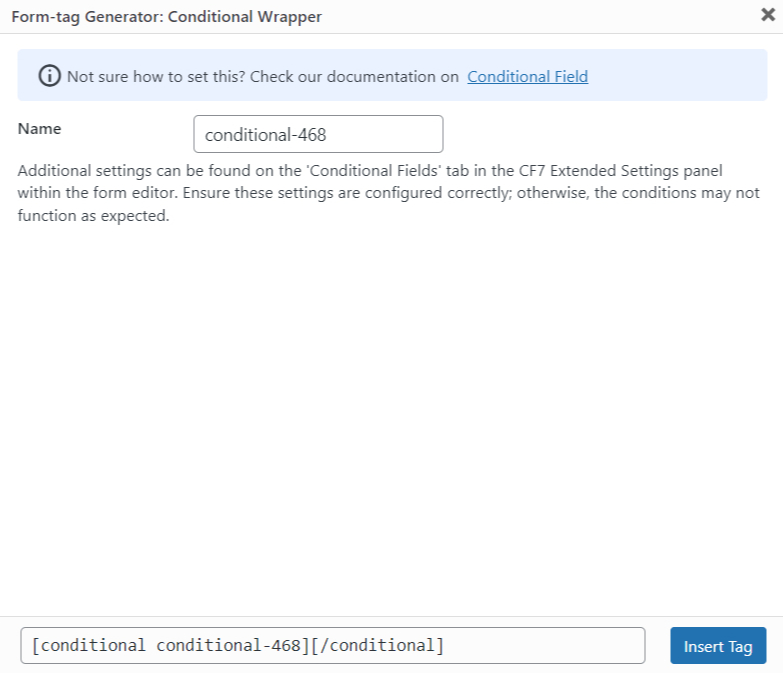
After clicking the Conditional Wrapper tag a new popup window will appear. Here you can configure & customize the conditional logic settings.
- Name: Usually the name field is auto-generated. You can add custom value if required.
Click the Insert Tag button once the configuration is done. The customized tag will be added to your form editing panel. Save Changes.
Configure Conditional Logic Additional Settings
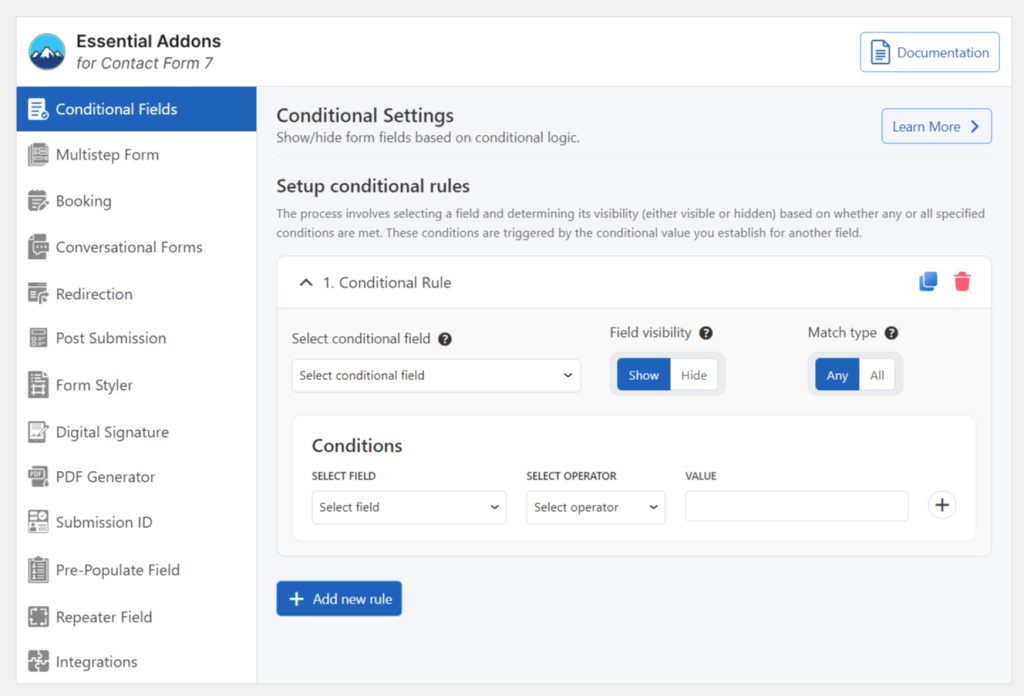
The process involves selecting a field and determining its visibility (either visible or hidden) based on whether any specified conditions are met. These conditions are triggered by the conditional value you establish for another field.
- Select Conditional Field: Select the conditional field which is wrapped by [conditional][/conditional] tag.
- Field Visibility: Select the field visibility whether the field should be visible or hidden on conditions match.
- Match Type: Select to match whether all conditions are required or any.
- Select Field: Select the field where conditions will apply.
- Select Operator: Select the operator where conditions will apply.
- Value: Select the value for the condition.
- Add New Rule: To add another tule click the Add New Rule button.
Embed the Shortcode
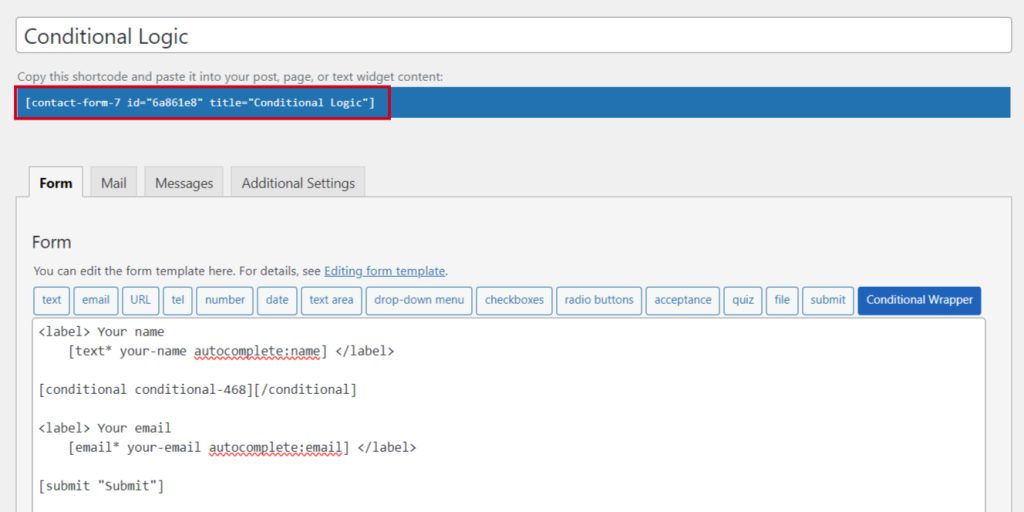
- Copy the Shortcode and paste it inside any page or post to display the conditional field in your form.
Video Tutorial
Conclusion
Incorporating conditional fields into your Contact Form 7 is a powerful way to enhance your forms, making them more interactive, efficient, and user-friendly.
By using the right plugin and following the simple steps, you can easily create dynamic forms that adapt to your users’ needs.
So why settle for a basic form when you can offer a tailored experience that boosts engagement and accuracy? Start setting up conditional fields today and take your forms to the next level!
