Do you know? The hassle of manually uploading, updating, and embedding media files on the WordPress website has gone! Instead, it leverages the cloud storage capabilities of Google Drive, allowing you to maintain a central repository for your files while effortlessly displaying them on your website.
We’ll explore an efficient method to display various media files — audio, video, and images — from your Google Drive directly on your WordPress website, all without the need for embedding. With this simple yet effective approach, you can seamlessly integrate your Google Drive content, enhancing the visual and auditory experience for your readers.
Whether you’re a content creator, educator, or business owner, this method will empower you to share your files effortlessly, streamlining the content delivery process. Let’s embark on this journey together and unlock the potential of displaying your Google Drive media files on your WordPress website without embedding hassle.
Why Should You Display Rather Than Embedding?
When it comes to showcasing media files on your WordPress website, you may be familiar with the traditional method of embedding. However, sometimes embedding can be time-consuming and a hassle for some people. As everybody wants to make things easier for them. Let’s explore why should you avoid embedding Google Drive media files and the benefits of displaying rather than embedding.
Streamlined File Management
By displaying Google Drive media files on your WordPress website, you can streamline your file management process. Rather than uploading and storing files directly on WordPress, you can leverage the robust cloud storage capabilities of Google Drive. This allows you to maintain a centralized repository for your media files, making it easier to organize, update, and manage your content.
With Google Drive’s intuitive file management features, you can easily categorize files into folders, apply tags, and make changes on the go, ensuring a seamless experience for both you and your audience.
Enhanced Website Performance
Embedding media files directly into your WordPress website can significantly impact its performance. Large file sizes and multiple embedded elements can slow down page loading times, leading to a poor user experience. By displaying Google Drive media files, you reduce the burden on your website’s server and optimize loading speeds.
Google Drive handles the heavy lifting, efficiently delivering media files to your audience, regardless of file size or format. This results in faster page loading times, improved website performance, and increased visitor engagement.
Consistent File Updates
One of the challenges of embedding media files is ensuring that they stay up to date across all your web pages. If you make changes or updates to an embedded file, you need to manually replace the embedded code on each webpage where it appears. This can be time-consuming and prone to errors, especially if you have a large website with numerous embedded files.
However, by displaying Google Drive media files, any changes made to the files automatically reflect on your WordPress website. This ensures consistency across all pages, saving you time and effort while providing a seamless user experience.
Versatile Access Control
Google Drive offers robust access control features, allowing you to define who can view, download, or edit your media files. By displaying files from Google Drive on your WordPress website, you can leverage these access control settings to protect your content.
Whether you want to share files with specific individuals, restrict access to a select group, or make them publicly available, Google Drive grants you the flexibility to tailor access permissions as per your requirements. This ensures that your media files remain secure and accessible only to authorized individuals.
Cost and Storage Efficiency
Embedding large media files directly into your WordPress website can consume significant storage space, especially if you have a limited hosting plan. This can lead to additional costs for upgrading your hosting package or purchasing extra storage. However, by displaying Google Drive media files, you can save on storage costs as your files are hosted on the cloud.
Google Drive offers generous storage options, often providing ample space even with free accounts. By offloading your media files to Google Drive, you can optimize your website’s storage usage and reduce overall costs.
How to Display Google Drive Media Files without Embedding?
To display Google Drive Media files rather than embedding you have to take assistance from a 3rd party plugin called Integrate Google Drive. This plugin will allow you to display limitless size media files (audio, video, image, and others) directly into your WordPress website without having an embedding hassle. So let me directly take you to the steps:
Step-1: Install & Activate Integrate Google Drive Plugin
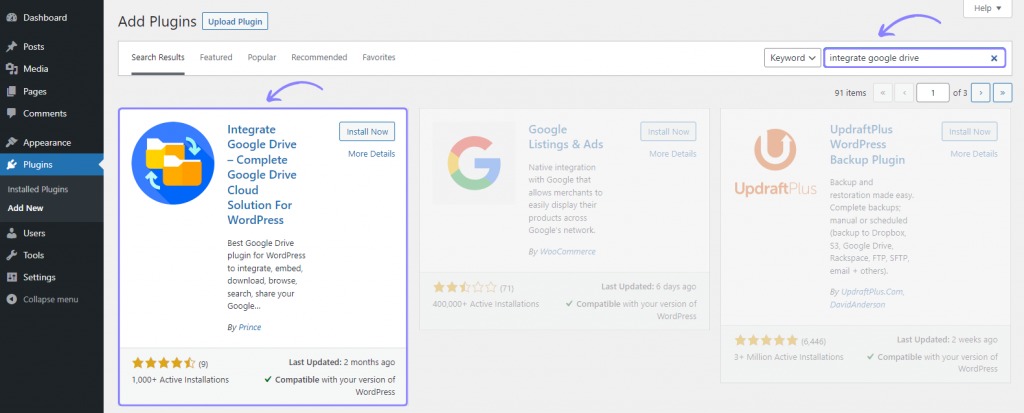
To display Google Drive video, audio, or image directly on your website without embedding, you should have installed & activated Integrate Google Drive plugin. Head over to Plugins > Add New > and type Integrate Google Drive keyword in the search bar.
Step-2: Create Embed Document Module
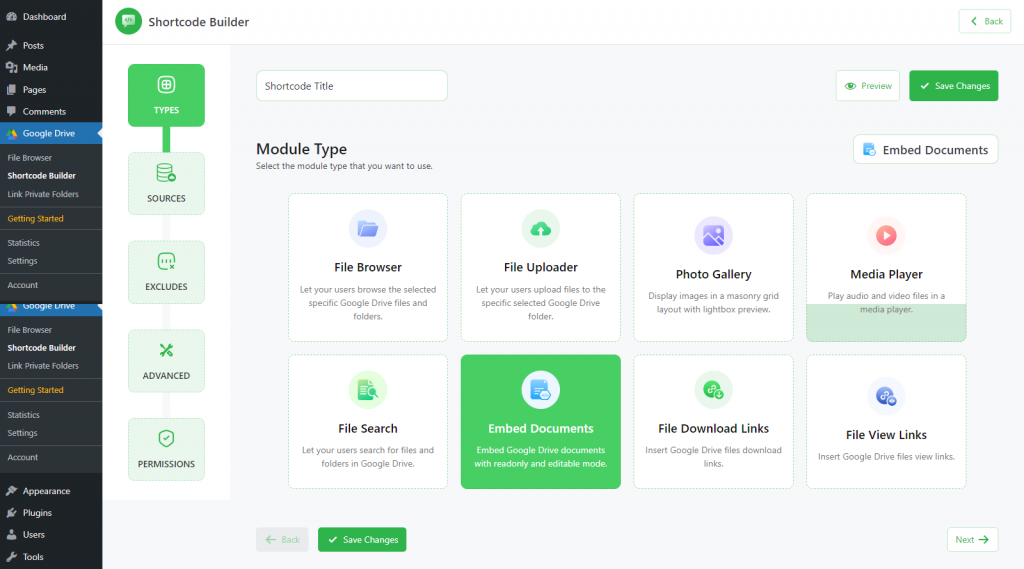
To create an Embed Document Module, click on Google Drive > Shortcode Builder. Create a New Shortcode > Select the Embed Document Module from the Types tab.
Rename the shortcode title from the top left side of the WordPress dashboard depending on your project type. Click Next.
Step-3: Configure the Sources Tab
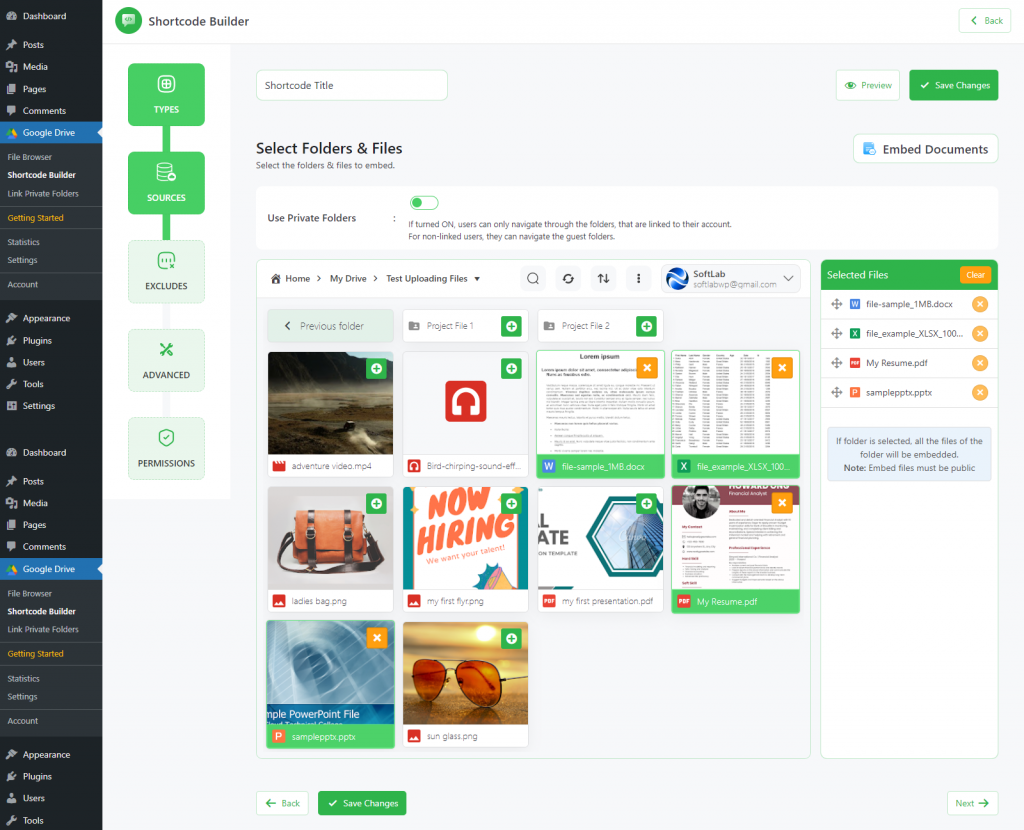
Now you will be redirected to the Sources (Files & Folders) tab. Here you need to select your files & folders from your linked Google Drive. Select your files & folders by pressing the select button.
You will discover your selected files, in the selected files list section of your screen. You can drag them up or down to change their orders.
You might notice a new settings option named Use Private Folders. Let’s introduce you to it.
- Use Private Files: If Use Private Folders is turned on, private files and folders will be linked to the user. Click Next.
Step-4: Configure Advanced Tab
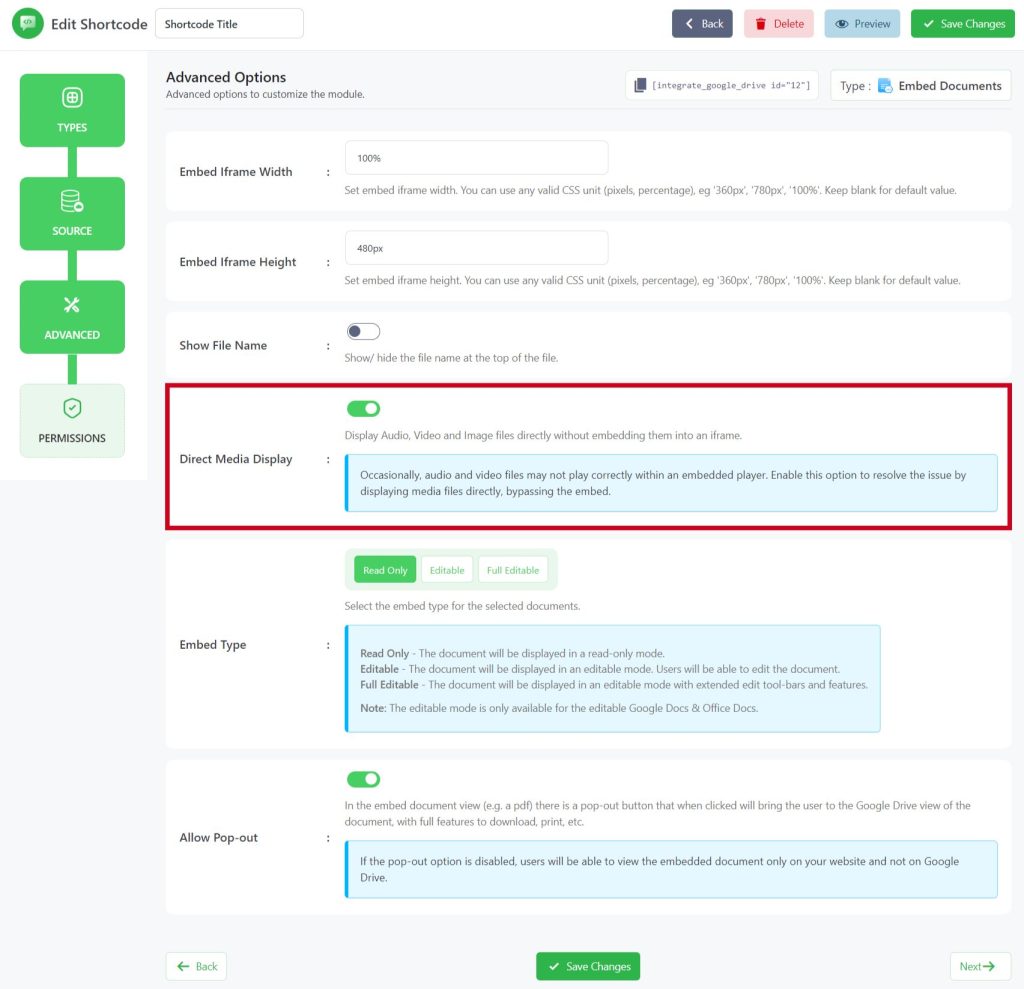
From the Advanced Settings, You can customize settings with some advanced features depending on what you are expecting.
Embed Iframe Width, Embed Iframe Height, Embed Type, and Allow Pop-out options won’t be useful while you are displaying media files directly on your website rather than Embedding.
- Show File Name: While the setting is enabled file name will be visible at the top of the file, otherwise won’t be.
- Direct Media Display: Easily display media files (images, videos, and others) directly without embedding them into an iframe when this setting is enabled. Click Next.
Step-5: Configure the Permissions Tab
Now you will be taken to the Permissions tab. Here you will mostly work on permission-related tasks for your Embed Documents module.
- Display for: Using this option you can allow permission of your files to everyone and logged-in users. You can also filter manually by user roles or any specific users.
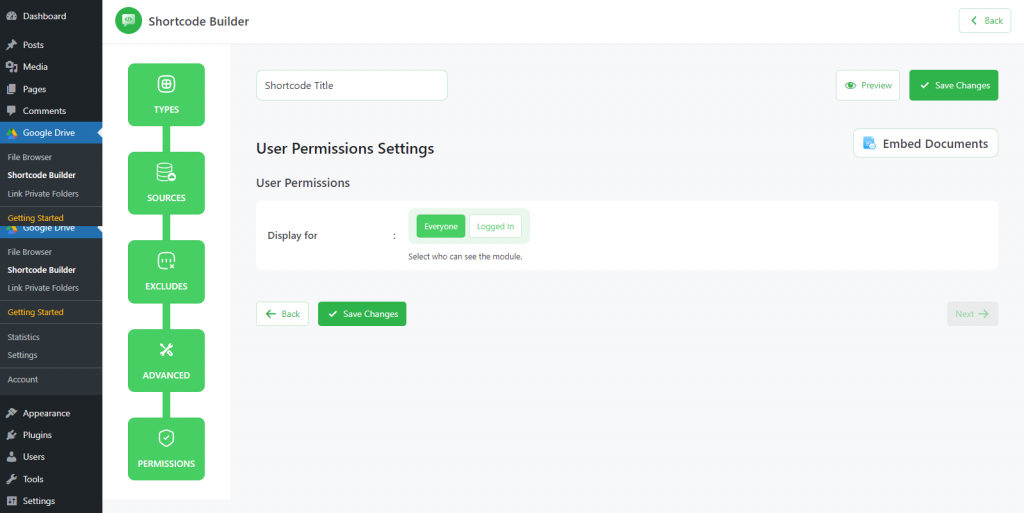
Click Save Changes and copy the shortcode from the shortcode builder page.
Now you can use the shortcode to display Google Drive files from your WordPress Website, any posts, or pages without embedding them.
Conclusion
By following the steps outlined in this article, you can easily display Google Drive Media Files on your WordPress website without embedding them. Hopefully, from now you won’t have to worry about the embedding hassle, large file size, management issues, or anything else. Integrate Google Drive is the one and only solution for you now.
No Comments yet!
Leave a reply