Want to make your forms more interactive? With the Image Choice field from Essential Addons for Contact Form 7, you can let users select images instead of text for Contact Form 7. This adds a visual touch to your forms, making them more engaging and user-friendly.
Perfect for product selections, surveys, or visual feedback, this feature allows users to choose from a gallery of images.
In this guide, we’ll walk you through how to add and customize the Image Choice field in your Contact Form 7 forms.
Make sure you have installed both Contact Form 7 & Essential Addons for Contact Form 7 in your WordPress dashboard.
Enable Image Choice
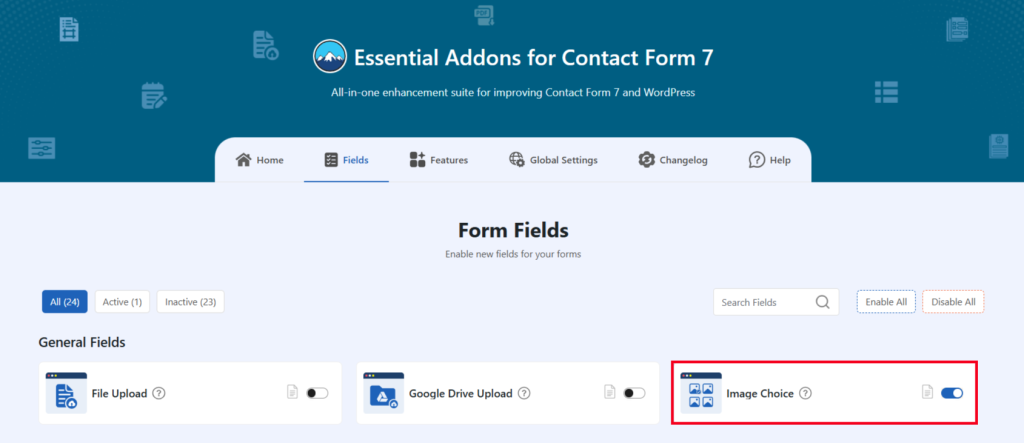
You must enable the Image Choice to implement image selection while submitting the form. To do that, follow the below steps:
- Navigate to the Contact Form 7 menu.
- Essential Addons.
- From the Fields tab enable the Image Choice.
Add Image Choice Field
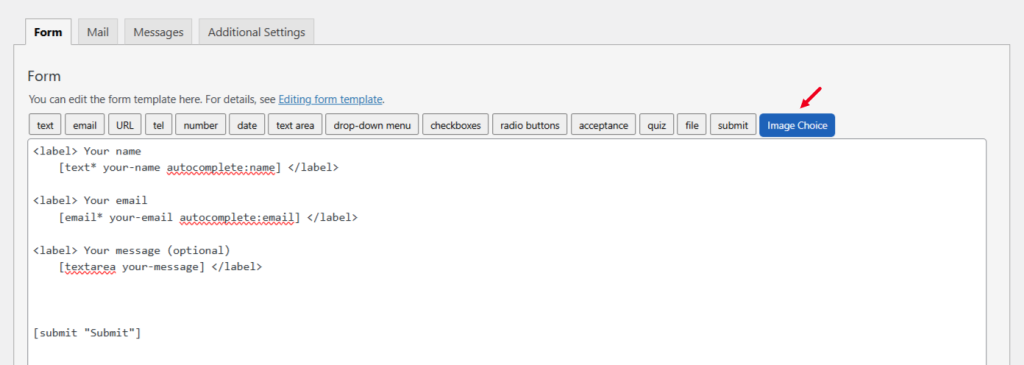
After enabling the Image Choice it’s to implement this in your contact form. Follow the below steps to do so.
- Navigate to any existing form or create a new one.
- Add the Image Choice tag where you want to display in your form.
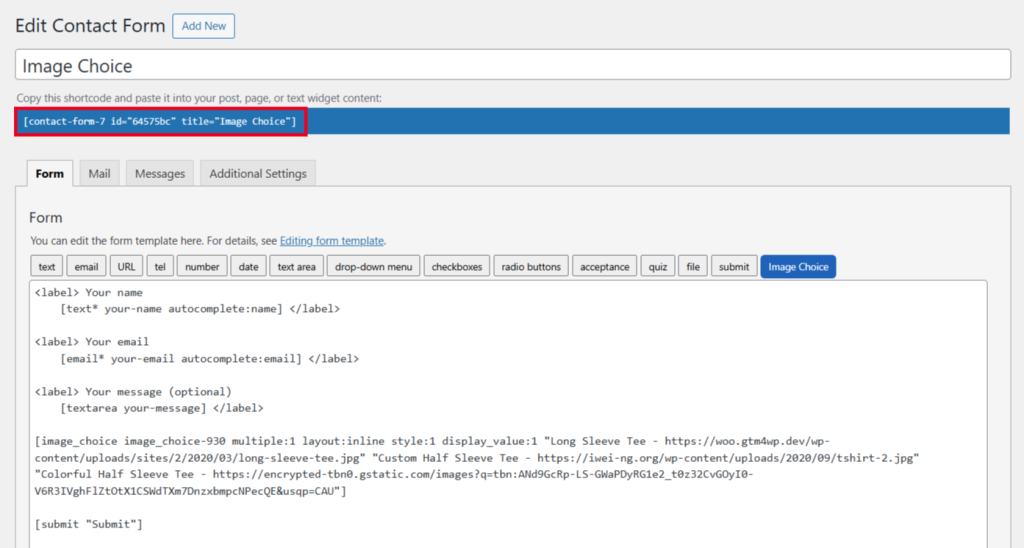
Configure Image Choice
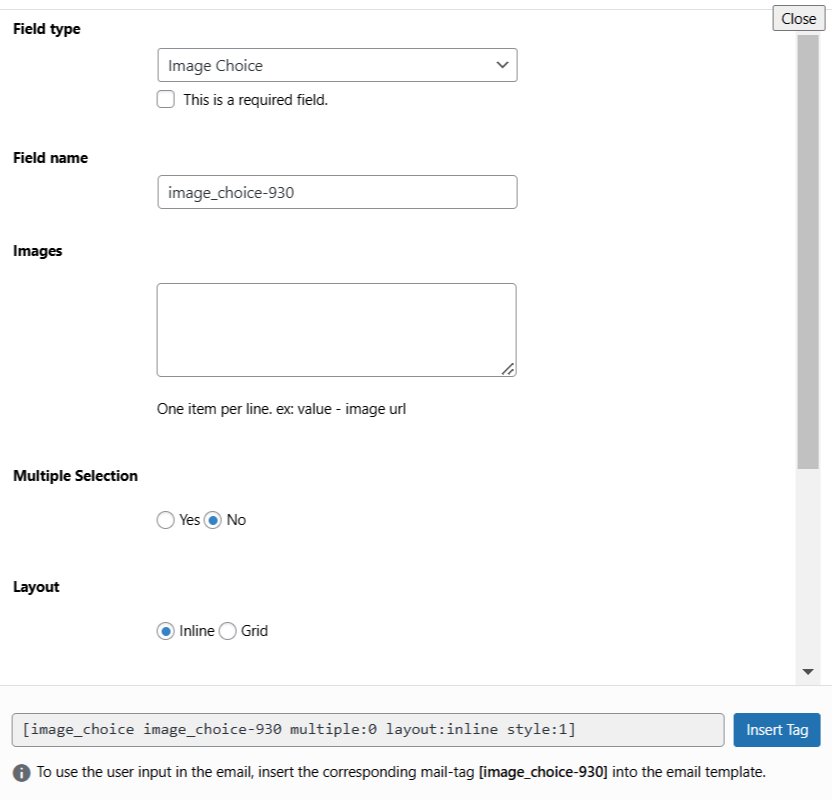
After clicking the Image Choice tag a new popup window will appear. Here you can configure & customize the Image Choice settings.
- Field Type: Tick or untick whether you want to mark it as required or not.
- Field Name: Usually the field name field is auto-generated. You can add custom value if required.
- Images: Enter image value with URLs in the input field. One item per line. ex: value – image URL.
- Multiple Selection: Choose Yes/No to allow or disallow multiple selections.
- Layout: Choose the preferred layout for the image choice field.
- Style: Select the style.
- Display Value: Choose Yes/No to allow or disallow to display the value.
- Class Attribute: Enter custom class attribute if required.
Click the Insert Tag button once the configuration is done. The customized tag will be added to your form editing panel. Save Changes.
Embed the Shortcode
- Copy the Shortcode and paste it inside any page or post to display the form.
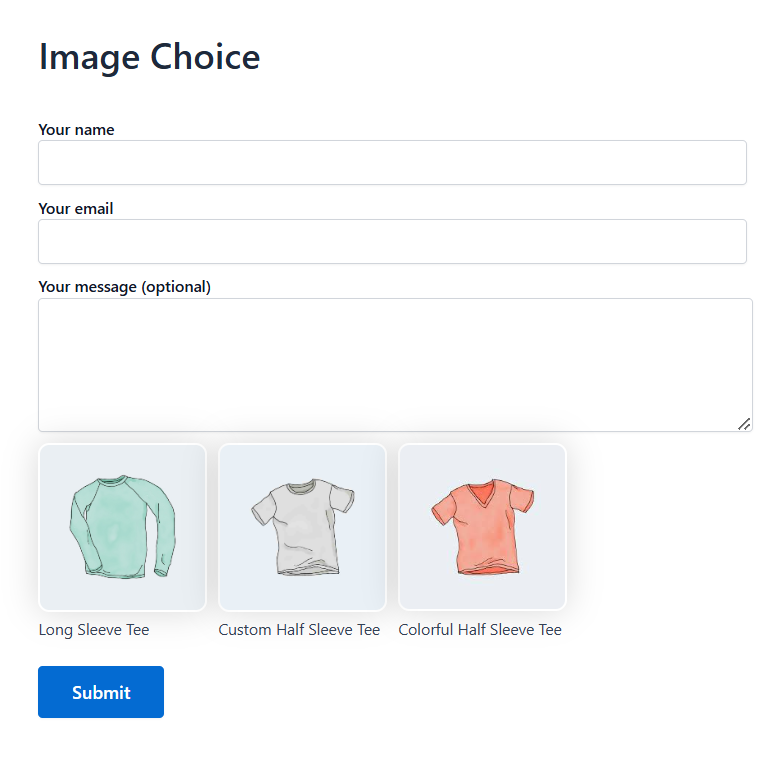
Output