With the Mailchimp integration, you can effortlessly collect customer information and automatically add it to your Mailchimp campaign lists. This feature streamlines your marketing efforts by ensuring that new contacts are captured and organized without manual input.
It saves time and keeps your email campaigns up to date, making it easier to reach your audience effectively. To enable Mailchimp integration and automate your marketing effort follow the below guideline.
Make sure you have installed both Contact Form 7 & Essential Addons Contact Form 7 plugins inside your WordPress.
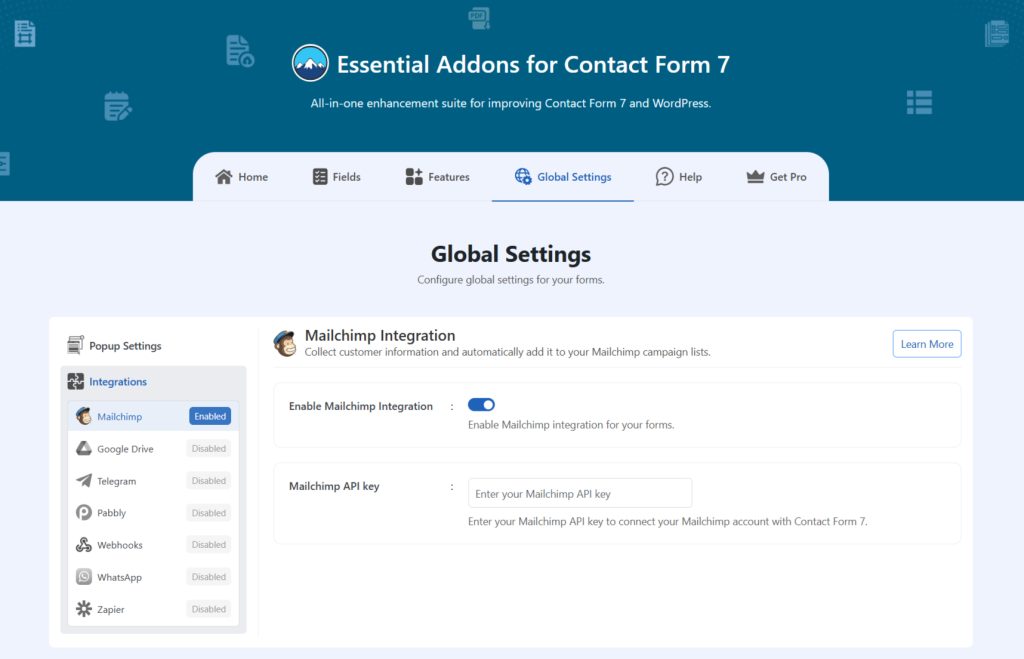
Enable Mailchimp Integration
Before connecting your Mailchimp with Contact Form 7 you have to enable Mailchimp integration. Follow the guidelines below to enable.
- Navigate to the Contact Form 7 menu.
- Essential Addons.
- Global Settings tab > Integrations > Mailchimp.
- Enable Mailchimp Integration.
- Enter the Mailchimp API Key in the input field.

Customize Mailchimp Settings
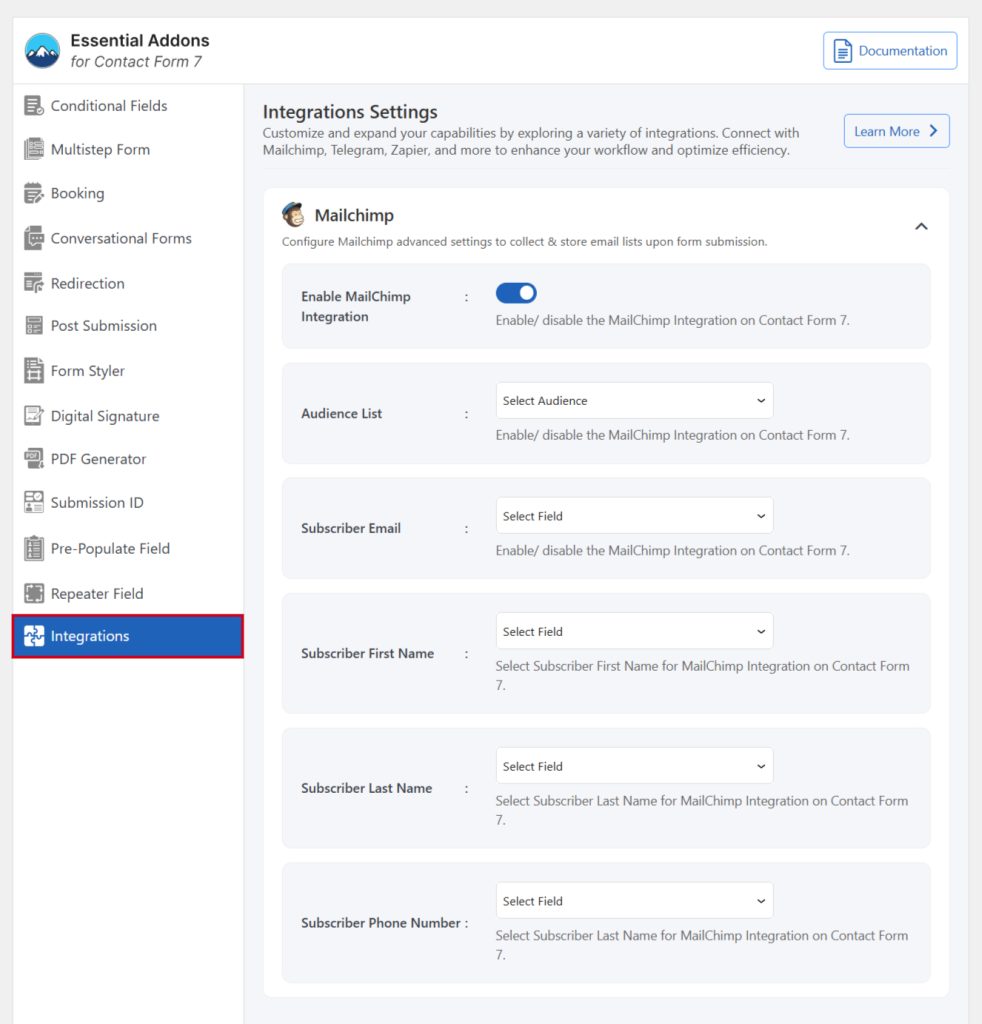
After enabling Mailchimp integration & setting your Mailchimp API key, it’s time to customize additional settings. Follow the guidelines below to implement the settings.
- Navigate to any existing form or create a new one.
- Scroll down and click on Integrations settings.
- Enable the Mailchimp Integration if it’s disabled.
- Audience List: Select the audience list from the drop-down selection menu.
- Subscriber Email: Select the subscriber email field to capture email.
- Subscriber First Name: Select the subscriber first name field to capture the first name.
- Subscriber Phone Number: Select the subscriber phone field to capture the phone number.
- Save Changes once customization is done.

Now, submission data will be stored directly on your Mailchimp account in the audience list.