


Dokan Multi-Vendor is a well-known WordPress plugin that allows vendors to sell their own products on a single platform. One of the most powerful features of this plugin is the ability for customers to upload files when making a purchase.
For example, if a customer is buying a custom product, they can upload necessary files or documents which will be stored in a Google Drive account.
In this article, we will learn how vendors can allow customers to upload files in Dokan. We will also discover how different types of files or documents can be directly stored in a specified Google Drive account automatically.
Step-1: Install Necessary Plugins
Make sure you have installed Dokan, WooCommerce & Integrate Google Drive plugin installed inside your website. Keep in mind that WooCommerce & Dokan stores must be completely set up.

Step-2: Enable WooCommerce & Dokan Integration
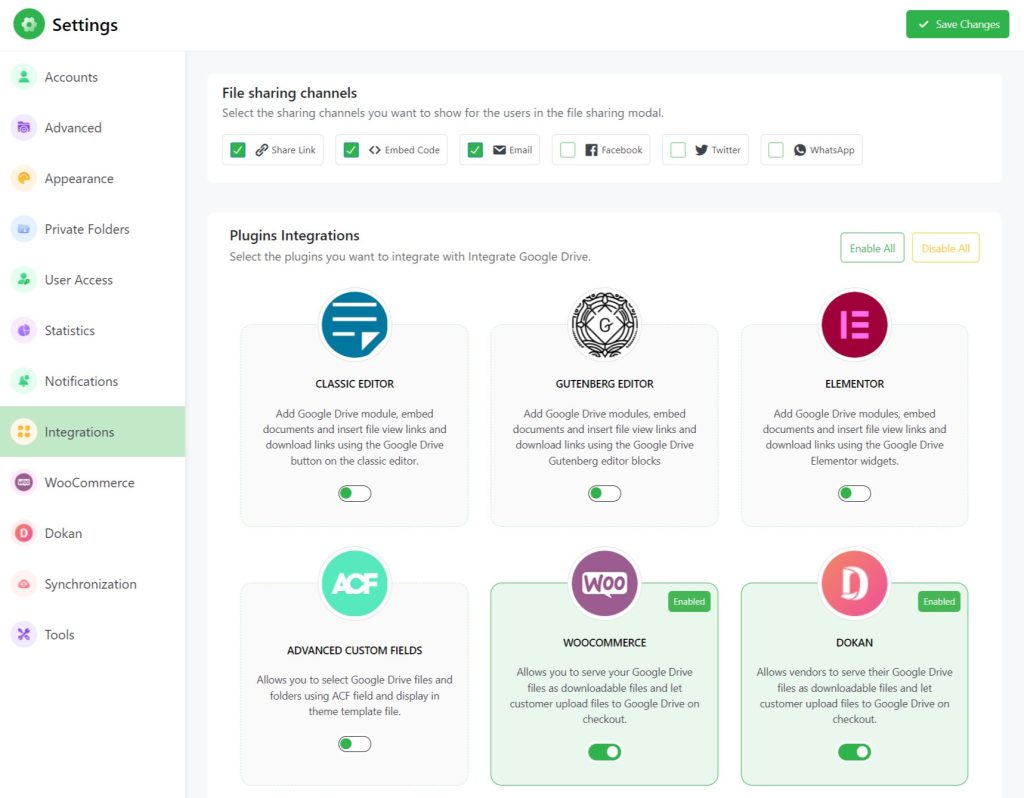
To make things work for you properly you have to enable WooCommerce & Dokan Integration from Integrate Google Drive plugin.
Navigate to Google Drive > Settings > Integrations > Enable WooCommerce & Dokan Integration > Save Changes.
Step-3: Enable Dokan Uploads
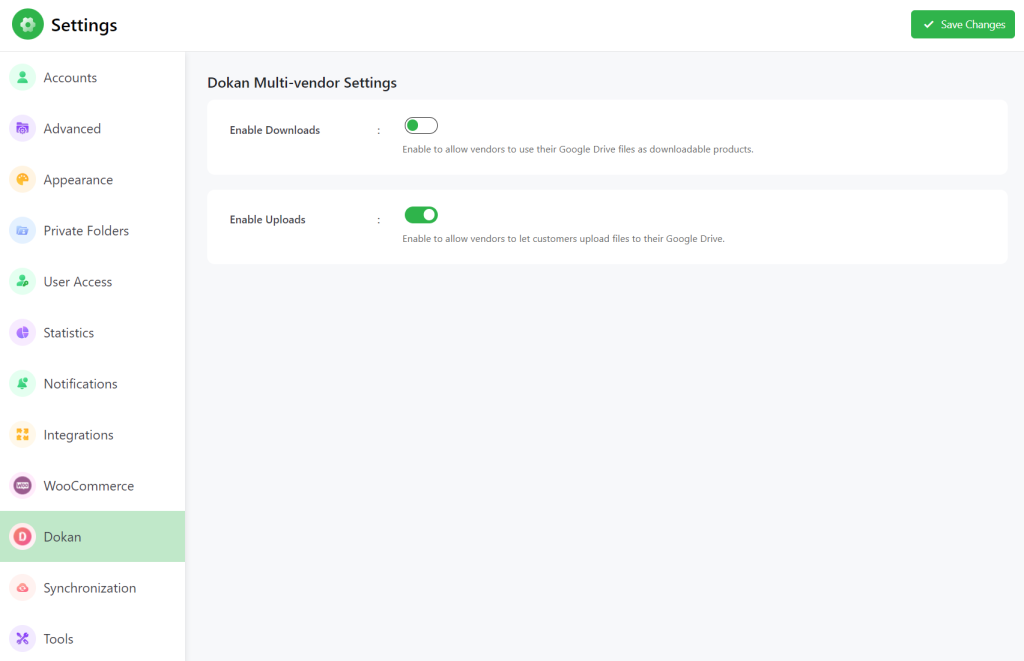
To enable Dokan uploads, navigate to Google Drive > Settings > Dokan > Enable Uploads > Save Changes.
Step-4: Setup Upload Option Display Location
To set up the upload option display location you have to log inside the Dokan Vendor dashboard > Settings > Google Drive > Upload Settings.
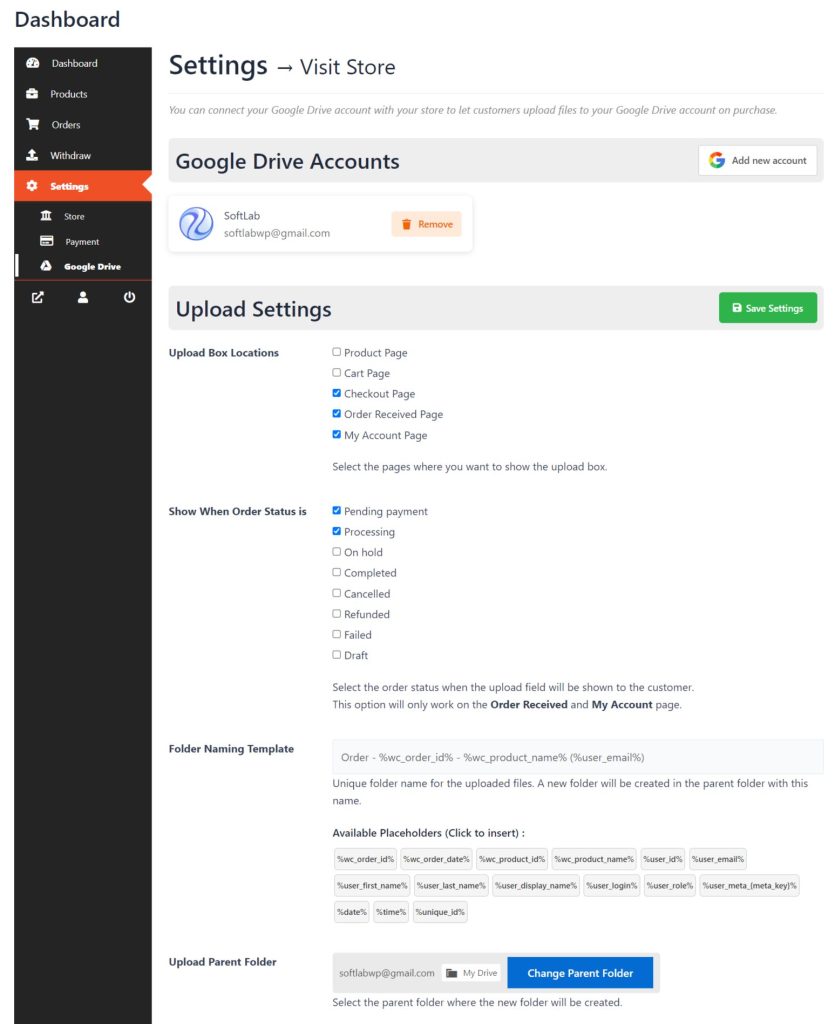
Upload Box Locations
You can fix or restrict to display upload box on a specific location to be allowed to upload files. You have to select the locations where you want to show the upload box in WooCommerce products.
- Product Page
- Cart Page
- Checkout Page
- Order Received Page
- My Account Page
Show Upload Box Based on Order Status
Select the order statuses when you want to show the upload box. These options will only work on the Order Received and My Account page.
- Pending Payment
- Processing
- On Hold
- Completed
- Canceled
- Refunded
- Failed
Folder Naming Template: Set the upload folder naming template when a customer uploads a file a new folder will be created with this name.
Upload Parent Folder: Select the parent folder where the new folder will be created.
Step-5: Add New Product
To add new products log in as Vendor inside the Dokan dashboard > navigate to Products > Add New Product > Give a product name & other necessary information > click Create Product.
Under the permalink check the Uploadable type. After enabling the uploadable option you will discover a new tab Uploadable Options
From the uploadable options tab check Upload to Google Drive.

Now you will discover a few customization options:
- Upload Button Text: Enter the text you want to display on the upload button.
- Upload Description: Enter the description you want to display for the upload box.
- Max File Size: Enter the maximum file size in MB. Leave blank to allow all file sizes.
- Allowed File Types: Enter the allowed file extensions separated by a comma (e.g.: png, jpg). Leave blank to allow all file types.
Now select the order status to display the upload button and publish the post > Save Product.
Step-6: Upload Files
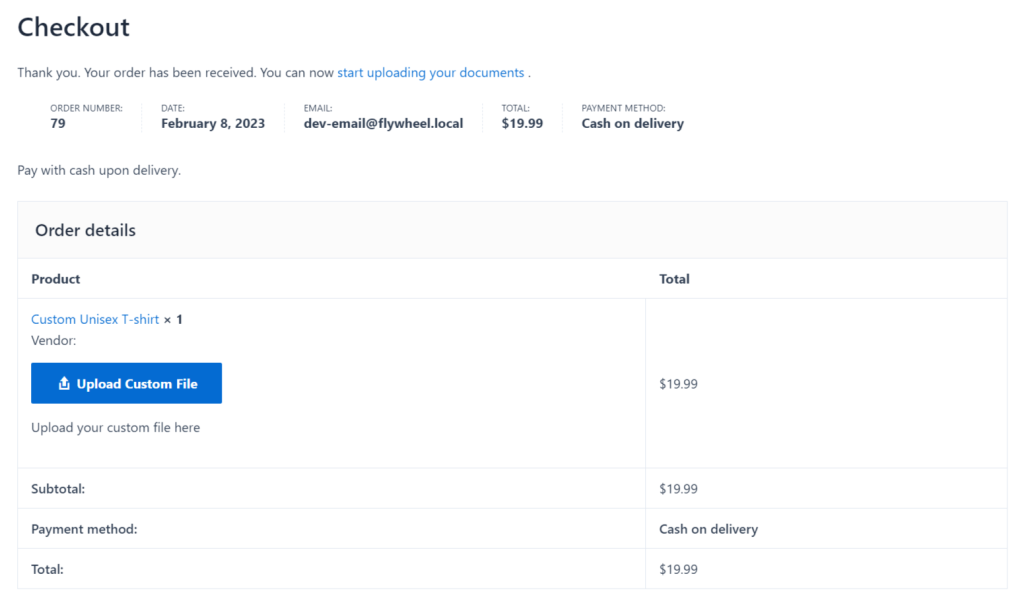
Once the order is placed customers can upload files. From the Order details page. By clicking on the upload button > browse files > select the files.
Now uploaded files will be uploaded to Google Drive in the selected folders. This is how your customers can upload any kind of file while purchasing any uploadable product, which will be stored in your Google Drive account.
Step-7: View Customer-Uploaded Files
Once the customer uploads files you can track them from Dokan vendor Dashboard > Order view page and view their uploaded files.
You can also check uploaded files directly on your Google Drive selected folder.
Conclusion
The ability for customers to upload files in Dokan Multi Vendor platforms is a crucial feature that allows vendors to provide a more personalized and seamless shopping experience for their customers. To enable the custom file or document uploading feature and to be stored in a Google Drive account you must Integrate Google Drive inside your website.
Now vendors will allow customers to upload files from Dokan and uploaded files will be stored in a specific Google Drive account for further inspection.
Read Also: How to Allow Customers to Upload Files in WooCommerce
No Comments yet!
Leave a reply