If you’ve ever wanted to let your visitors upload files directly to your Google Drive through Contact Form 7, you’re not alone. Unfortunately, Contact Form 7 doesn’t offer a Google Drive upload field out of the box.
But don’t fret!
With a little help from a third-party plugin, you can easily add this feature and make your forms smarter and more efficient.
Whether you’re collecting images, documents, or any other files, this guide will show you how to seamlessly integrate Google Drive with your forms and take your contact forms to the next level.
Ready to make file uploads a breeze? Let’s dive in!
Table of Contents
What is Google Drive Upload Field?
A Google Drive Upload Field lets users upload files directly to a Google Drive account via a form. Instead of storing files on a website’s server, everything goes straight to the cloud.
It’s like sending files to a virtual locker—secure, organized, and accessible anytime. With this feature, file management becomes effortless, and you don’t have to worry about storage limits.
Perfect for keeping your data safe and neatly organized in one place!
Why Google Drive Upload Field is Important in Contact Form 7?
Incorporating a Google Drive Upload Field into Contact Form 7 offers several advantages for both website owners and users. Here’s why it’s so important:
- Cloud Storage: Files are uploaded directly to Google Drive, which means your website’s server doesn’t need to store them. This saves valuable server space and reduces hosting costs by keeping the heavy lifting off your site.
- Easy Access & Organization: Once uploaded, files are automatically stored in your Google Drive account. This makes it easier to find, organize, and share files, eliminating the hassle of manually sorting through your website’s backend.
- Enhanced Security: Google Drive offers powerful security features, including encryption and access controls. This ensures that the files you receive are securely stored and can only be accessed by authorized people, reducing the risk of data breaches or loss.
- Convenience for Users: Users will appreciate the simplicity and ease of uploading files directly to Google Drive. It removes the need for email attachments, bypassing size limitations, and ensures that file submissions are quick and straightforward.
- No File Size Restrictions: Unlike traditional file upload fields, which can have size limitations, Google Drive allows for much larger file uploads. This flexibility is especially useful if you’re receiving high-resolution images, large documents, or videos.
- Automated Workflow: Direct integration between Contact Form 7 and Google Drive automates file storage. There’s no need for manual downloads or additional steps, saving you time and allowing for a more efficient workflow.
Google Drive Upload Field vs Traditional Upload Field
When it comes to file uploads, choosing the right option can make a huge difference. Let’s compare the traditional upload field with the Google Drive upload field to see how the latter stands out and offers more benefits for both users and website owners.
| Feature | Google Drive Upload Field | Traditional Upload Field |
|---|---|---|
| Storage Location | Files are stored in Google Drive (cloud-based). | Files are stored on your website’s server. |
| File Size Limits | No restrictions (Google Drive’s generous limits). | Often limited by server or email size restrictions. |
| Security | High-end security, with encryption and access control. | Depends on your server’s security settings. |
| Accessibility | Files can be accessed anytime, anywhere, by authorized users. | Limited to the server or need for manual downloads. |
| Ease of Management | Automatically organized in Google Drive for easy access. | Requires manual sorting and storage. |
| Server Load | No strain on your server, saving space and resources. | Puts pressure on your server’s storage capacity. |
| User Experience | Simple, direct upload to Google Drive with no email hassle. | Can be slow, prone to timeouts, or email delivery issues. |
| Backup & Recovery | Google Drive’s automatic backups ensure file safety. | No automatic backup or recovery process. |
Must-Have Plugins to Add Google Drive Upload Field
How to Add Google Drive Upload Field in Contact Form 7?
Ready to level up your forms? Adding a Google Drive Upload Field in Contact Form 7 is easier than you think—just follow these simple steps, and you’ll have a seamless file upload experience in no time!
Enable Google Drive Upload
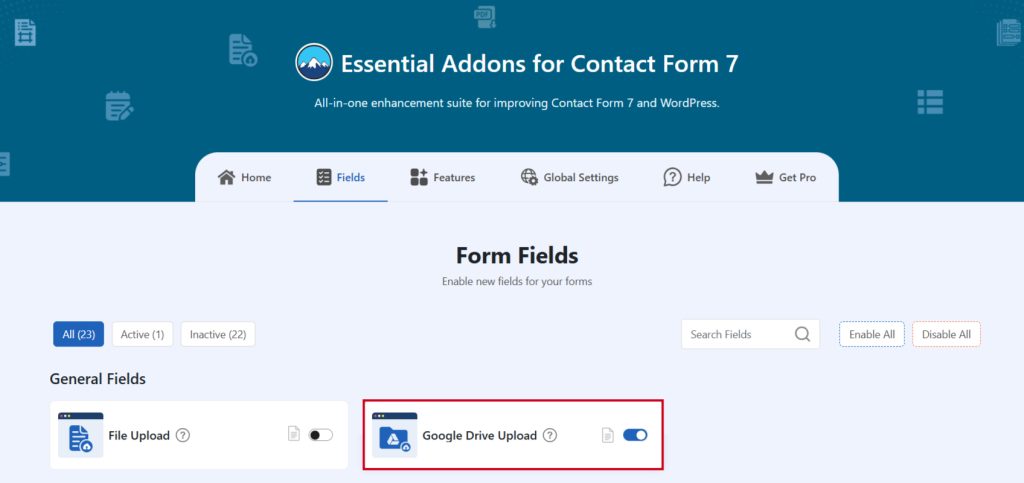
You must enable Google Drive Upload before implementing the customized input field in Contact Form 7. To do that, follow the below steps:
- Navigate to the Contact Form 7 menu.
- Essential Addons.
- From the Fields tab enable the Google Drive Upload.
Enable Google Drive Integration
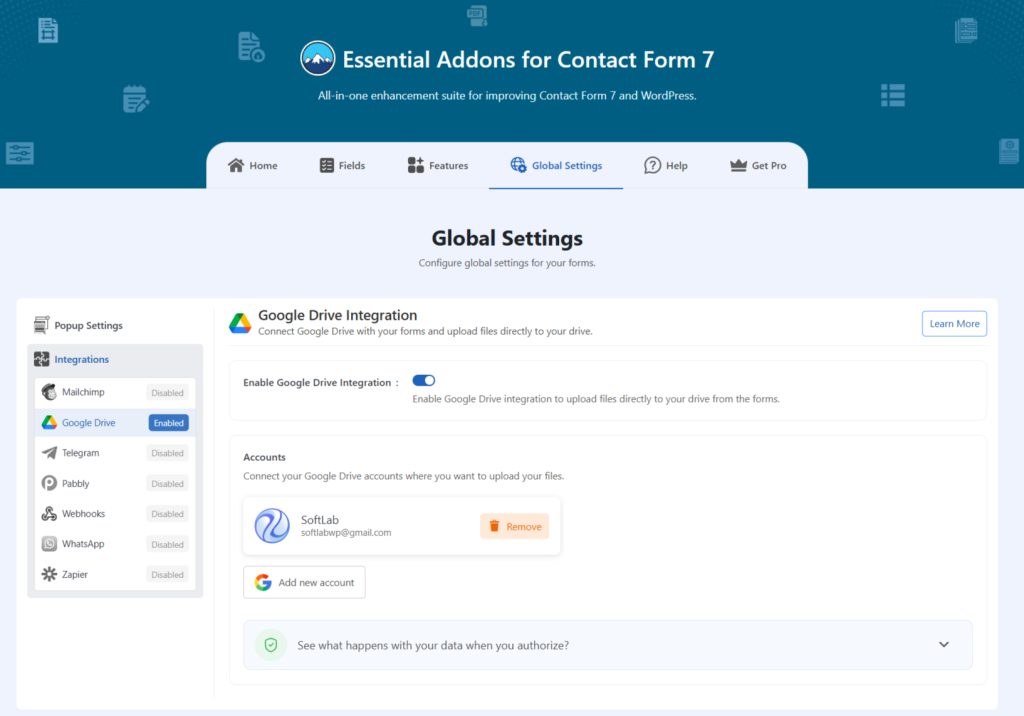
You should enable Google Drive integration and connect your Google account to start the procedure.
- Navigate to Global Settings.
- Integrations > Google Drive.
- Enable Google Drive Integration.
- Connect your preferred Google Drive account by clicking the Add New Account button.
Add Google Drive Upload Tag
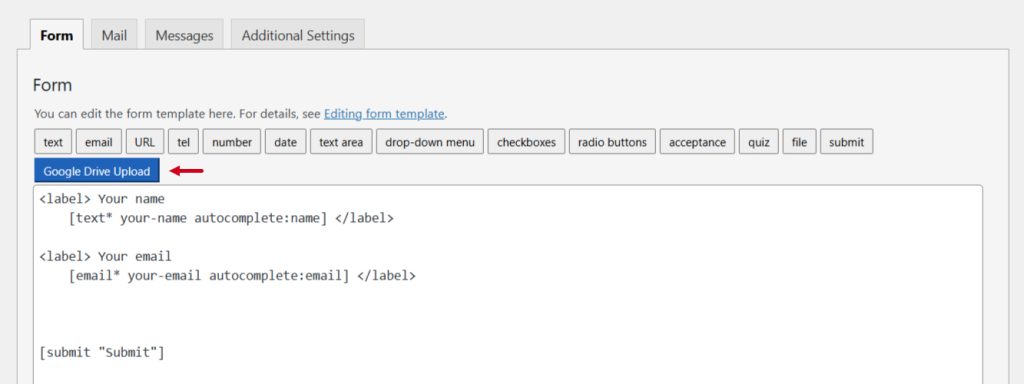
To implement the Google Drive Upload in your contact form follow the below steps:
- Navigate to any existing form or create a new one.
- Add the Google Drive Upload tag where you want to display it in your form.
Configure Google Drive Upload
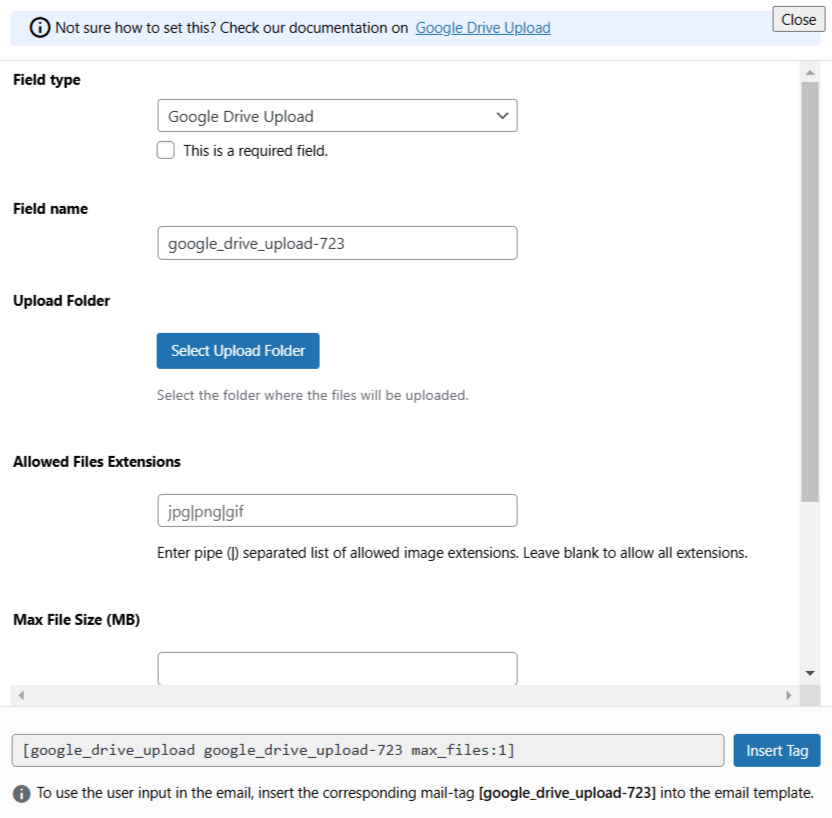
After clicking the Google Drive Upload tag a new popup window will appear. Here you can configure & customize the Google Drive Upload settings.
- Field Type: Tick or untick whether you want to mark it as required or not.
- Field Name: Usually the name field is auto-generated. You can add custom value if required.
- Upload Folder: Select the folder where the files will be uploaded.
- Allowed Files Extensions: Enter pipe (|) separated list of allowed image extensions. Leave blank to allow all extensions.
- Max File Size (MB): Enter the max size of each file, in megabytes. If left blank, the value defaults to the maximum size the server allows which is 256 MB.
- Max Files Uploads: Enter the maximum number of images to allow. If left blank, the value defaults to 1.
Click the Insert Tag button once the configuration is done. The customized tag will be added to your form editing panel. Save Changes.
Embed the Shortcode
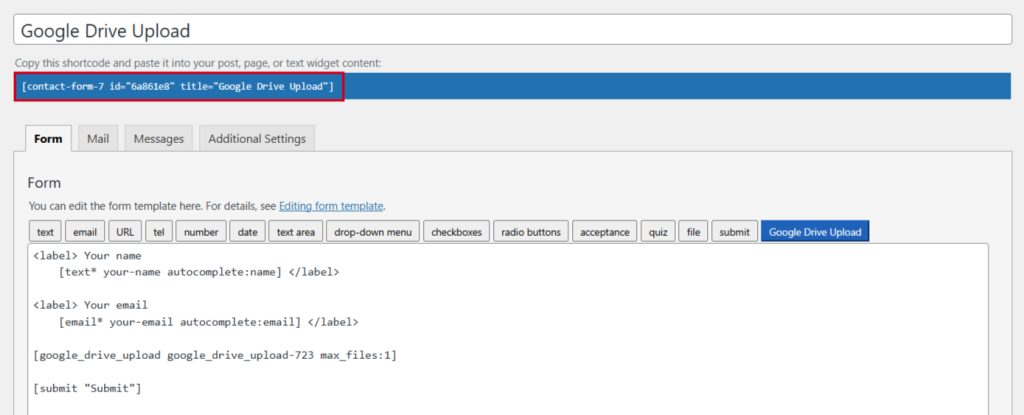
- Copy the Shortcode and paste it inside any page or post to display the Google Drive Upload field in your form.
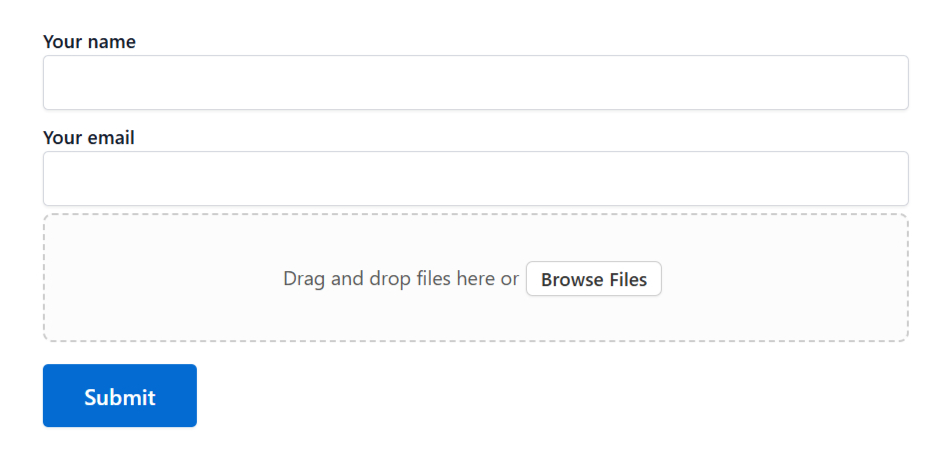
Output
Video Tutorial
Conclusion
And just like that, you’ve unlocked the power of seamless file uploads with Google Drive! By adding the Google Drive Upload Field to your Contact Form 7, you’re not only saving server space but also creating a smoother, and secure experience for users.
No more worrying about file sizes or chaotic storage—everything is neatly organized in the cloud.
With just a few steps, you’ve turned your simple contact form into a smart, efficient tool. So, why wait? Time to make your forms work harder for you!
