
Are you searching for a smart way to play your own online radio station directly inside your WordPress website?
Don’t have a clue what to do?
No worries! I will help you out with the following guidelines.
In this article, I will share with you a crazy method that will allow you to play your online radio station on a WordPress website.
Wondering how? Let’s find out right away!
To successfully play radio stations on your WordPress website, you have to do all the setup using the Radio Player Plugin developed by SoftLab.
Table of Contents
What is Radio Player Plugin?
Radio Player is a simple, easy-to-use, and fully customizable Web Radio Player for WordPress. That can play any MP3, AAC, M3U8, Shoutcast, IceCast, Radionomy, Airtime, Live365, radio.co, and any Audio stream without any hassle.
Let me now take you directly into the main process shortly!

How to Add Radio Player on My Website?
To install the Radio Player Plugin,
- Navigate to Plugins > Add New.
- Search for Radio Player.
- Install & Activate the Radio Player Plugin by SoftLab.
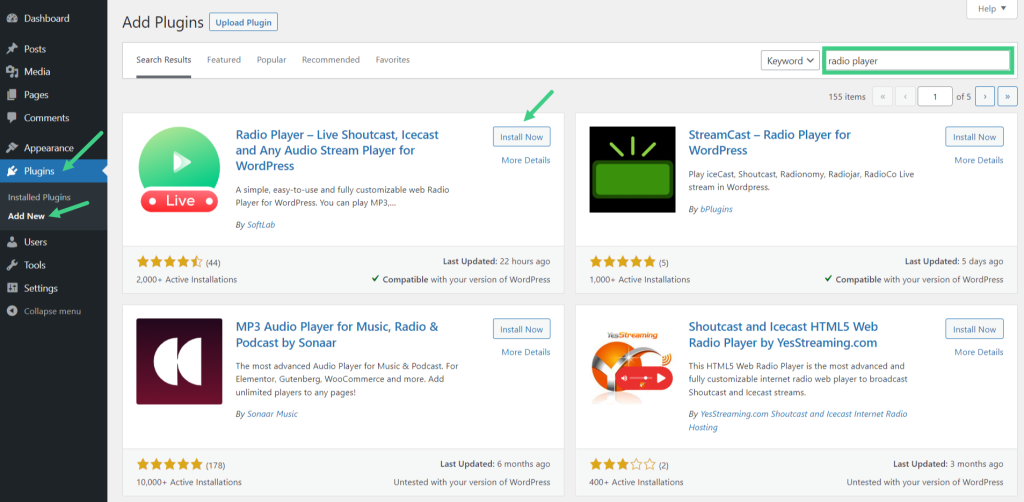
Hurrah! You have successfully installed and activated the Radio Player WordPress Plugin.
Creating A New Radio Player
To create a new Radio Player,
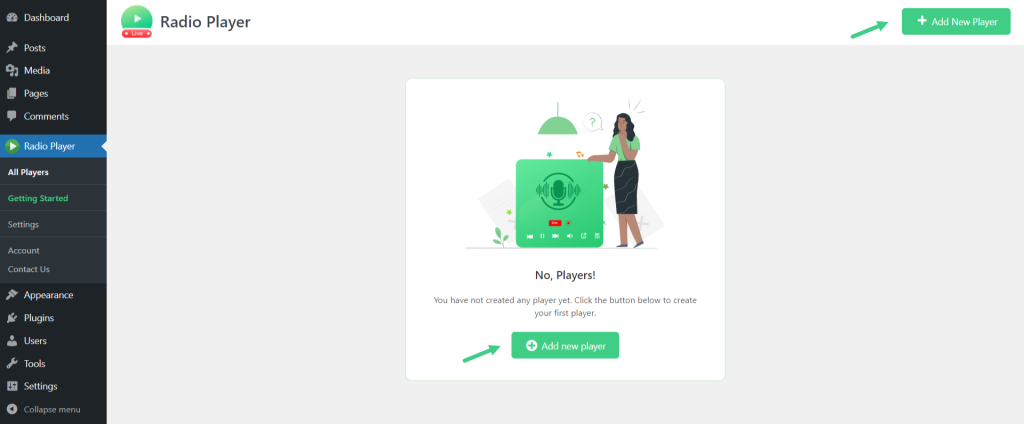
- Click All Players.
- Click on Add New Player.
- Give your Radio Player a suitable Name.
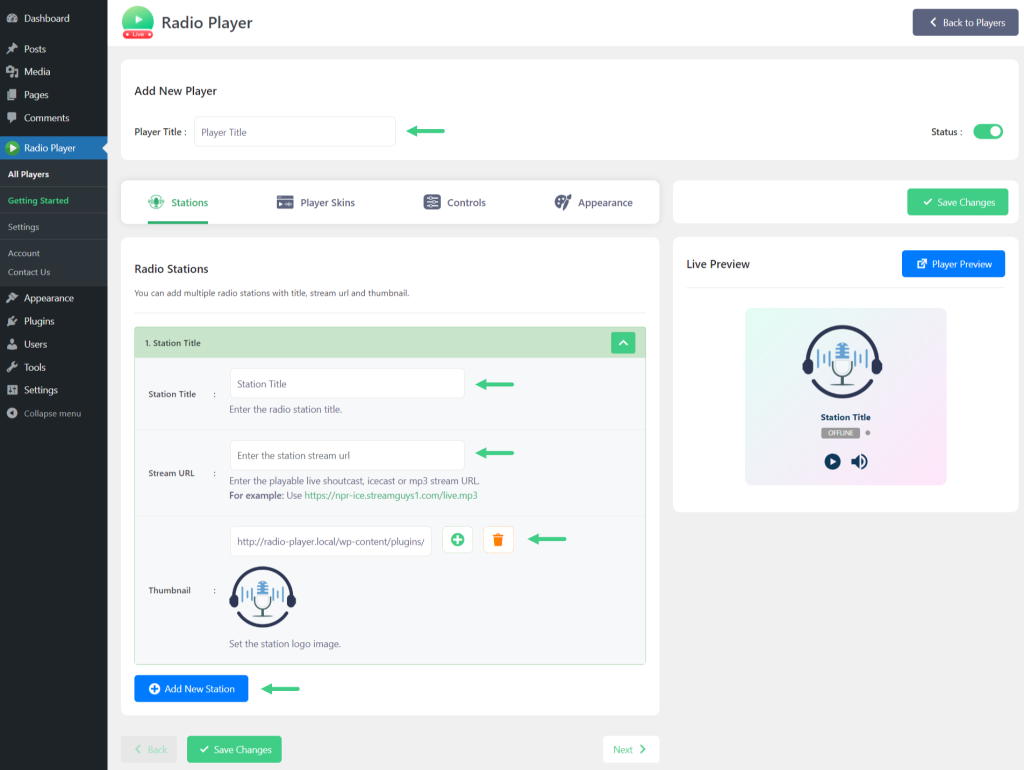
How to Add Radio Stations?
Enter the Radio Station Title, Stream URL, and Station Logo. If you want to add multiple Stations, click Add New Station. Click Next.
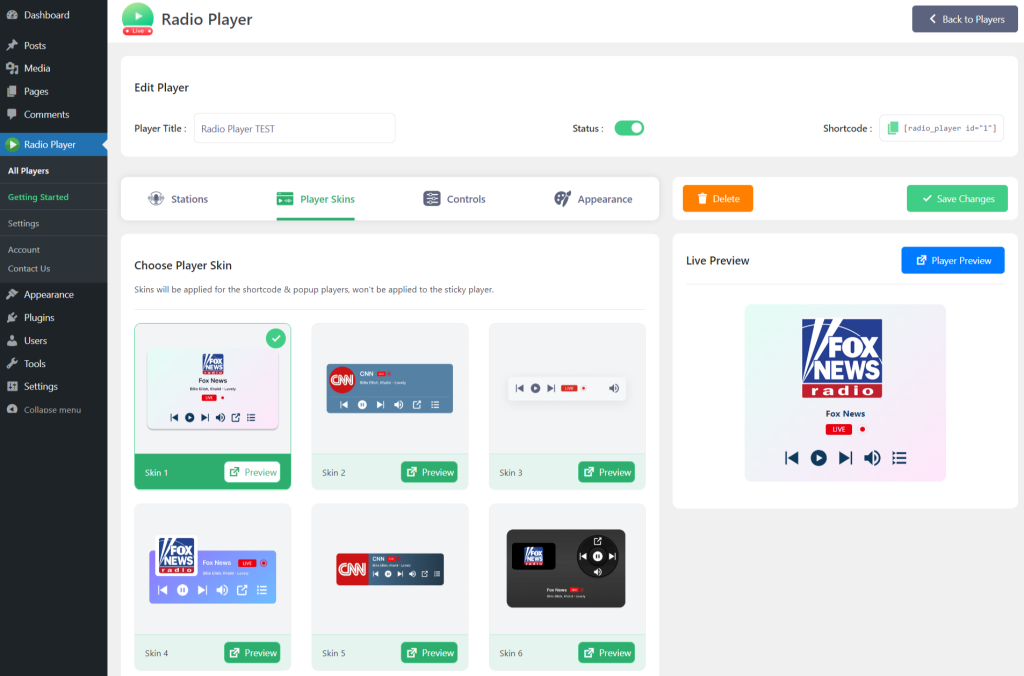
Select Player Skin
From the Player Skins Tab, you can select or change player skins from our 10+ unique & attractive skins. Select Any Skin > Click Next.
Player Controls
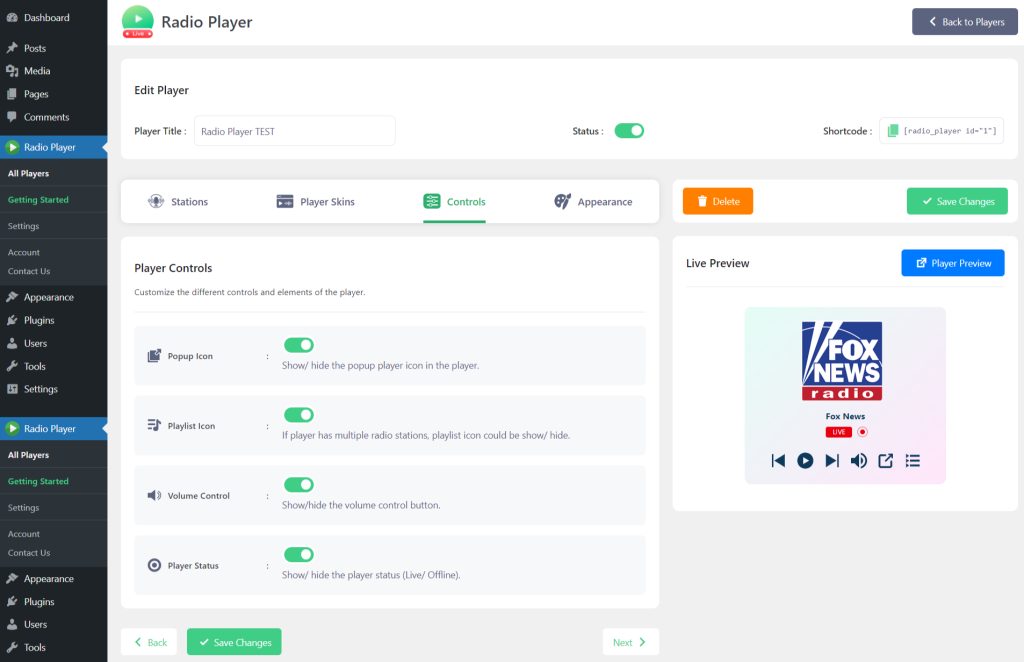
From the Controls tab, you can control some basic player control settings. Such as displaying or hiding Popup Icon, Playlist Icon, Volume Control, and Player Status. Click Next.
Customize Player Appearance
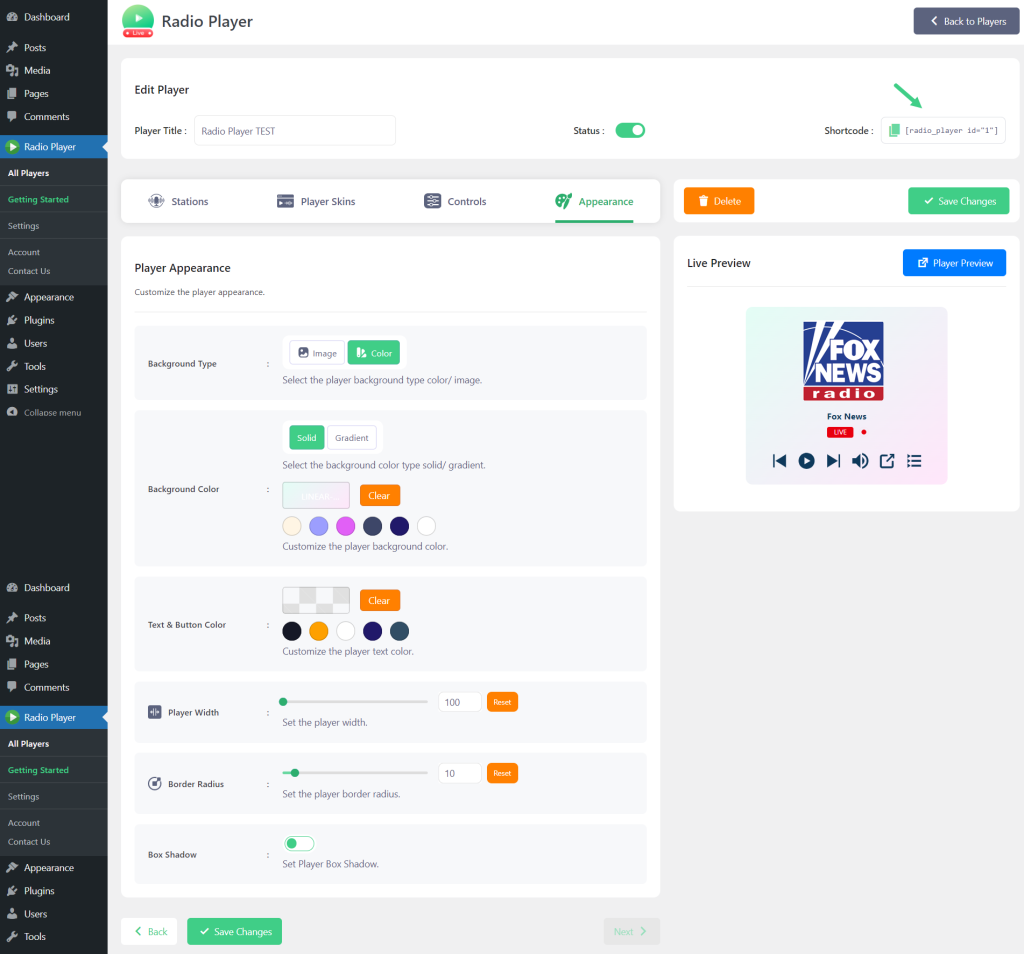
From the Appearance tab, you can easily customize the Radio Player’s appearance. Set the player’s background type as an image and solid or gradient color, text & button color, player width, border radius, and box-shadow. Click Save Changes.
Display Radio Player on Your Website
Copy the Shortcode > Paste into any of your pages or posts.
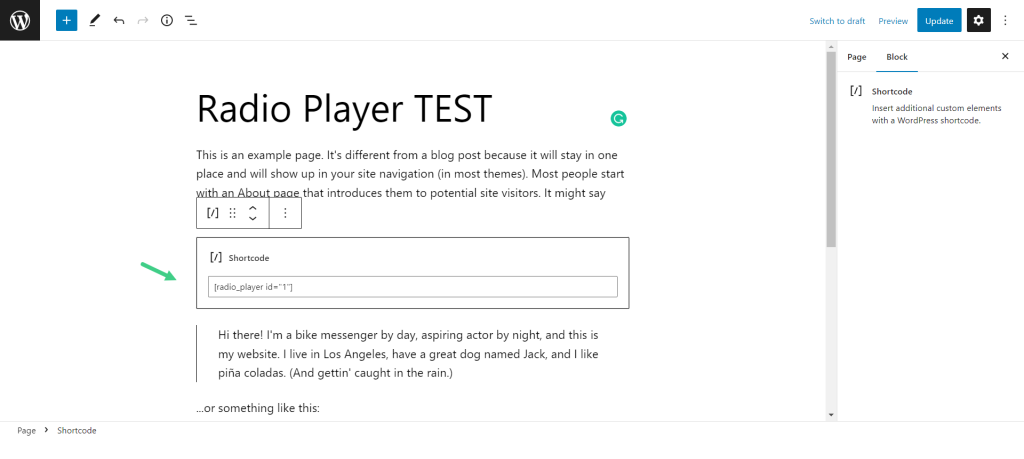
Now you have successfully completed the procedure of adding Radio Player to your WordPress website.
Wondering how easy it was? Yes, definitely it was super easy!
Conclusion
If you went through the guide properly, you might discover the easiest way to play online radio stations on a WordPress website. From now on, both you and your users can play the radio without any suffering or difficulties.
It’s time to play with the Radio Player plugin and customize how you like to display it on your website. Start playing with the plugin and give your radio stations a new move.
FAQs & Answers
Can I customize the appearance of the radio player?
Yes, the plugin offers real-time customization options. You can adjust colors, background images, width, border radius, and more to match your website’s design. Additionally, there are over 10 attractive player skins to choose from.
Is it possible to display multiple radio stations?
Absolutely. The plugin allows you to add multiple radio stations within a single player, enabling listeners to switch between stations seamlessly. This feature enhances user experience by providing variety in one interface.
Does the plugin support mobile devices?
Yes, the Radio Player plugin is mobile-responsive. It includes a mobile media notification feature, allowing users to see currently playing station information and control playback directly from their mobile notification bar.
Can I schedule when the radio player appears on my site?
Yes, the plugin includes a scheduling feature. You can set specific start and end dates for when the player is visible on your website, making it ideal for special events or promotions.
Is there a way to track listener statistics?
Yes, the Radio Player plugin provides an analytics dashboard. You can monitor play counts, listener numbers, daily trends, and identify top-performing players, helping you optimize your broadcast strategy.
No Comments yet!
Leave a reply