
If you are using Contact Form 7 on your WordPress website, you might sometime need to allow visitors to upload files to Google Drive. This feature allows visitors to upload any files to Google Drive from the Contact Form 7 file upload field.
The Google Drive upload field for Contact Form 7 can be handy because visitors can upload any files that will be stored sequentially inside your Google Drive.
Why Do You Need Google Drive Upload Field?
Most of the Contact Forms don’t have built-in Google Drive file uploading features included. It can be a handy option for your visitors to enable the Google Drive uploading field, especially on Contact Form 7.
It’s important for you because it’s gonna save your hosting space, easy interaction for visitors, files can be stored in one place, easy to maintain, and others.
Seems interesting right?
Read Also: Upload Files to Google Drive from Ninja Forms
Enabling Contact Form 7 File Upload to Google Drive
I will assist you with simple steps that might be valuable for you. But before I begin the step-by-step guide, keep in mind you will be using a vastly popular WordPress Plugin Integrate Google Drive to make things easier for you as a website owner.
What sort of process do you need to Follow?

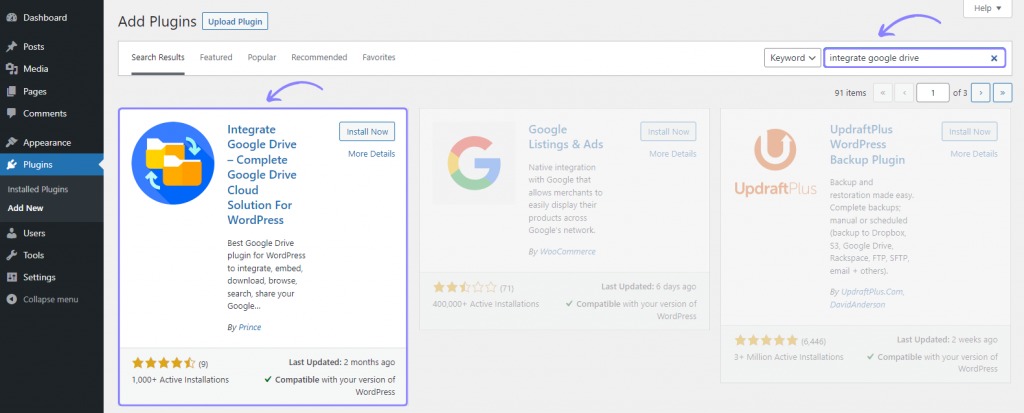
Step-1: Installing Integrate Google Drive Plugin
Go to WordPress Plugins > Add New > Search Integrate Google Drive > Install & Activate the plugin.
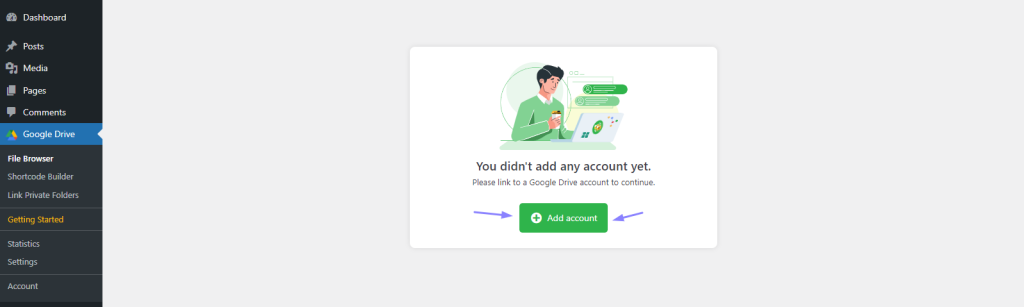
Step-2: Linking Google Account
Click Google Drive > Settings > Add Account > Click Google Account You want to Add > Allow necessary permissions.
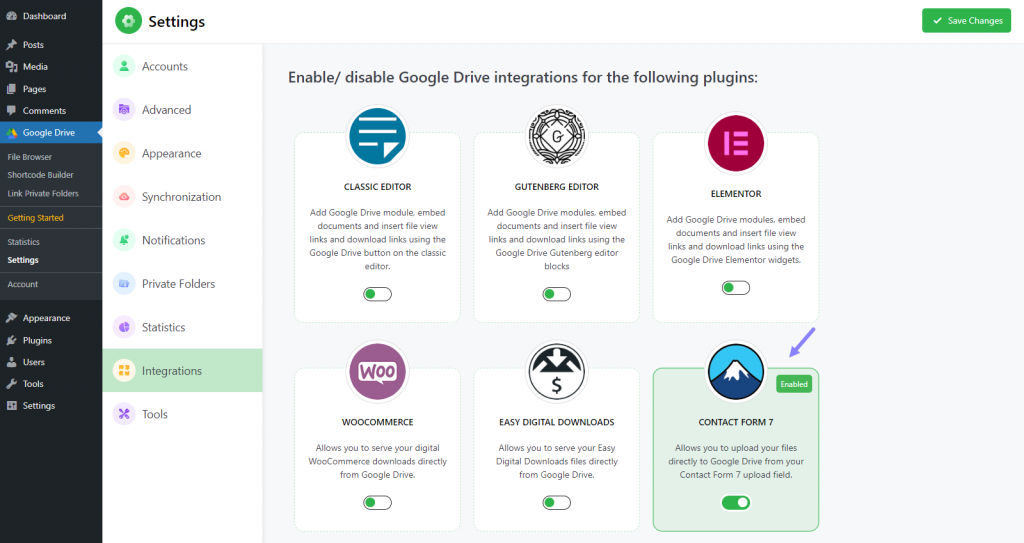
Step-3: Enabling Contact Form 7 Integration
Go to Integrate Google Drive Plugin Dashboard > Settings > Integrations > Enable Contact Form 7 > Save Changes. To enable Contact Form 7 integration you need to upgrade your package.
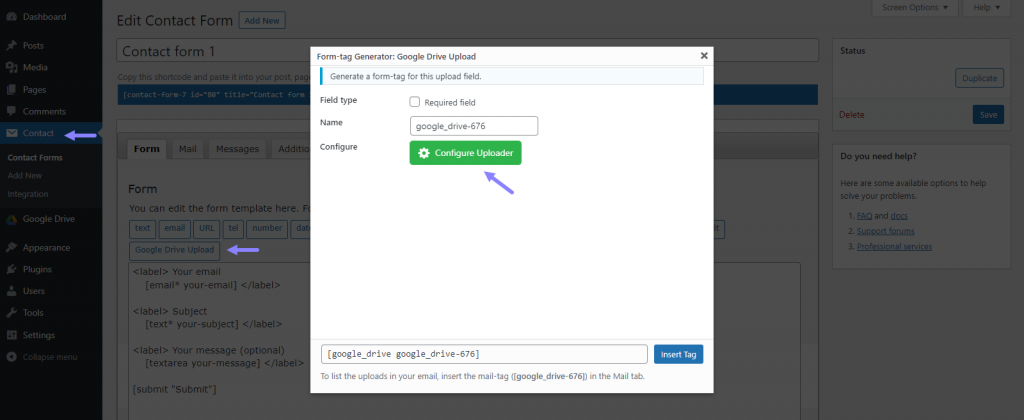
Step-4: Create A Form & Configure
Click on Contact (from the WordPress sidebar) > Edit the existing form or Create a new one > click Google Drive Upload > Configure Uploader.
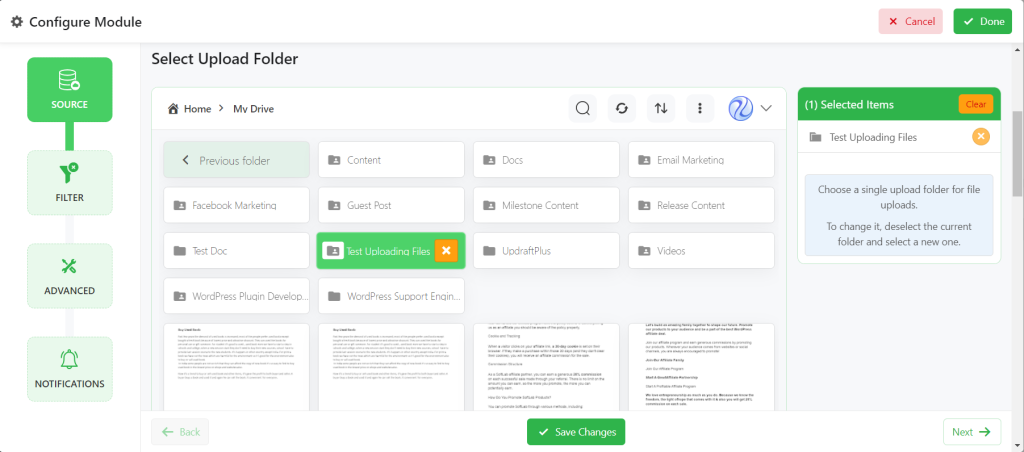
Step-5: Allocate Folder Where Uploaded Files Will Be Stored
From the Source Tab, select a Google Drive folder where you want users to store their uploaded files. You have more options to customize depending on your needs and expectations.
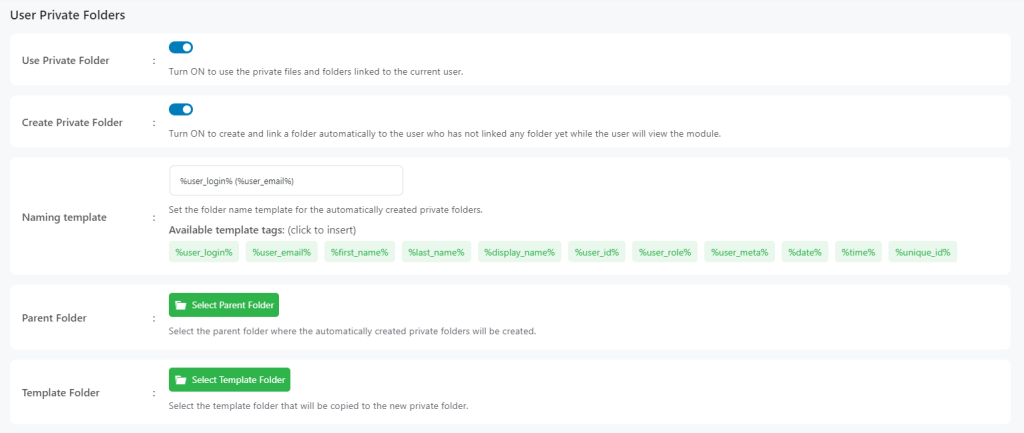
User Private Folders
Use Private Folder: Turn ON to use the private files and folders linked to the current user.
Create Private Folder: Turn ON to create and link a folder automatically to the user who has not linked any folder yet while the user will view the module.
Naming template: Set the folder name template for the automatically created private folders.
Parent Folder: Select the parent folder where the automatically created private folders will be created.
Template Folder: Select the template folder that will be copied to the new private folder.
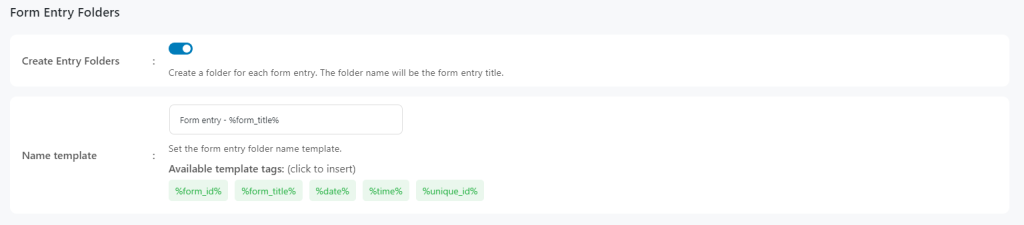
Form Entry Folders
Create Entry Folders: Once enabled folder for each form entry will be created.
Name template: Set the form entry folder name template. There are some available template tags for you. Just click your necessary tag to insert.
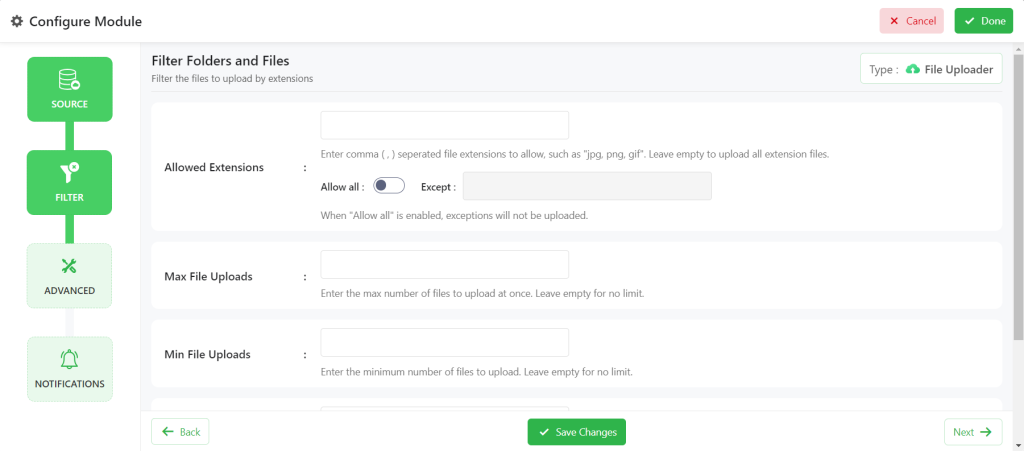
From Filter Tab, you can include/ exclude any files by their extensions. Or you can turn on Expect all to allow only one file by extension.
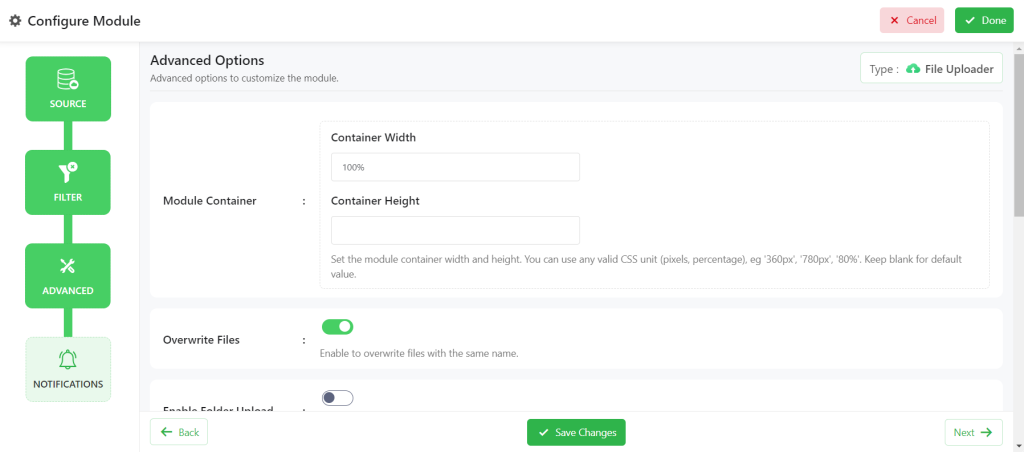
From Advanced Tab, you can customize module width, and height, how to upload label text, maximum file size, and minimum file size, and enable folder upload.
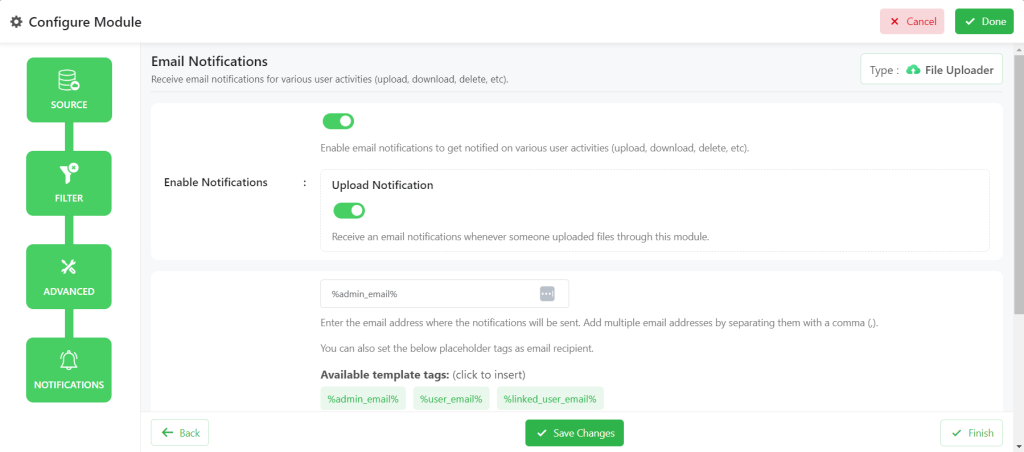
From the Notifications Tab, you will mostly work on notification-related tasks. Ex: Email Notification, Upload Notification, and others.
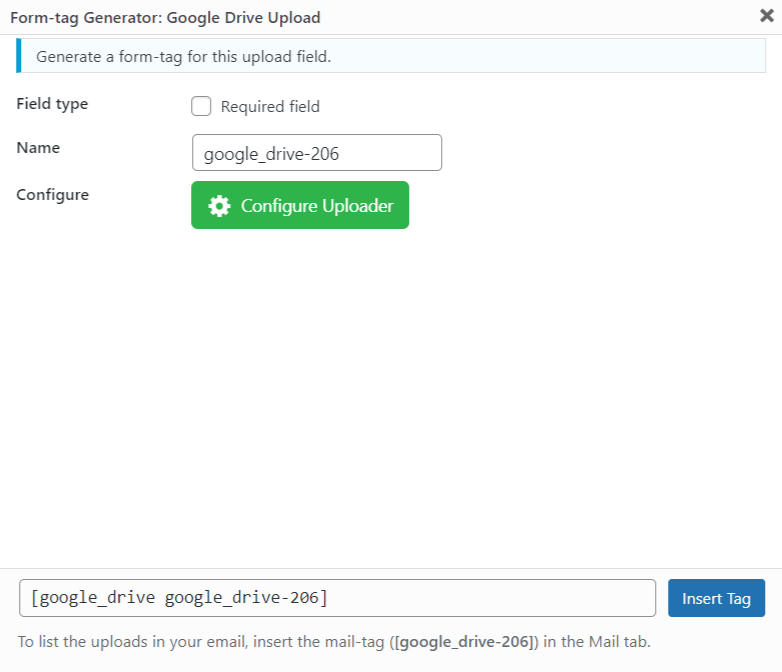
Click Done. Click Integrate Tag > Place the Tag at any position where you want to display the uploading field.
Click Done > Save Changes.
Now you can display the contact form with the Google Drive uploading field by using the shortcode.
Hurrah! You have successfully created an uploading field under Contact Form 7. Once any visitor uploads important files, they will be stored in the folder you have allocated previously (Step-4).
You will get an email notification with sufficient links. Make sure to check your email address.
Read Also: Upload Files to Google Drive from Formidable Forms
Video Tutorial
If you are searching for an easy-understanding video tutorial, here you go!
Conclusion
I think you already discovered how easy it is to enable the uploading field under Contact Form 7. And allow visitors to upload files directly inside your Google Drive account. You don’t need to be an expert in coding to do this simple task. Integrate Google Drive Plugin is an easy solution built only for you.
If you are still having difficulties displaying the uploading field, or if the uploading field is not working properly, you are welcome to comment down. Our specialist experts will reach you shortly.
No Comments yet!
Leave a reply