
Photo Gallery is a stunning feature to display photos on your website smartly. There are multiple WordPress plugins available in the market that help you create a simple photo gallery. Such as Photo Gallery by 10Web, Photo Gallery by Supsystic, Gmedia Photo Gallery, etc.
But how can you create a Google Drive photo gallery on your WordPress website? And save your valuable hosting space?
In this article, I will guide you step-by-step through creating an eye-catching Google Drive photo gallery directly from your WordPress website.
What is the Purpose of a Photo Gallery on a Website?
There are many key reasons & purposes for photo galleries on your website. All of them vary from person to person depending on their needs. Let’s figure out the main purposes!
Improve Overall Look: The main reasons website owners want to create a photo gallery improve their website look. Rather than displaying photos here and there, a photo gallery is a handy & disciplined way. It’s an easy way to improve user experience as well.
Better Explanation: The better you can explain to your visitors, the more you will win user performance. A photo gallery is way better understandable for users than a single image. That means you can explain better with valuable images & information.

Better SEO Results: While you create an image gallery with multiple images, you will have more options to optimize multiple image alt tags. As a result, there is a high chance your image comes at image search results and you can gain organic traffic easily.
Read Also: How to Create Google Drive Slider Carousel
How to Create Google Drive Photo Gallery on WordPress Website?
You might be searching for the easiest way to create a Google Drive photo gallery on your WordPress website. Integrate Google Plugin can be a handy choice to help you get your task done in a go.
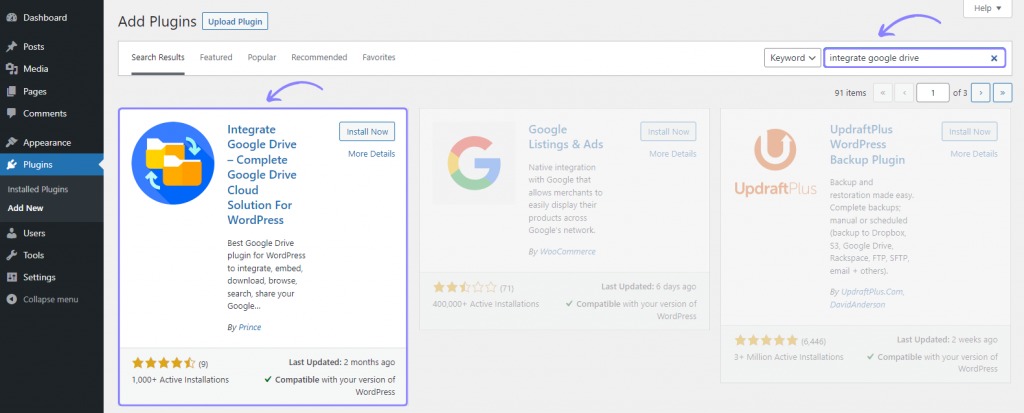
Step-1: Installing Integrate Google Drive Plugin
Go to WordPress Plugins > Add New > Type Integrate Google Drive > Install & Activate the plugin.
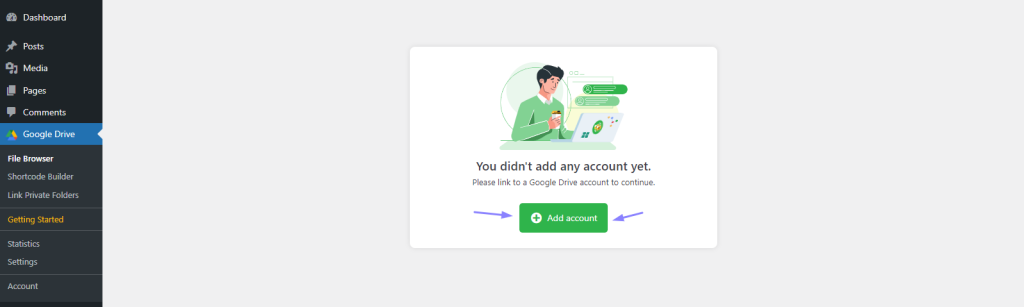
Step-2: Linking Google Account
Click Google Drive > Settings > Add Account > Click Google Account You want to Add > Allow necessary permissions.
Step-3: Creating Photo Gallery Module Builder
Go to Google Drive (from the WordPress Dashboard Menu) > Settings > Shortcode Builder > Add New Shortcode > Select Gallery Module.
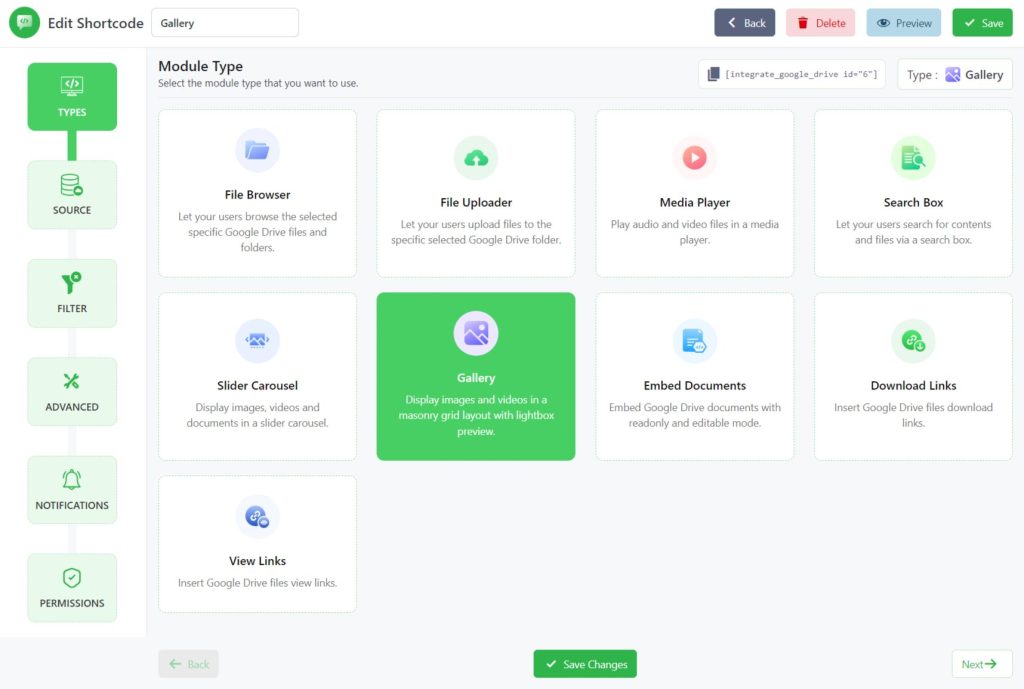
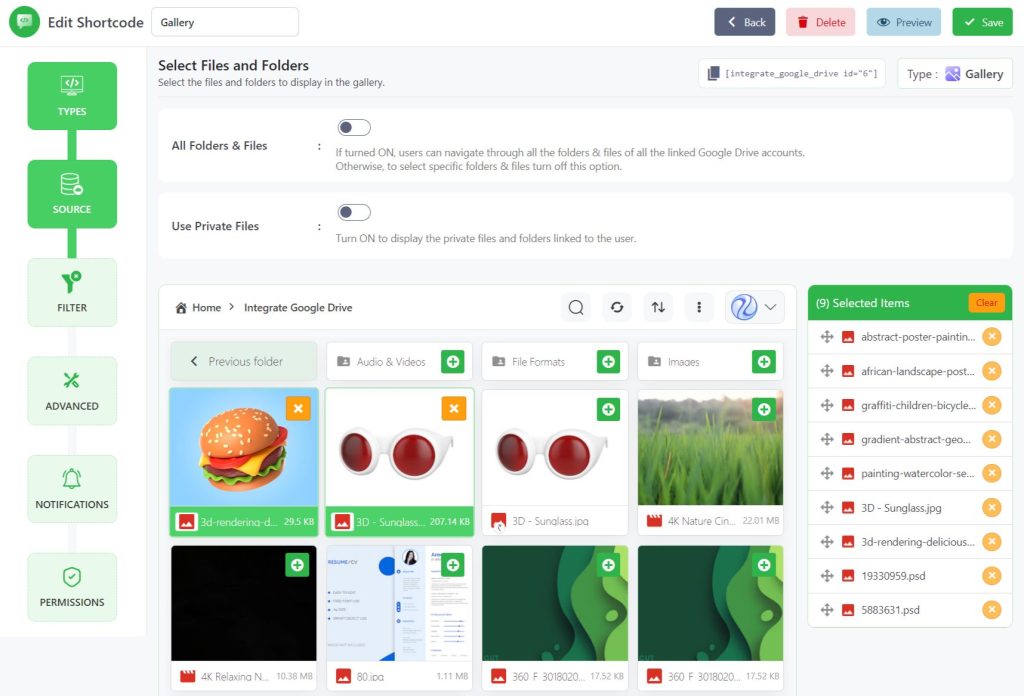
Step-4: Selecting the Photos You Want to Embed
From the Sources Tab, Select any type of Google Drive Image File (.jpg, .png, .gif) you want to display on your WordPress website. You can also embed Folders and groups of folders in the photo gallery.
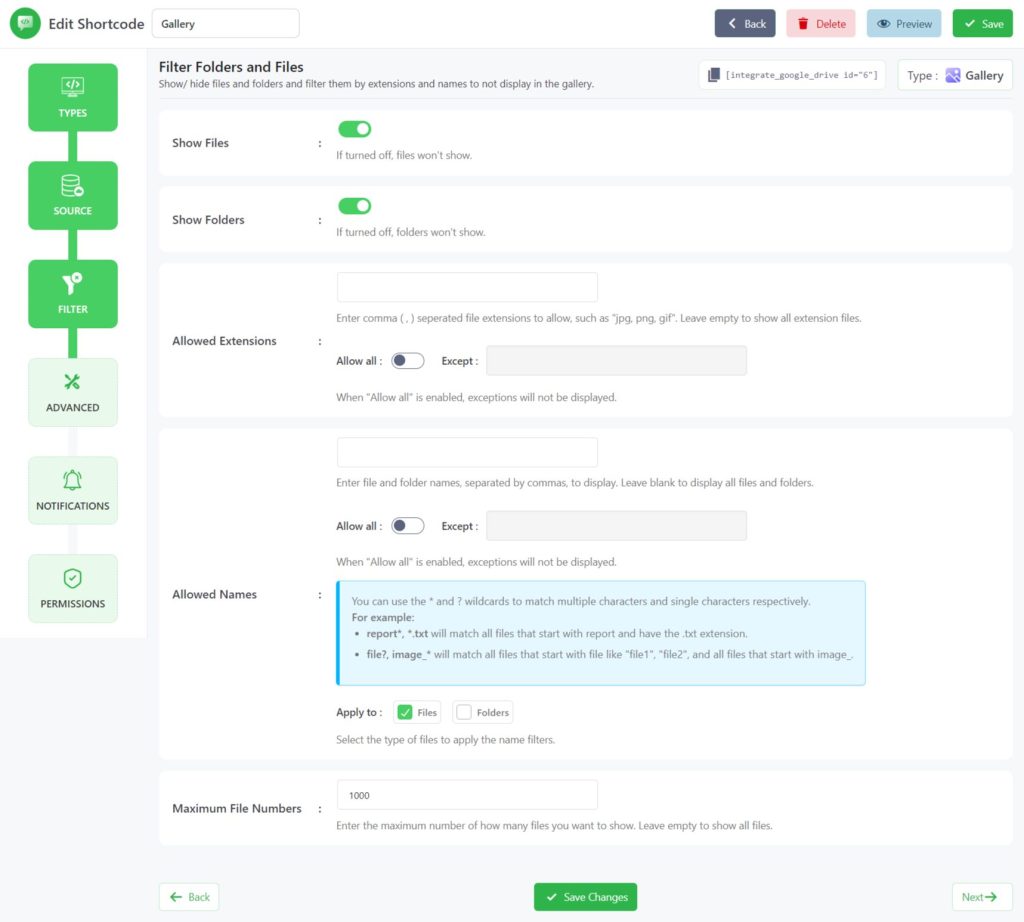
Filter Tab: From the filter tab you can filter files, folders, image extensions, and image names.
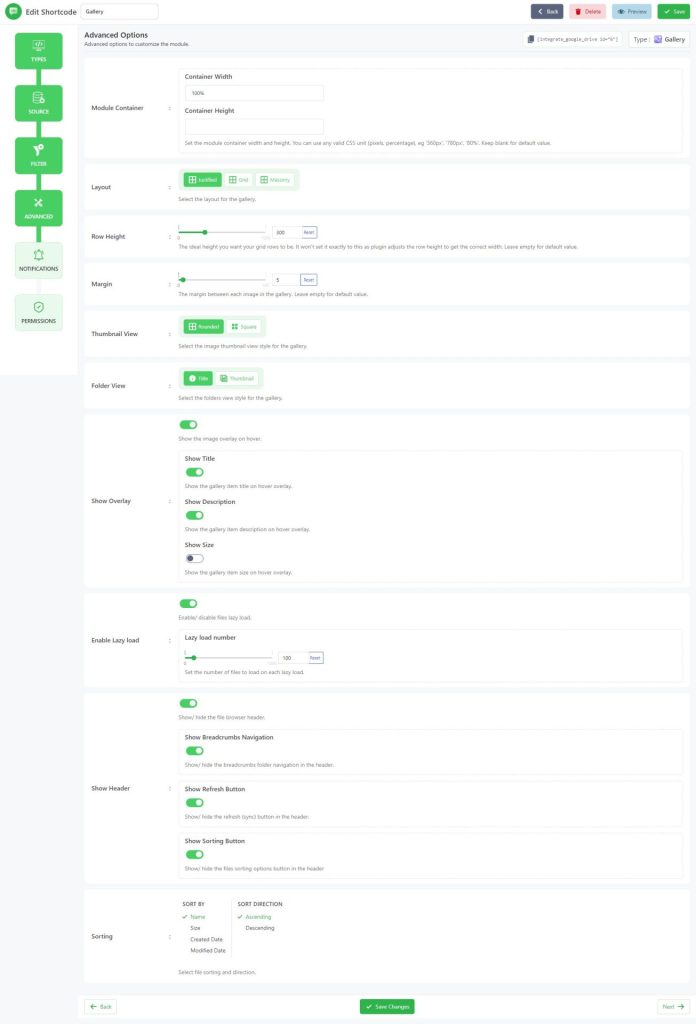
Advanced Tab: From advanced settings module width, height, gallery row height, show caption, show header, and others can be customized.
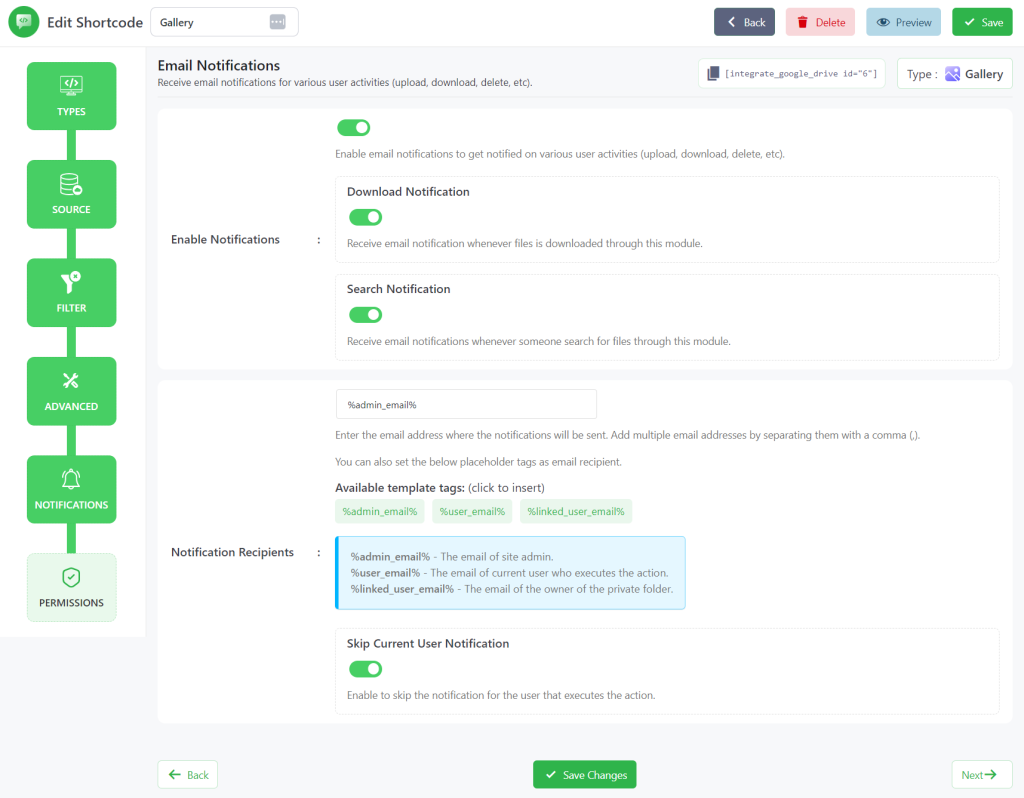
Notifications Tab: Here you will mostly work on Gallery Module notifications. Ex: Email Notification, Download Notification, Search Notification, etc.
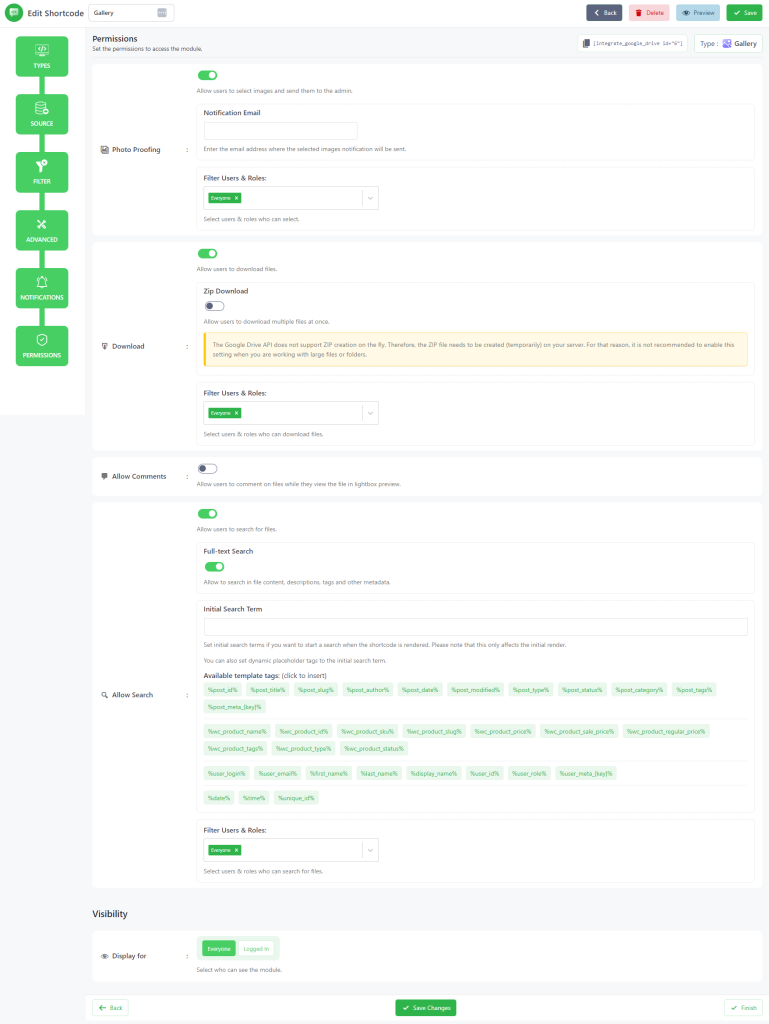
Permissions Tab: Here you will mostly work on Gallery Module permission settings. Ex: Photo Proofing, Downloads, Comment Allow, Allow Search, etc.
Step-6: Displaying Photo Gallery in Your Post or Page
Copy the Shortcode from the Shortcode Builder page > Paste it to your page or post. Now your users can view and interact with the stunning photo gallery.
Read Also: How To Create Google Drive Video Gallery On WordPress Website
Video Tutorial
If you don’t prefer reading step-by-step tutorials, I come up with an easy-to-understand video tutorial for you.
Conclusion
Hopefully, this simple guide will help you create and display stunning photo galleries from Google Drive on your WordPress website’s page or post. As a result, visitors will have a better experience and easy understanding of the visuals they will notice.
If you still have any difficulties you can simply comment below. Our specialized team members will solve things instantly for you.
No Comments yet!
Leave a reply