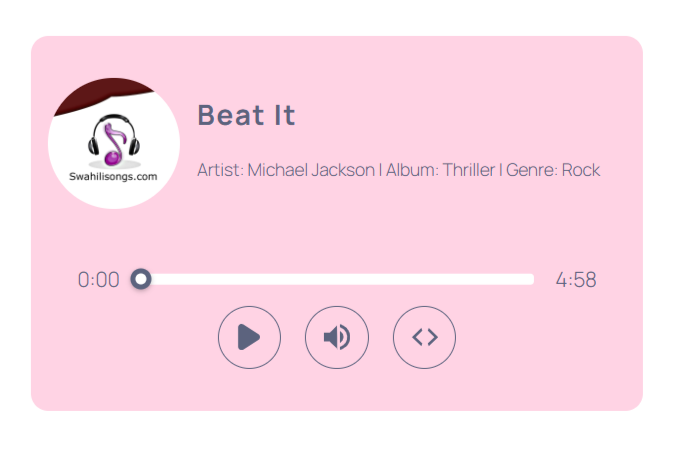
The Audio Player is designed to offer a flexible, feature-rich solution for embedding and streaming audio on your website. Whether you’re showcasing a single track, podcast episode, music album, or an entire playlist, the plugin allows you to deliver high-quality audio experiences with customizable controls and design.
Create a New Audio Player
- Navigate to Multimedia Player > All Players > Add New Player in your WordPress dashboard.
- Select Audio Player from the available player types.
- Enter a Name for your new player to identify it easily.

Manage Track Details
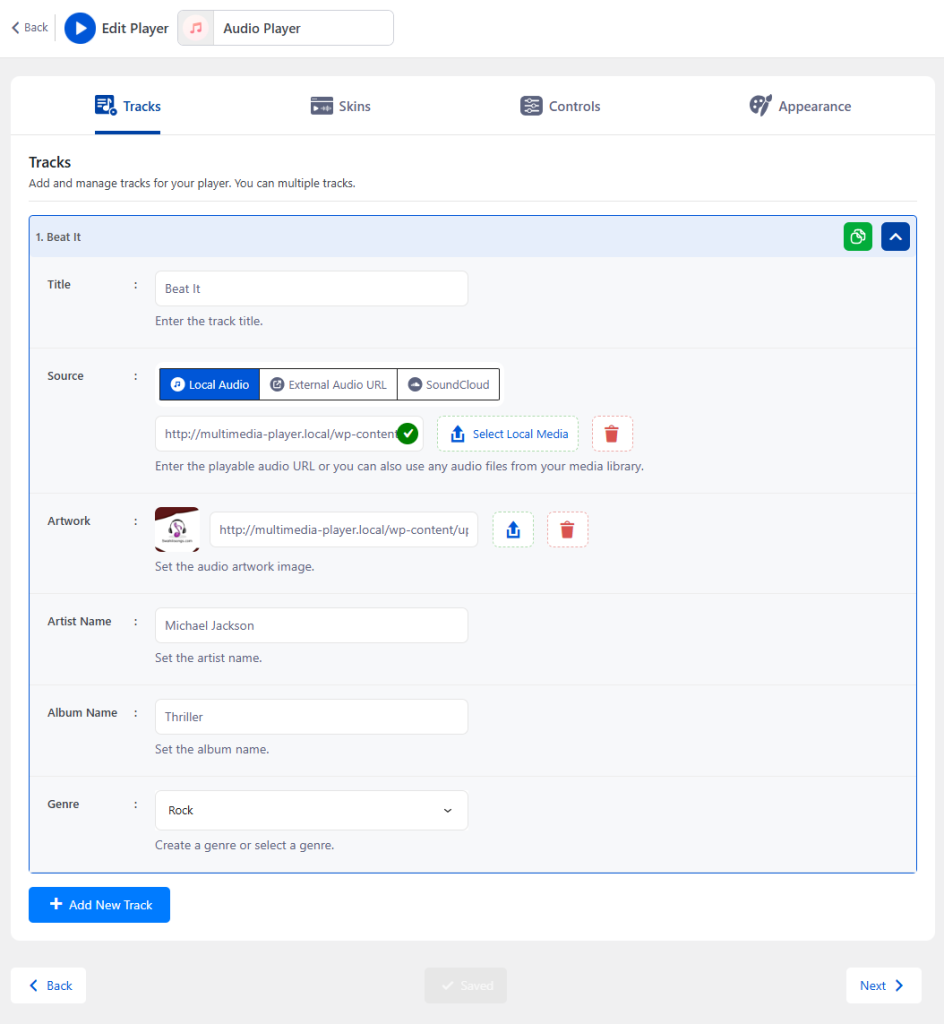
- From the Tracks tab add track sources, title, artwork, artist name, album name, genre and others.
- Title: Enter the track title.
- Source: Enter the playable audio URL or you can also use any audio files from your media library.
- Artwork: Set the audio artwork image.
- Artist Name: Set the artist name.
- Album Name: Set the album name.
- Genre: Create a genre or select a genre.
- Click on Add New Track button to add multiple tracks.
- Once you’re done adding tracks, click Next to continue.
Choose a Player Skin
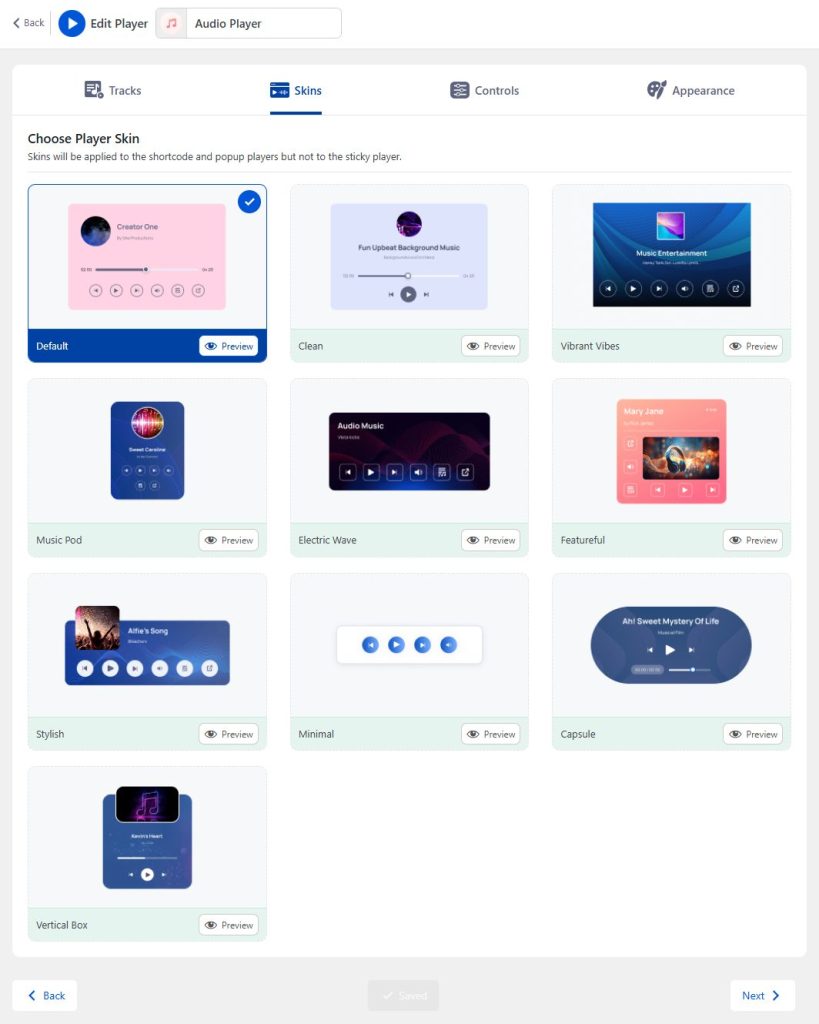
- Navigate to the Skins tab.
- Browse and select from 25+ pre-built skins to instantly apply a visual style to your player.
- Click Next when you’re ready to proceed.
Customize Player Controls
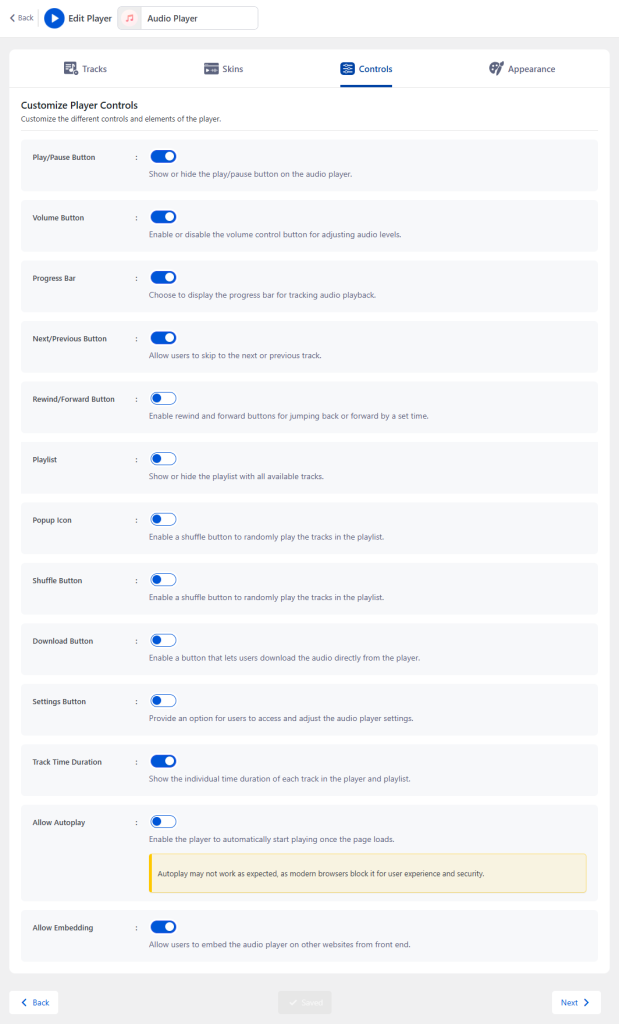
- In the Controls tab, configure the visible control elements. Show or hide options such as Play/Pause, Next/Previous, Progress Bar, Playlist, Shuffle, Download, Embed, etc.
- Play/Pause Button: Show or hide the play/pause button on the audio player.
- Volume Button: Enable or disable the volume control button for adjusting audio levels.
- Progress Bar: Choose to display the progress bar for tracking audio playback.
- Next/Previous Button: Allow users to skip to the next or previous track.
- Rewind/Forward Button: Enable rewind and forward buttons for jumping back or forward by a set time.
- Playlist: Show or hide the playlist with all available tracks.
- Popup Icon: Enable a shuffle button to randomly play the tracks in the playlist.
- Shuffle Button: Enable a shuffle button to randomly play the tracks in the playlist.
- Download Button: Enable a button that lets users download the audio directly from the player.
- Settings Button: Provide an option for users to access and adjust the audio player settings.
- Track Time Duration: Show the individual time duration of each track in the player and playlist.
- Allow Autoplay: Enable the player to automatically start playing once the page loads.
- Allow Embedding: Allow users to embed the audio player on other websites from front end.
- Tailor the interface based on your audience’s needs.
- Click Next to move on.
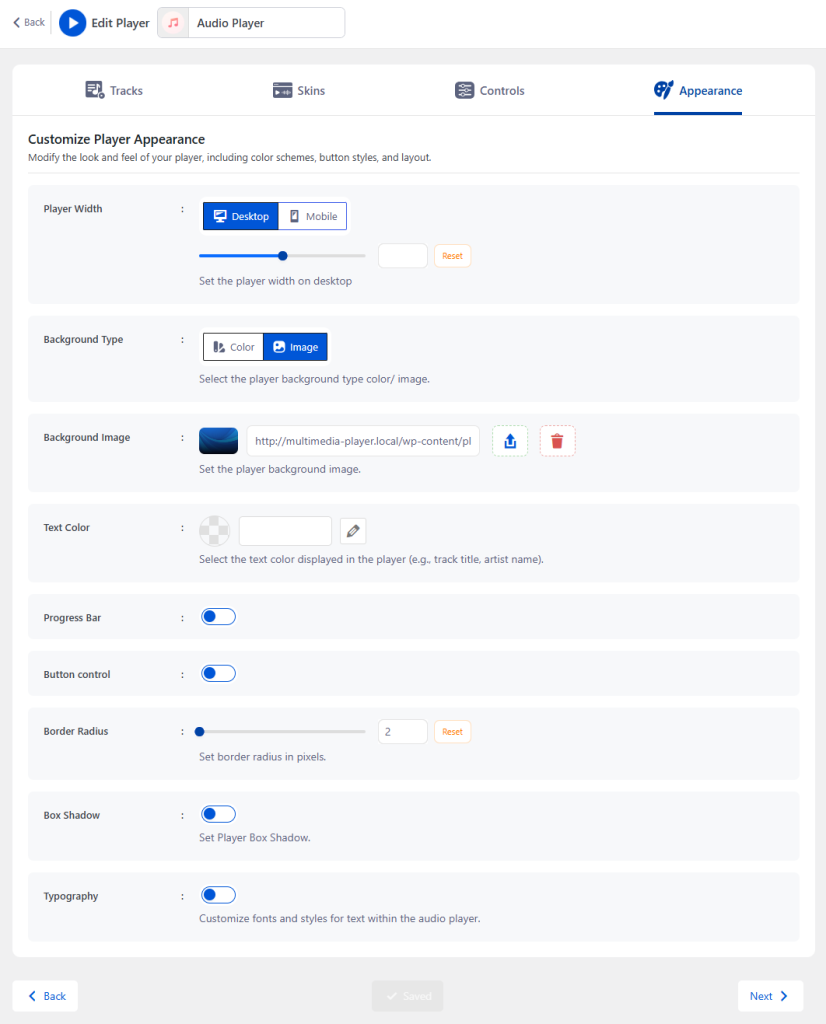
Customize Player Appearance
- Go to the Appearance tab to personalize your player’s visual style. Adjust color schemes, button designs, layout spacing, and more.
- Player Width: Set the player width on desktop or mobile.
- Background Type: Select the player background type color/ image.
- Background Image: Set the player background image.
- Text Color: Select the text color displayed in the player (e.g., track title, artist name).
- Progress Bar: Configure progress bar color & appearance.
- Button Control: Configure button color & appearance.
- Border Radius: Set border radius in pixels.
- Box Shadow: Set Player Box Shadow.
- Typography: Customize fonts and styles for text within the audio player.
- Create a look that matches your website or brand.
- Click Next when finished.
Display the Player
- Once your player is ready, click the Embed button.
- Copy Shortcode.
- Paste the shortcode into any page, post, or widget area on your site to display the player.

Output