Your radio station may not be live 24/7, or perhaps it only broadcasts for specific periods throughout the day. In such instances, creating a schedule for your station can be extremely beneficial for both you and your listeners. This allows you to effectively manage your broadcasting times, while also keeping your audience informed about when they can tune in to enjoy your station’s content.
If you wish to exhibit your radio station at certain times, you’ve come to the right place! This comprehensive guide is designed to provide all the information you need to effectively schedule your Radio Player stations. From basic setup to intricate details, we’ve got you covered. Let’s dive in and explore the world of radio scheduling together.
“Currently, Radio Player offers you a variety of scheduling options to match your station’s unique requirements. Here’s a quick rundown of the modes available:
- Always: If you’re running a station that’s live 24/7, this is your go-to option. The ‘Always’ mode ensures that your Radio Player is constantly available to listeners.
- Daily: Want your station to go live at specific times every day? The ‘Daily’ mode lets you define your own daily schedule for when the player turns on and off.
- Weekly: If you prefer a week-based schedule, choose the ‘Weekly’ mode. Here, you can set which days of the week and what times your station should be live.
- Monthly: Perfect for stations that operate on a monthly schedule, this mode allows you to specify the dates and times for when your player will be available each month.
Choose the mode that best fits your needs and gives your listeners the optimal listening experience.
Setting Up Daily Visibility for Radio Player
To display your Radio Player on a daily basis, follow the steps outlined below. This guide will take you through the process of configuring daily visibility for the Radio Player on your website.
Step 1: Access the Radio Player Section
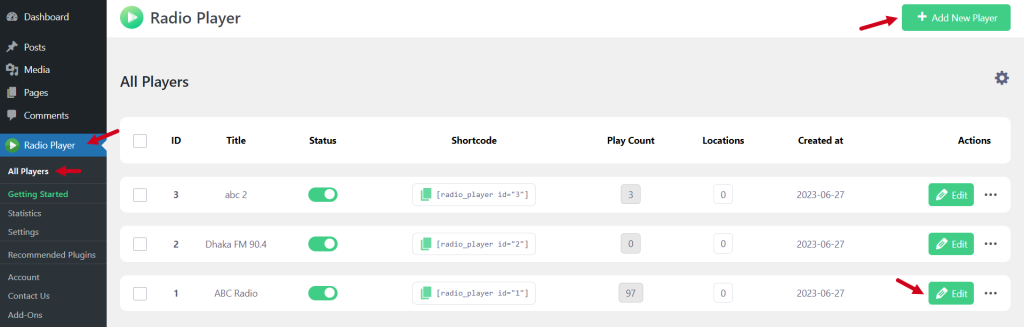
Begin by navigating to the admin area of your website, then locate and click on the Radio Player plugin section.
Step 2: Create or Modify a Player
Decide whether you’d like to create a new radio player or edit an existing one. Then, proceed with your chosen action.
Step 3: Set Up Daily Schedules for Your Player
Inside the player editing interface, you’ll find the ‘Schedules’ option. Here, you can specify the times when your radio player should be active.
Navigate to the ‘Display Player’ dropdown menu in the Schedules section. From the available options, select ‘Daily’.
Step 4: Define Start and End Times
Set the specific start and end times for your radio player’s daily display. You can input these manually in the corresponding fields or use the built-in time picker tools.
If you want to add more time slots throughout the day, just click the ‘Add Time’ button to include additional intervals.
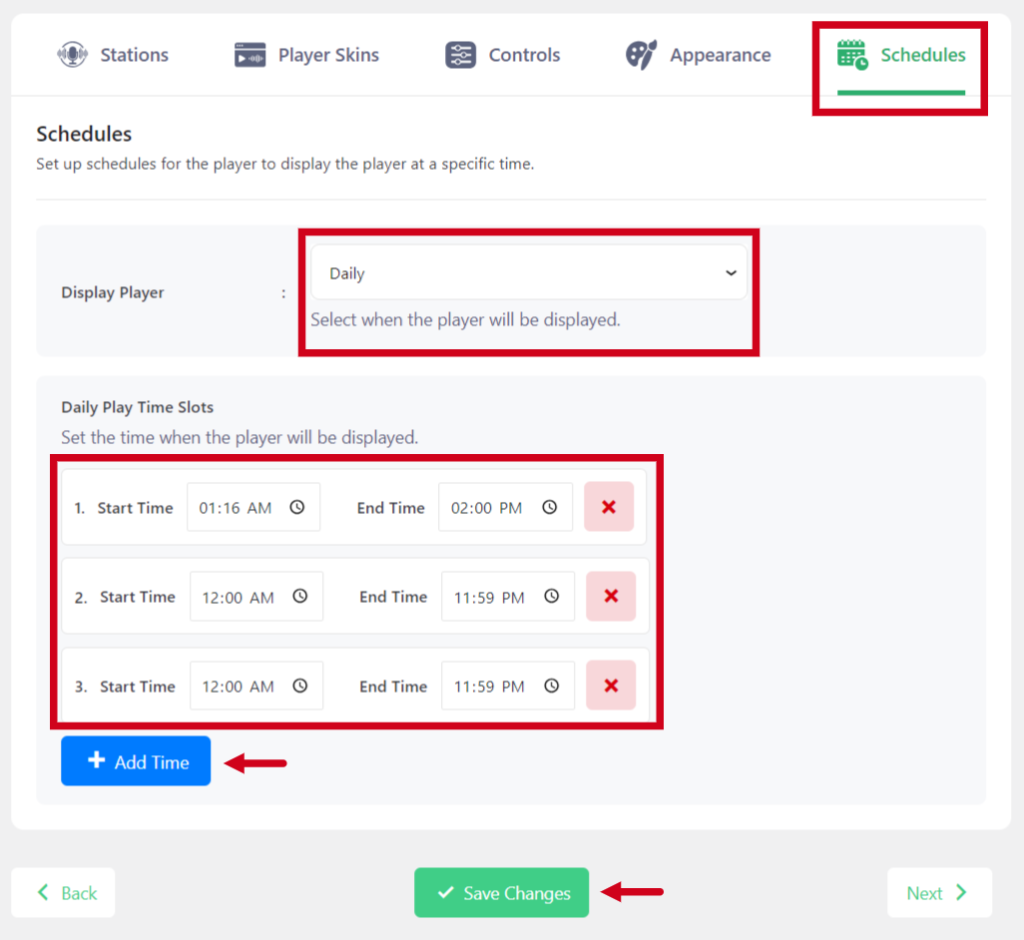
Step 5: Save Your Settings
After configuring the start and end times to your liking, make sure to save your changes. Your radio player will now be displayed according to the daily schedule you’ve set up.”
Setting Up Weekly Visibility for Radio Player
To display your Radio Player on a weekly basis, follow the steps outlined below. This guide will take you through the process of configuring weekly visibility for the Radio Player on your website.
Step 1: Access the Radio Player Section
Begin by navigating to the admin area of your website, then locate and click on the Radio Player plugin section.
Step 2: Create or Modify a Player
Decide whether you’d like to create a new radio player or edit an existing one. Then, proceed with your chosen action.
Step 3: Set Up Weekly Schedules for Your Player
Inside the player editing interface, you’ll find the ‘Schedules’ option. Here, you can specify the times when your radio player should be active.
Navigate to the ‘Display Player’ dropdown menu in the Schedules section. From the available options, select ‘Weekly’. Select the weekly days from the checkboxes.
Step 4: Define Start and End Times
Set the specific start and end times for your radio player’s weekly display. You can input these manually in the corresponding fields or use the built-in time picker tools.
If you want to add more time slots throughout the day, just click the ‘Add Time’ button to include additional intervals.
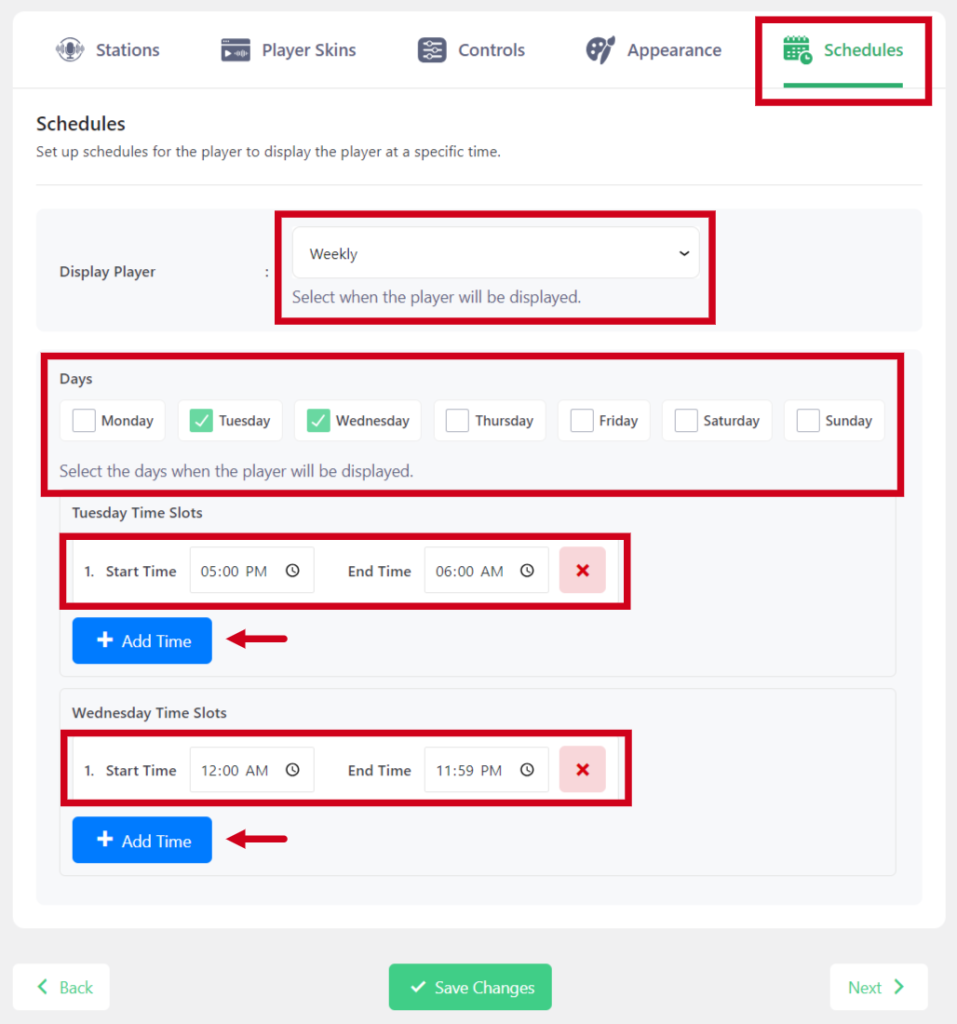
Step 5: Save Your Settings
After configuring the start and end times to your liking, make sure to save your changes. Your radio player will now be displayed according to the daily schedule you’ve set up.”
Setting Up Monthly Visibility for Radio Player
To display your Radio Player on a monthly basis, follow the steps outlined below. This guide will take you through the process of configuring monthly visibility for the Radio Player on your website.
Step 1: Access the Radio Player Section
Begin by navigating to the admin area of your website, then locate and click on the Radio Player plugin section.
Step 2: Create or Modify a Player
Decide whether you’d like to create a new radio player or edit an existing one. Then, proceed with your chosen action.
Step 3: Set Up Monthly Schedules for Your Player
Inside the player editing interface, you’ll find the ‘Schedules’ option. Here, you can specify the times when your radio player should be active.
Navigate to the ‘Display Player’ dropdown menu in the Schedules section. From the available options, select ‘Monthly‘. Select the month days from the checkboxes.
Step 4: Define Start and End Times
Set the specific start and end times for your radio player’s monthly display. You can input these manually in the corresponding fields or use the built-in time picker tools.
If you want to add more time slots throughout the day, just click the ‘Add Time’ button to include additional intervals.
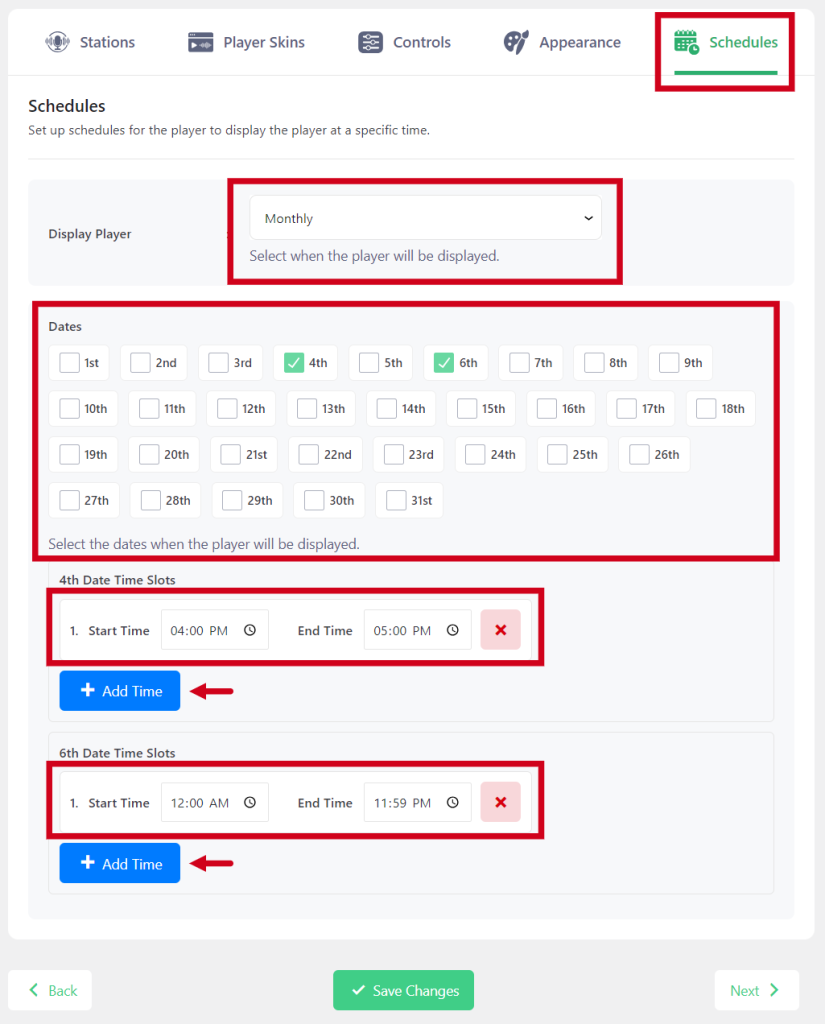
Step 5: Save Your Settings
After configuring the start and end times to your liking, make sure to save your changes. Your radio player will now be displayed according to the daily schedule you’ve set up.”
Video Tutorial