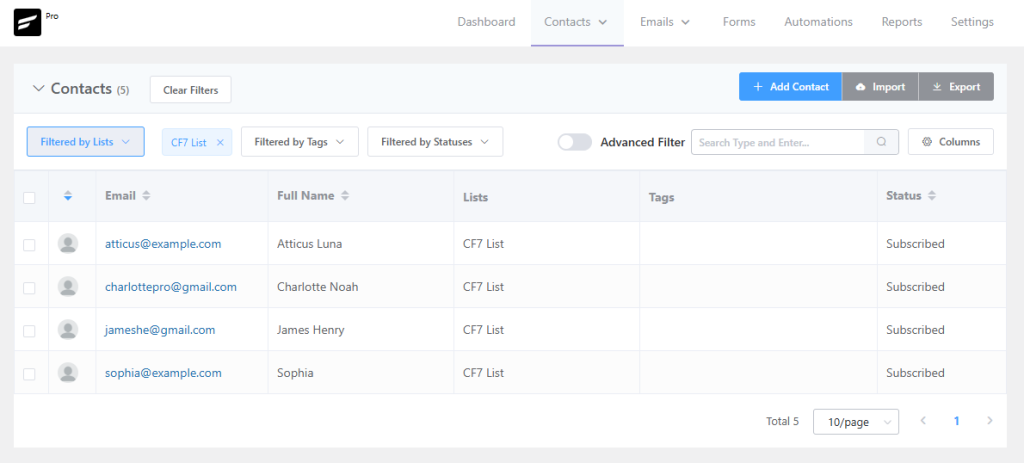
Managing subscriber data shouldn’t slow you down. With the FluentCRM Integration in Essential Addons for Contact Form 7, every form submission is instantly added as a new contact inside your FluentCRM dashboard—no manual entry needed.
As soon as a user submits a form, their information is automatically synced to your selected FluentCRM list. This seamless integration helps you grow your audience, segment contacts efficiently, and power your automated email campaigns with accurate, real-time data.
Follow the steps below to connect FluentCRM with your Contact Form 7 forms and streamline your email marketing workflow.
Before you begin, make sure both Contact Form 7, Essential Addons for Contact Form 7 (PRO), and FluentCRM (PRO) are installed on your WordPress site.
Enable FluentCRM Integration
Before connecting your FluentCRM account with Contact Form 7, you need to enable FluentCRM integration. Follow the steps below to get started:
- Navigate to the Contact Form 7 menu.
- Go to Essential Addons.
- Click the Global Settings tab > Integrations > FluentCRM > Enable FluentCRM Integration.

Configure FluentCRM Settings
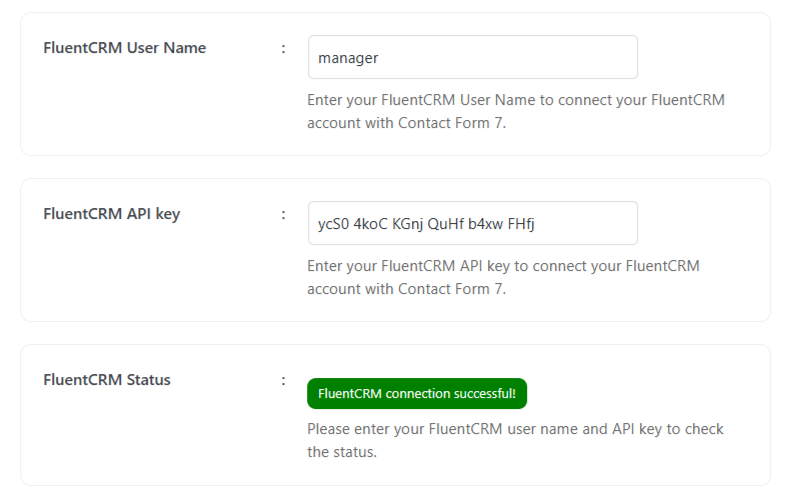
Once you activate the FluentCRM Integration toggle, you’ll discover a few other options. This is where you configure your FluentCRM environment and provide the necessary credentials to connect your account.
Here’s what each field means:
- FluentCRM Username: Enter your FluentCRM User Name to connect your FluentCRM account with Contact Form 7.
- FluentCRM API key: Enter your FluentCRM API key to connect your FluentCRM account with Contact Form 7.
- FluentCRM Status: Displays FluentCRM credential status, whether it’s active or not.
How to Get FluentCRM Username?
To get FluentCRM username, follow the steps below:
- Navigate to FluentCRM Dashboard from the Premium plugin > Settings > Managers > Add New Manager.
- Enter User Email (must be a user of your WordPress website) > Set Permissions > Click Create button.

How to Get FluentCRM API?
To get FluentCRM API, follow the steps below:
- Navigate to FluentCRM Dashboard from the Premium plugin > Settings > REST API > Add New Key.
- Enter Key Name > Select Manage > Click Create.

Configure FluentCRM Additional Settings
Before collecting & storing necessary information through Contact Form 7 to FluentCRM, configuring additional settings is mandatory. Otherwise, the functionality won’t work as expected.
Follow the guidelines below to configure the settings properly.
- Navigate to Contact Forms to create a new form or edit an existing one.
- Enter Form Name, customize Form Template, and others.
- Navigate to Integrations from Essential Addons for Contact Form 7 settings > FluentCRM > Enable FluentCRM Integration if it’s disabled.
- FluentCRM List: Select the campaign list where submitted data will be stored.
- Subscriber User Tag: Set Subscriber user tag Name for FluentCRM Integration on Contact Form 7.
- Subscriber Email: Select the correct tag to capture the subscriber email while submitting the form.
- Subscriber First Name: Select the correct tag to capture the First Name while submitting the form.
- Subscriber Last Name: Select the correct tag to capture the Last Name while submitting the form.
- Subscriber Phone Number: Select the correct tag to capture the Phone Number while submitting the form.
- Save Changes while configuration is done.

Upon submitting the form, the necessary and selected information will start storing inside the FluentCRM account directly from Contact Form 7.
Inside CRM Output