Managing your email list should be effortless and fully automated. With the FunnelKit Integration, every form submission is instantly captured and added to your FunnelKit-powered workflow—no manual imports or extra steps required.
The moment a user submits a form, their details are automatically synced to your selected FunnelKit contact list or automation. This smooth, hands-free process helps you build your audience faster, segment contacts intelligently, and power your funnels with accurate, real-time data.
Follow the steps below to connect FunnelKit with your forms and turn every submission into a valuable lead inside your funnel system.
Before you begin, ensure Contact Form 7, Essential Addons for Contact Form 7 (PRO), and FunnelKit plugins are installed on your WordPress site.
Enable FunnelKit Integration
Before connecting FunnelKit with your forms, you need to enable the FunnelKit integration. Follow the steps below to get started:
- Navigate to the Contact Form 7 menu.
- Go to Essential Addons.
- Click the Global Settings tab > Integrations > FunnelKit > Enable FunnelKit Integration.

How to Get Your FunnelKit API Key?
To access the FunnelKit API Key, follow the steps below:
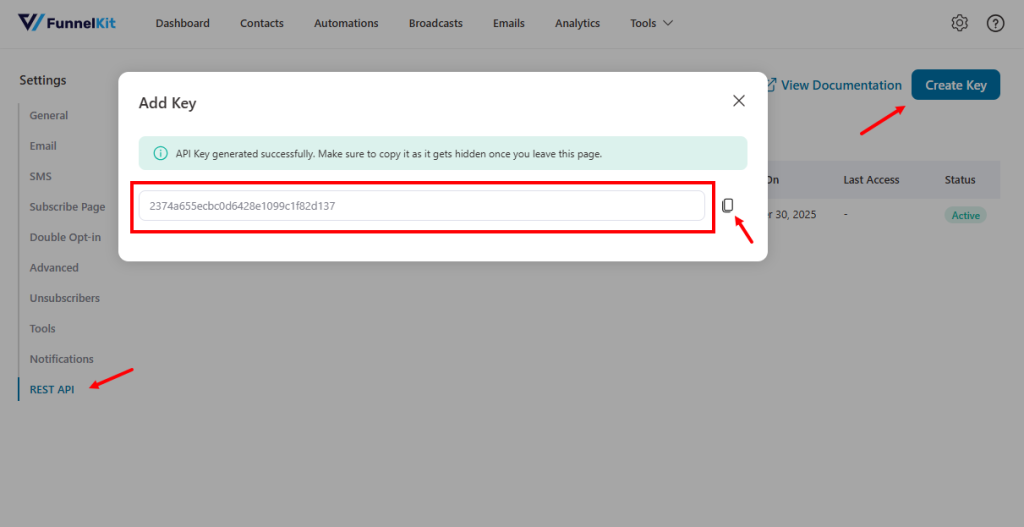
- Navigate to FunnelKit Plugin > Settings > REST Api.
- Click on Create Key.
- Give Permission, Select User, Write Description.
- Click on Add > Copy the Api key and paste it inside the Essential Addons for Contact Form 7 FunnelKit Api Key input field.
Configure FunnelKit Additional Settings
Before collecting and storing customer data from Contact Form 7 into FunnelKit Automations, you must configure the FunnelKit integration settings properly. If these settings are not configured, the integration will not work as expected.
Follow the steps below to complete the setup.
-
Navigate to Contact Forms to create a new form or edit an existing one.
-
Enter the Form Name, customize the Form Template, and add the required form fields.
-
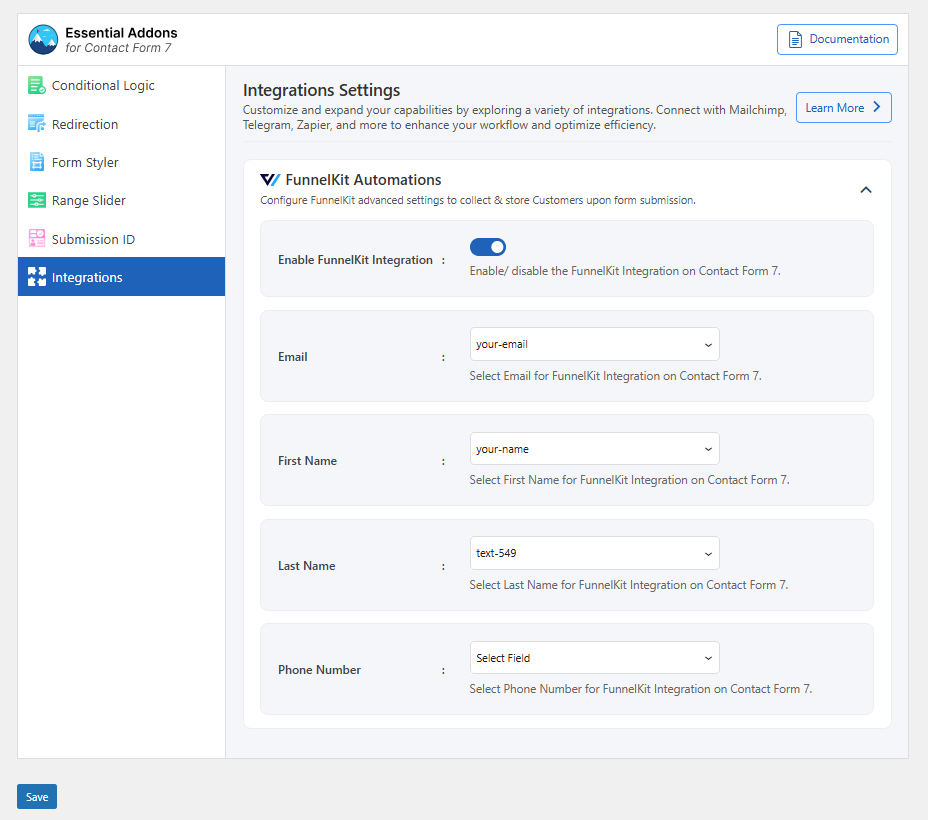
Navigate to Integrations from Essential Addons for Contact Form 7 settings > FunnelKit Automations. > Enable FunnelKit Integration if it’s disabled.
-
Email: Select the correct form tag to capture the subscriber’s email address.
-
First Name: Select the correct form tag to capture the subscriber’s first name.
-
Last Name: Select the correct form tag to capture the subscriber’s last name.
-
Phone Number: Select the correct form tag to capture the subscriber’s phone number.
-
Save Changes once the configuration is complete.
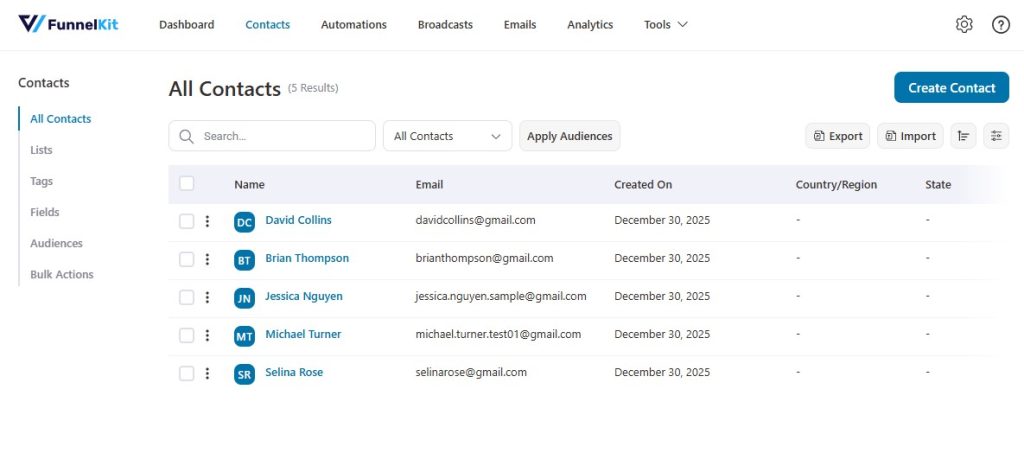
Upon submitting the form, the necessary and selected information will start storing inside the FunnelKit plugin Contact page directly from Contact Form 7.
Output