The Private Folders is an easy and secure solution that allows you to link specific Google Drive folders to your specific users. Using Private Folders you can easily and securely share your Google Drive documents with your users/clients. This allows your users/ clients to view, download and manage their documents in their own private folders.
How to Enable Private Folders Automatically While a New User Sings Up?
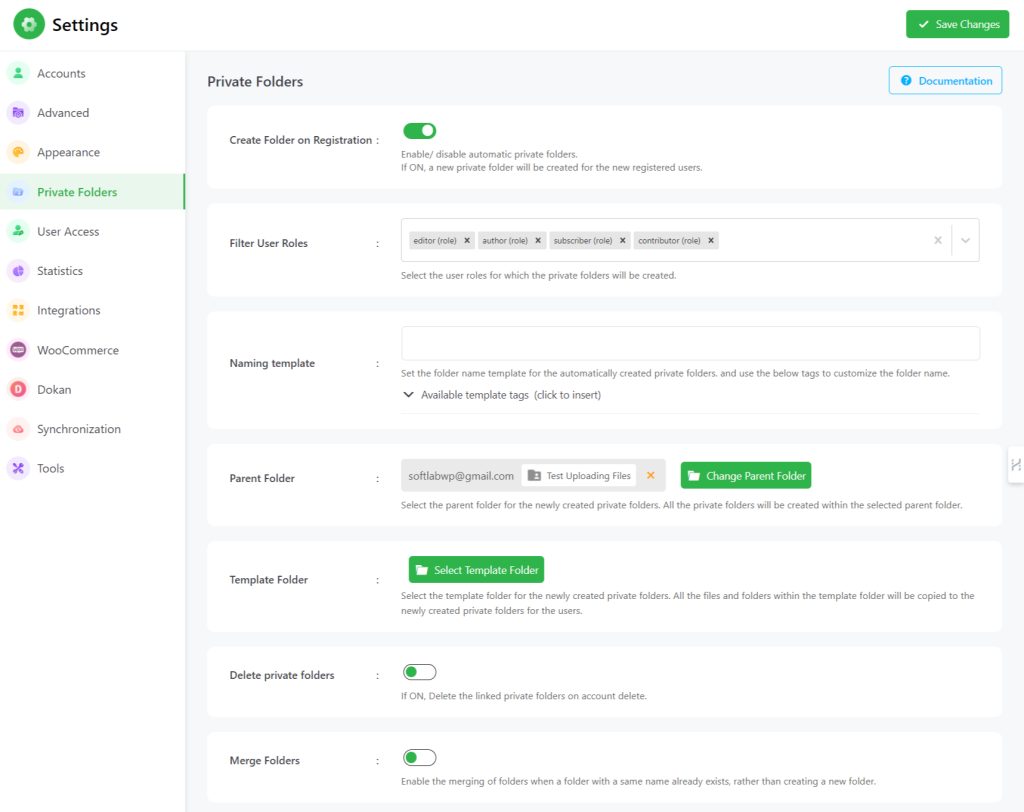
To Enable Private Folders Automatically While a New User Signs Up click on Settings from the left side of your WordPress sidebar > Private Folders menu > enable Create Folder on Registration.
- Create Folder on Registration: Enable/ disable automatic private folders. If enabled, a new private folder will be created for the new registered users.
- Filter User Roles: Select the user roles for which the private folders will be created.
- Naming template: Set the folder name template for the automatically created private folders. and use the below tags to customize the folder name. Example: %user_login% (%user_email%) %user_login%
- Parent Folder: Select the parent folder for the newly created private folders. All the private folders will be created within the selected parent folder.
- Template Folder: Select the template folder for the newly created private folders. All the files and folders within the template folder will be copied to the newly created private folders for the users.
- Delete Private Folders: If enabled, Linked private folders on the account will be deleted once the account is deleted.
- Merge Folders: Enable the merging of folders when a folder with a same name already exists, rather than creating a new folder.
Click Save Changes. Once enabled, a new private folder will be created for the newly registered users.
How to Link Private Folders Manually to Users’ Accounts?
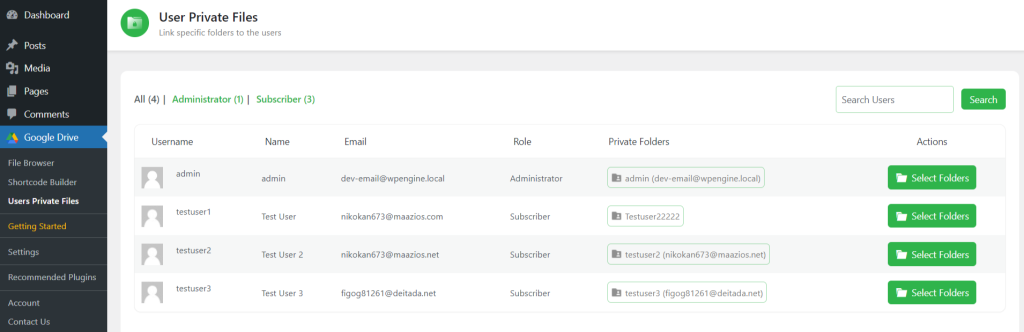
To link, private folders click User Private Files from the left side of your WordPress dashboard > find users whom you want to share (you can use the search bar to find users fast) > click Select Folder under the action column.
Selecting Files
After clicking, a new pop-up window will open. Select the files you want to share with your user.
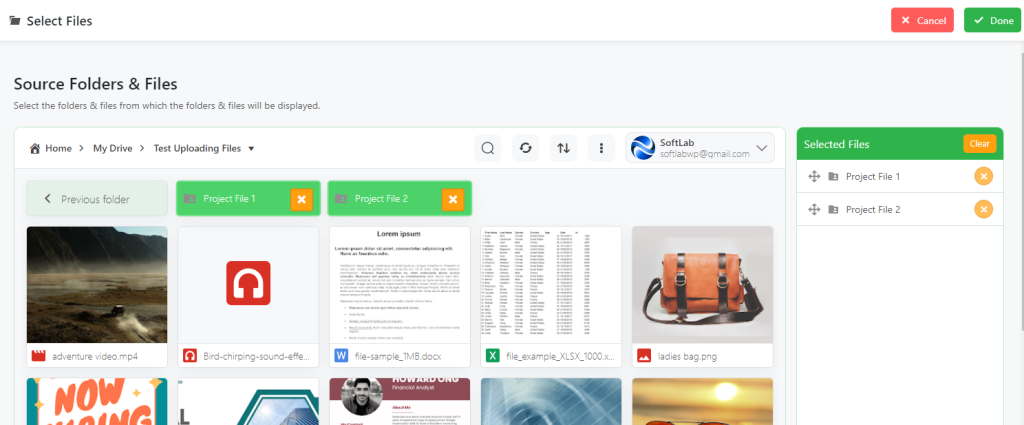
Click Done.
How to Use & Display Private Folders?
Create a new module where you want to allocate private folders. From the sources tab, enable Use Private Files > enable Create Private Folder > Select Naming Template > Available Template Tags > Parent Folder > Template Folder.
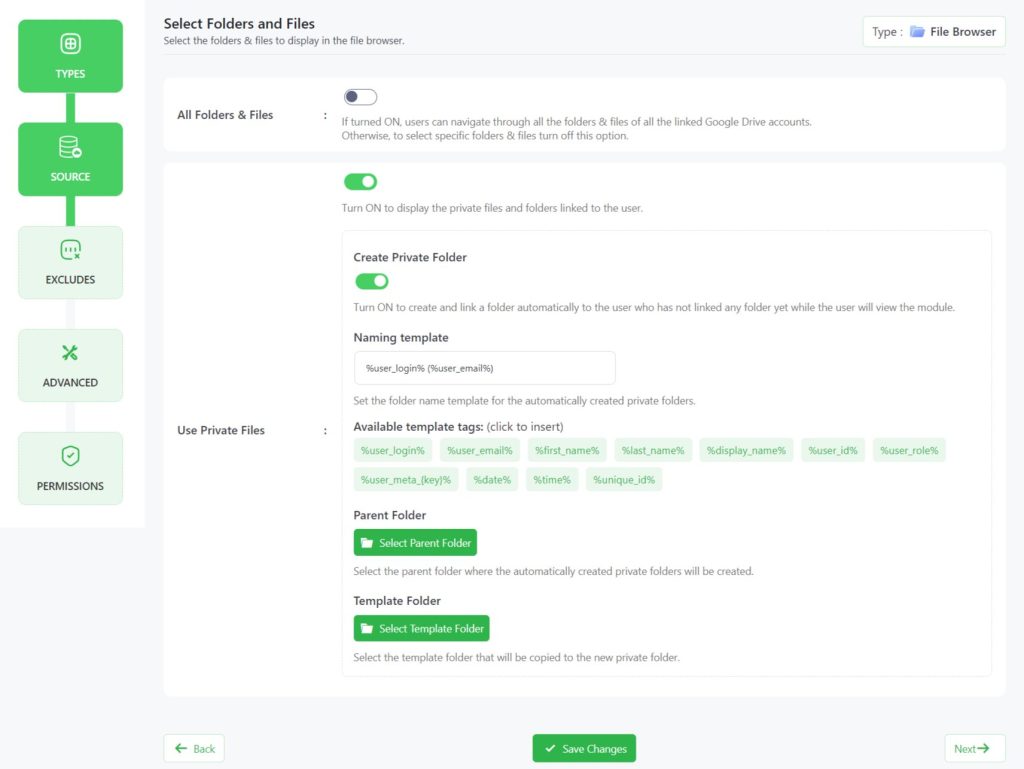
Use Private Folder: Turn ON to use the private files and folders linked to the current user. This will allow you to link specific private folders with specific users. Once enabled you will discover an option called Create Private Folder.
- Create Private Folder: Turn ON to create and link a folder automatically to the user who has not linked any folder yet while the user views the module. Once enabled you will discover the Naming template, Parent Folder, and Template Folder.
- Naming template: Set the folder name template for the automatically created private folders.
- Parent Folder: Select the parent folder where the automatically created private folders will be created.
- Template Folder: Select the template folder that will be copied to the new private folder.
Click Save Changes. Copy the Shortcode > and Paste it into any of your pages or post.
If the allocated user opens the page without logging in, the allocated private folders won’t be visible. If the user visits the page by logging in with a specific user’s credentials (logged in), he/she can access the allocated private folders as the specific user role.