With Advanced Custom Fields, you can completely control your WordPress custom field data and edit screens. Integrating the ACF with Integrate Google Drive plugin allows you to easily select files and folders stored in Google Drive to be used in your pages and posts. This provides a convenient and efficient way to manage your digital assets and incorporate them into your website with any theme.
Step-1: Enable Advanced Custom Fields Integration
To enable ACF integration, navigate to Google Drive > Settings > Integrations > Enable Advanced Custom Fields Integration > Save Changes.
Step-2: Create New Field
Navigate to Custom Fields from the admin menu > Add New Field > Add Field Group Title > Select Field Type as Google Drive Files > Type Field Label > Type Field Name > Save Changes.
Step-3: Create a Post & Add Files
Navigate to Posts > Add New > click Add File button and select the files you want to add.
Step-4: Use Files Data
Now, You can get the file data using the get_field() function in your theme template for the post/ page. You will get the data as an array.
For example, we are using the below codes for our theme template file:
<?php

if ( function_exists( 'get_field' ) ) {
   $data = get_field( 'field_name' );

   echo '<pre>';
   print_r( $data );
   echo '</pre>';

}

?>
Now, while visiting the post, we will discover the below output:
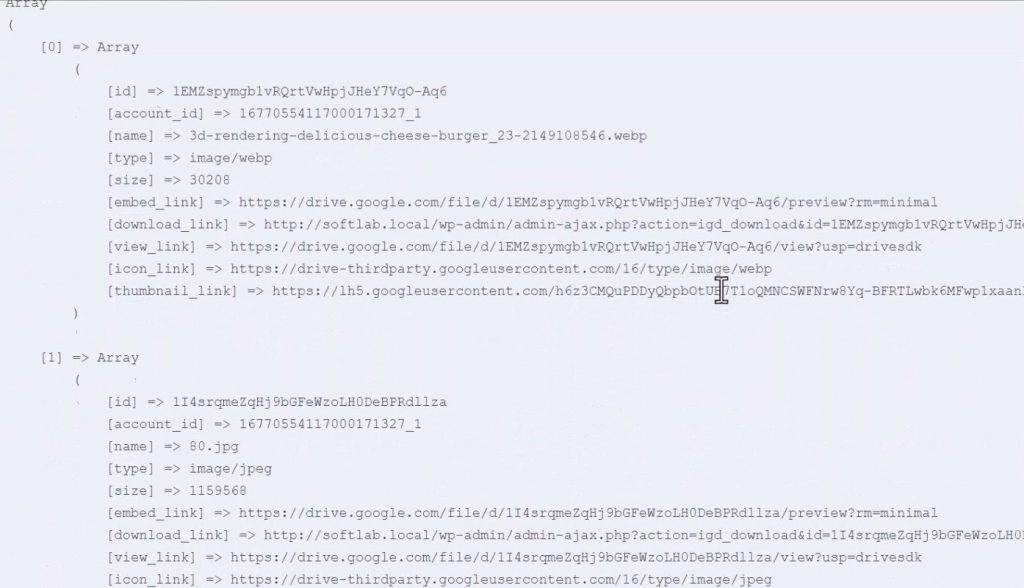
Arrays & their Definition
[id] = The ID of the item
[account_id] = Google Drive associated account ID of the item
[name] = Name of the item
[type] = Type of the item
[size] = File size of the item
[embed_link] = Embed URL to embed the file in any iframe.
[download_link] = URL to download the file.
[view_link] = URL to view the file on Google Drive
[icon_link] = File icon URL.
[thumbnail_link] = File thumbnail URL.
Video Tutorial