Do you know you can allow users to upload necessary files from MetForm and store them in Google Drive? In this documentation, we will explain exactly how to use Google Drive Uploader Field with MetForm and upload any files from MetForm to Google Drive.
Step-1: Install & Activate Necessary Plugins
Make sure you have successfully installed both MetForm & Integrate Google Drive plugin inside your WordPress dashboard. Both of the plugins are required to enable uploading to Google Drive.
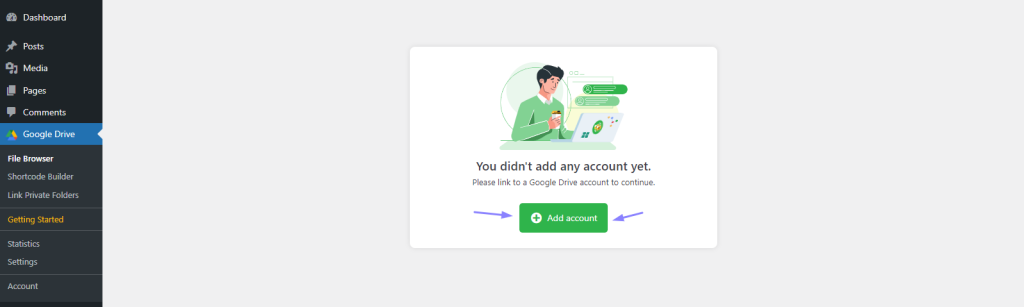
Step-2: Connect Google Account
To connect to your Google Account, navigate to Google Drive > Settings > Accounts > Add New Account > Connect your preferred Google Account. Note: Uploaded files will be stored in this Google Drive account. Make sure you have connected to the right account.
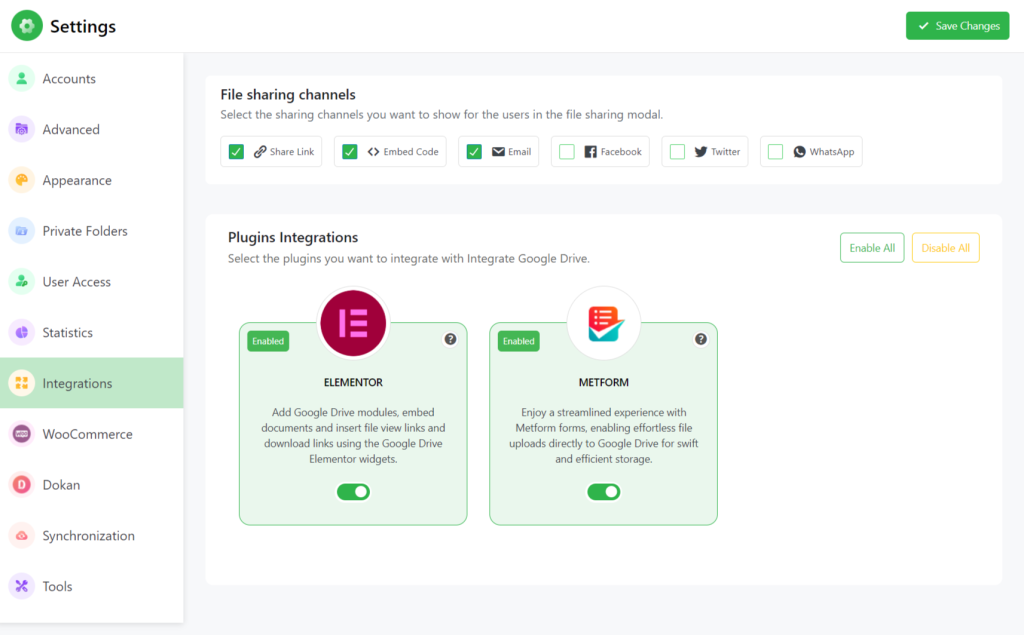
Step-3: Enable MetForm Integration
Navigate to Google Drive > Settings > Integrations > Enable MetForm Integration. This will allow you to enable the Google Drive Upload field inside the MetForm.
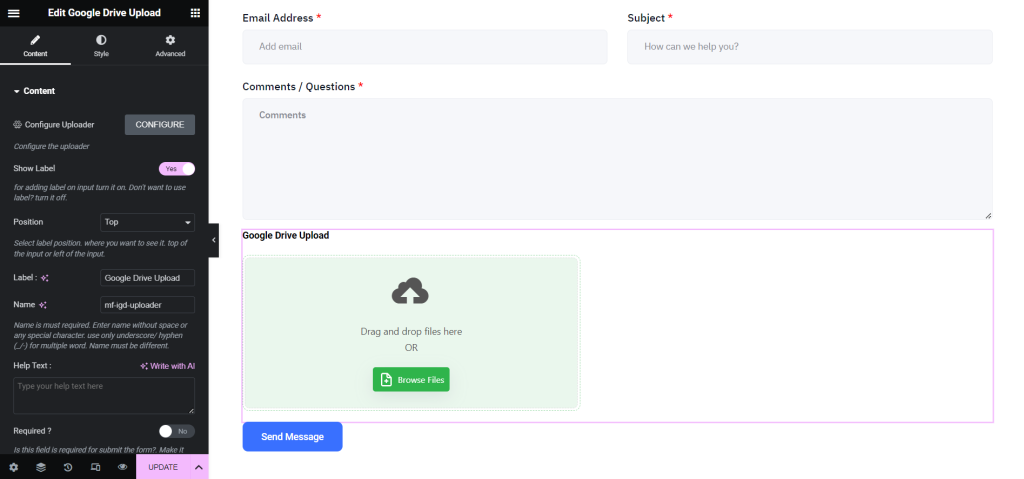
Step-4: Add Google Drive Upload Field
To add a Google Drive upload field inside MetForm, navigate to MetForm > Forms > Add New > Name Form > Choose Form Template > Cick Edit Form > Search for “Google Drive Upload” Widget > Drag & Drop where you want to place the upload field.
Click Configure to set up the form as you need.
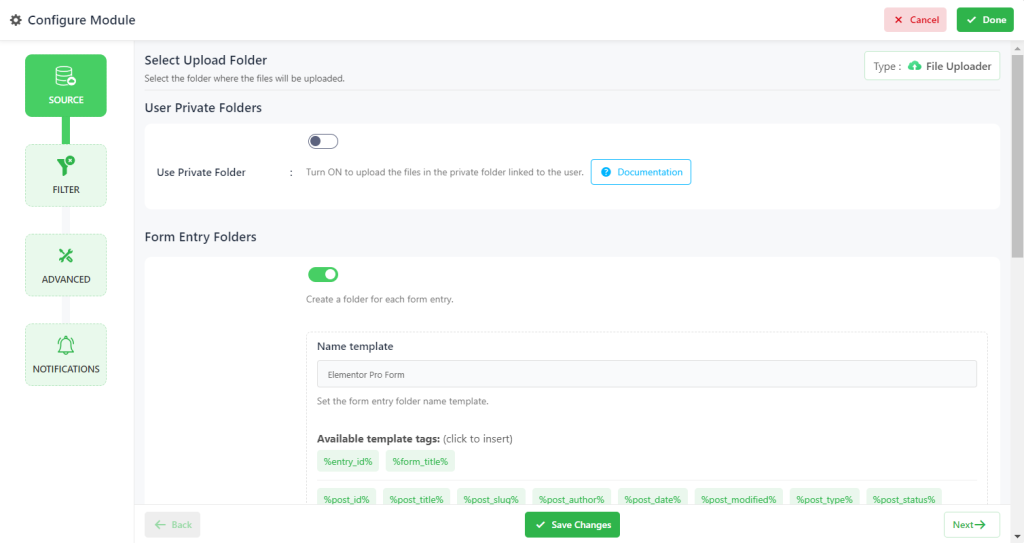
- Source Tab > Create Entry Folders will create a new folder for each form entry. You can also set the form entry folder name template.
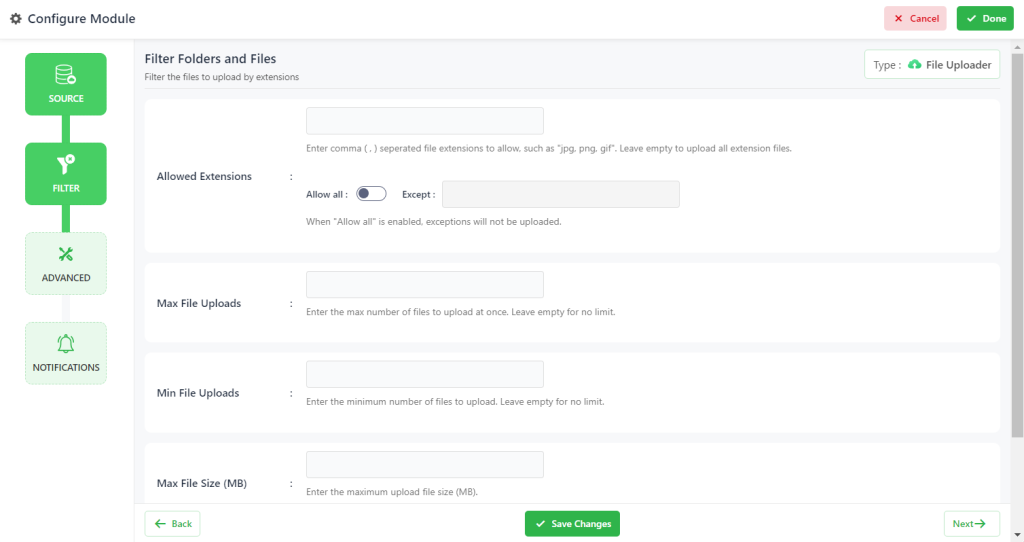
- From the Filter Tab, you can Allow/ Disallow file extensions, Max/ Min File Uploads, and Max/ Min file size. Such as, Allowed Extensions, Max File Uploads, Min File Uploads, Max File Size (MB), and Min File Size (MB).
- Allowed Extensions: Enter comma (,) separated file extensions to allow, such as “jpg, png, gif”. Leave empty to upload all extension files. When “Allow all” is enabled, exceptions will not be uploaded.
- Max File Uploads: Enter the max number of files to upload at once. Leave empty for no limit.
- Min File Uploads: Enter the minimum number of files to upload. Leave empty for no limit.
- Max File Size (MB): Enter the maximum upload file size (MB).
- Min File Size (MB): Enter the minimum upload file size (MB).
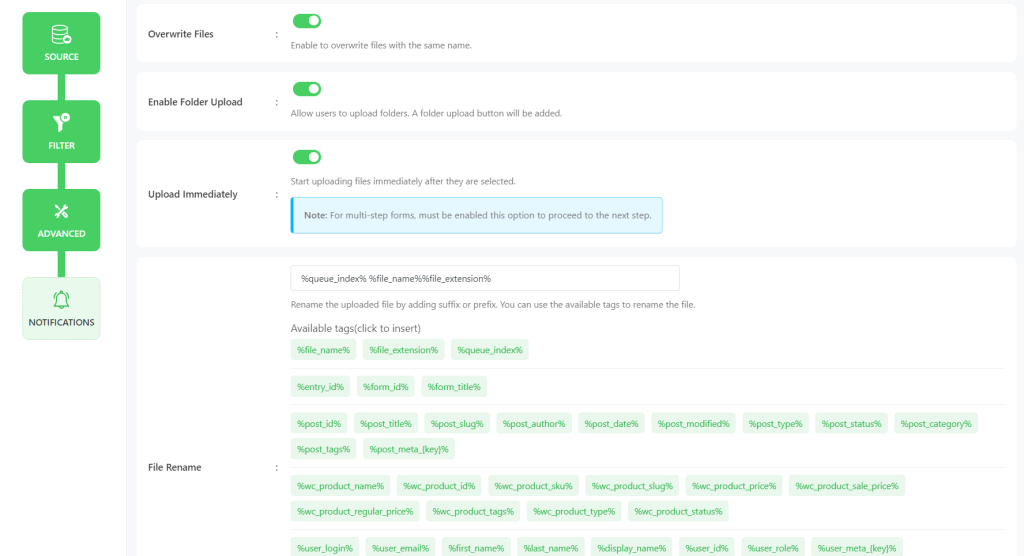
- From the Advanced Tab, you can set the file renaming template by yourself. Such as, Module Container, Overwrite Files, Enable Folder Upload, Upload Immediately, File Rename Template, and Show Upload Label Text.
- Module Container: Set the module container width and height. You can use any valid CSS unit (pixels, percentage), eg ‘360px’, ‘780px’, ‘80%’. Keep blank for the default value.
- Overwrite Files: Enable to overwrite files with the same name.
- Enable Folder Upload: Allow users to upload folders. A folder upload button will be added.
- Enable File Description: Allow users to add a description to the uploaded files.
- Upload Immediately: Start uploading files immediately after they are selected.
- File Rename: Rename the uploaded file by adding a suffix or prefix. You can use the available tags to rename the file.
- Show Upload Label Text: Show/ hide the uploader label text.
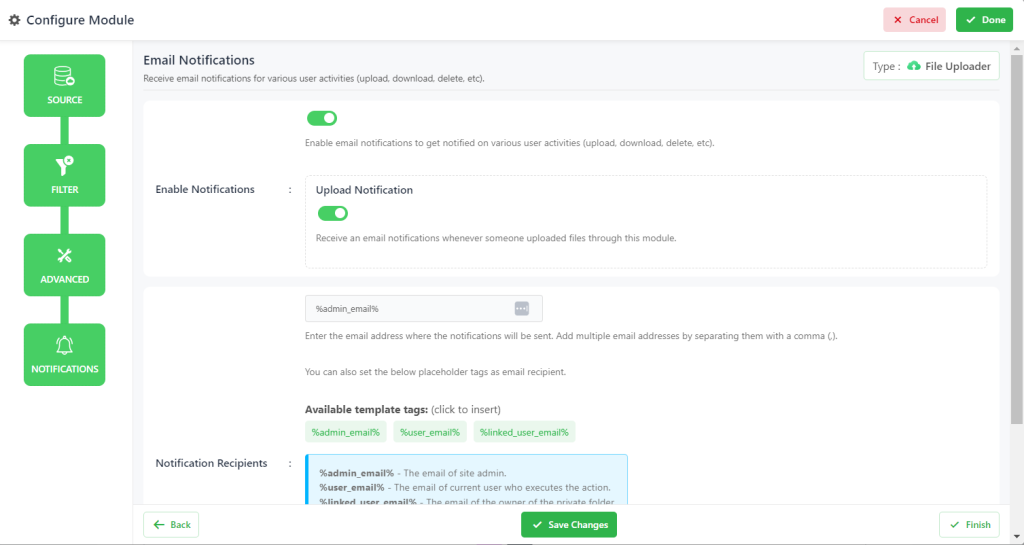
- From the Notifications Tab, you can control notification settings. Such as Upload Notification, Notification Recipients by naming templates, and even you can skip current user notification settings.
- Enable Notifications: Enable email notifications to get notified on various user activities (upload, download, delete, etc).
- Upload Notification: Receive email notifications whenever someone uploaded files through this module.
- Notification Recipients: Enter the email address where the notifications will be sent. Add multiple email addresses by separating them with a comma (,). You can also set the below placeholder tags as email recipients.
- %admin_email% – The email of the site admin.
- %user_email% – The email of the current user who executes the action.
- %linked_user_email% – The email of the owner of the private folder.
- Skip Current User Notification: Enable to skip the notification for the user that executes the action.
- Enable Notifications: Enable email notifications to get notified on various user activities (upload, download, delete, etc).
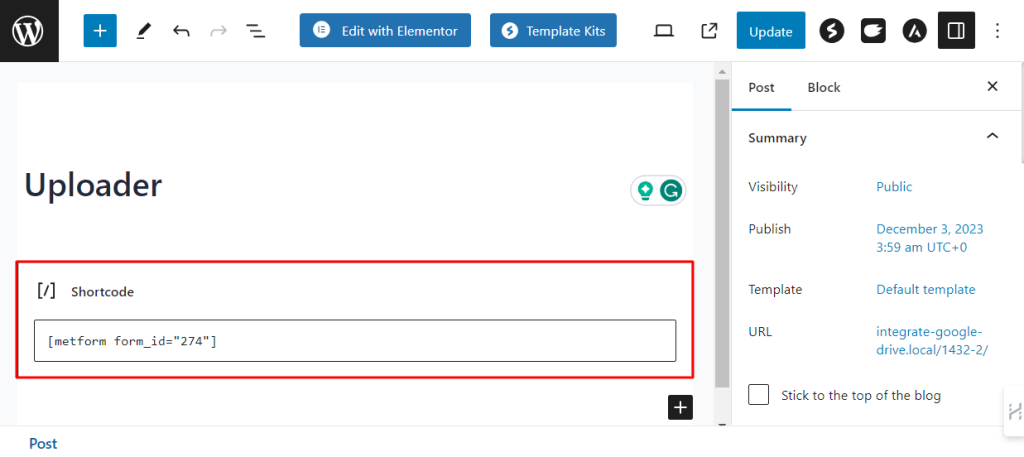
Step-5: Embed Upload Field Using Shortcode
You can also embed the uploader field using shortcode. Copy the shortcode from MetForms and paste any page or post where you want to display the uploader.
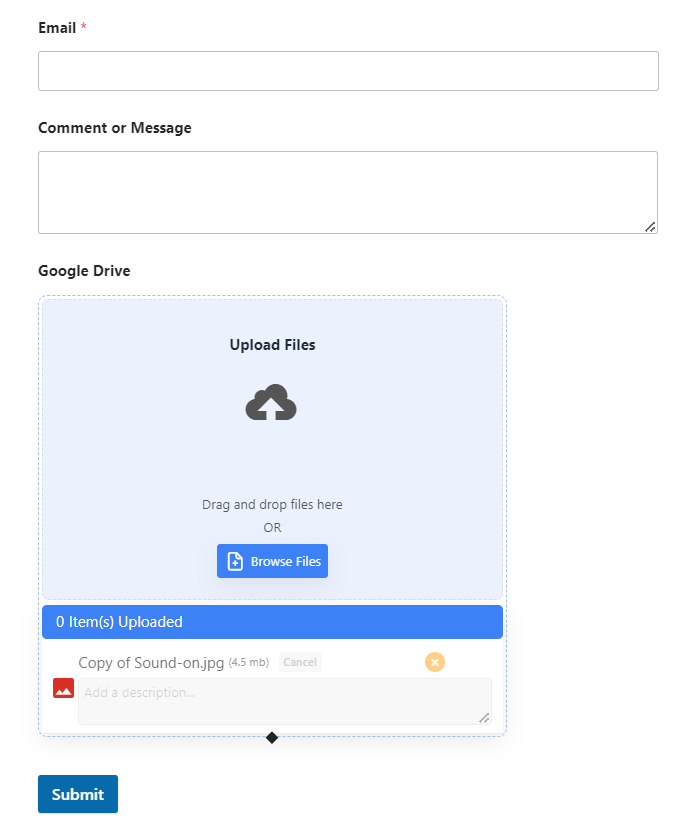
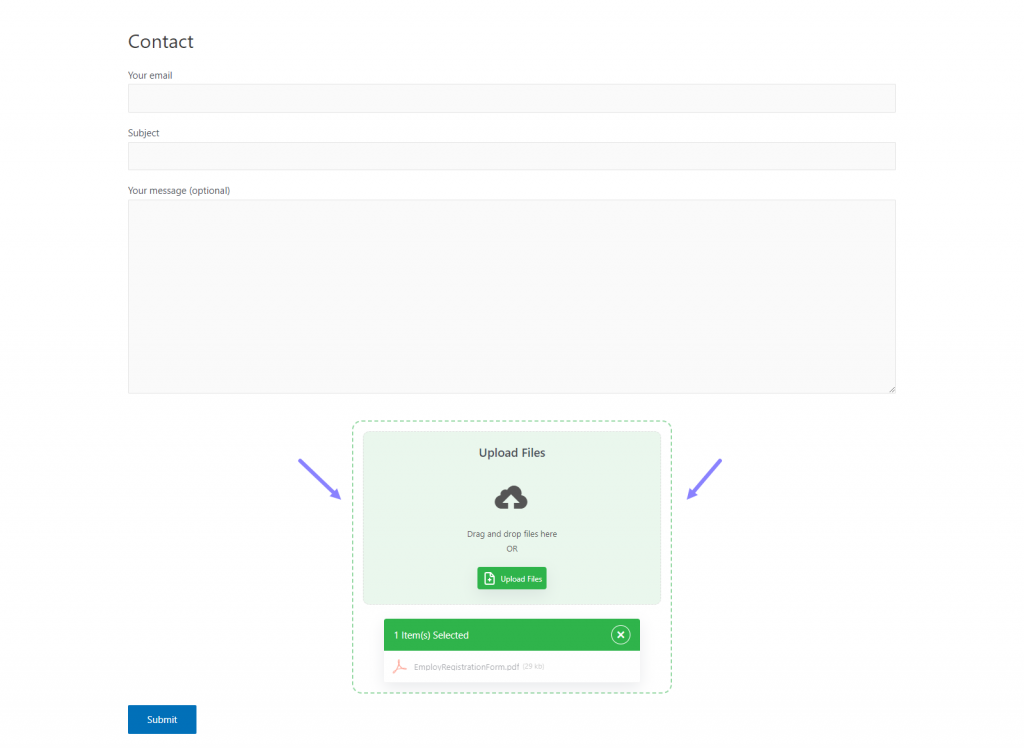
Step-6: Upload Field Output
Here is what the uploading field will look like. Now your users can upload files easily. You will also get an email notification with sufficient links. Make sure to check your email address.
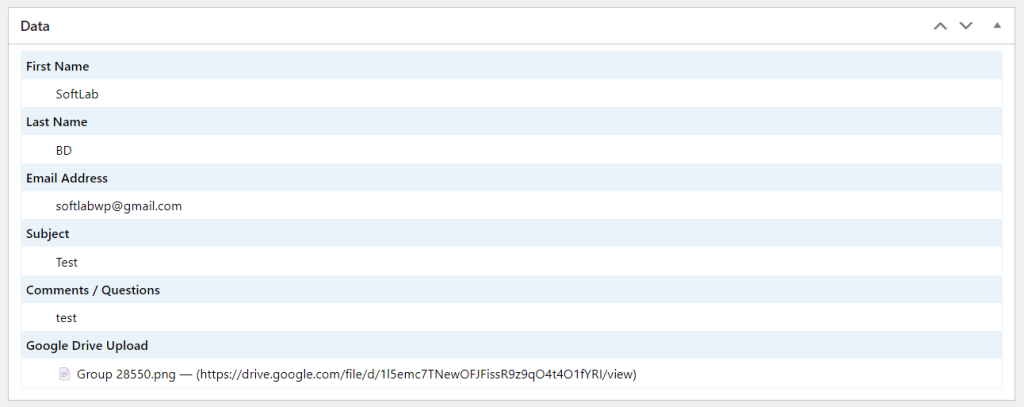
You have successfully set up the Google Drive upload field for MetForm. If any user uploads file(s) from the page or post, all the files will be stored inside your Google Drive account.
You can view form submissions from MetForm > Entries. Also can view form submissions from your email.
Step-7: Upload Field Output
Here is what the uploading field will look like.