With the help of the File Uploader Module, users can upload files to the specific selected Google Drive folder allocated by you. In this guide, we will elaborate on how to properly use and manage the File Uploader Module.
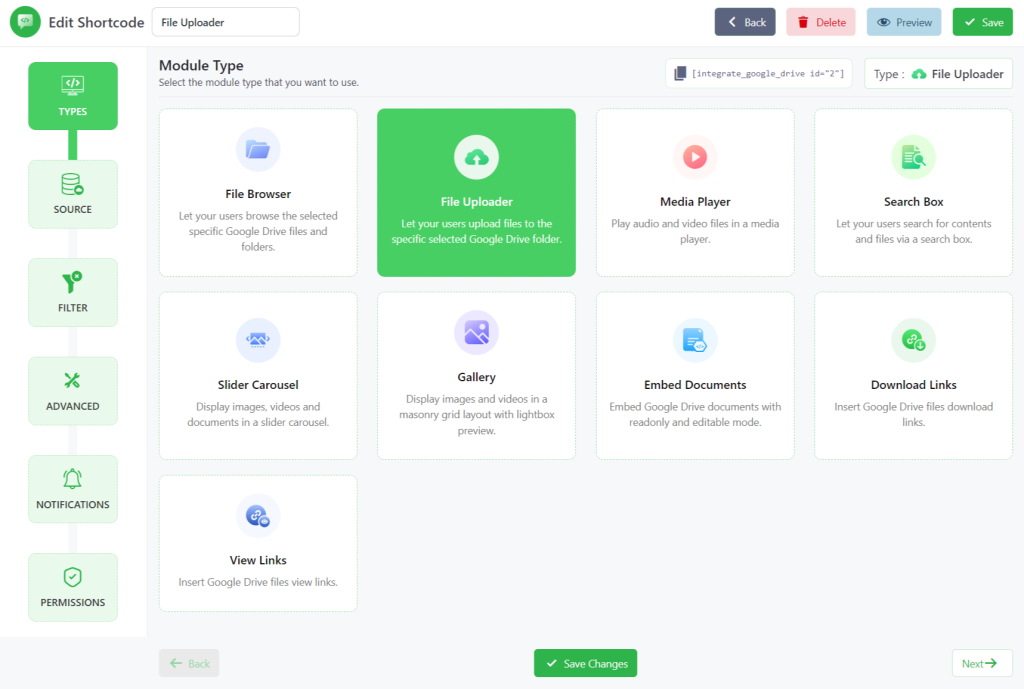
Step-1: Choose File Uploader Module
- Navigate to Google Drive.
- Go to Shortcode Builder from your WordPress dashboard.
- Click Add New Shortcode.
- Select File Uploader from the Types tab.
- Change the shortcode title by clicking the pencil button (if desired).
- Click Next.
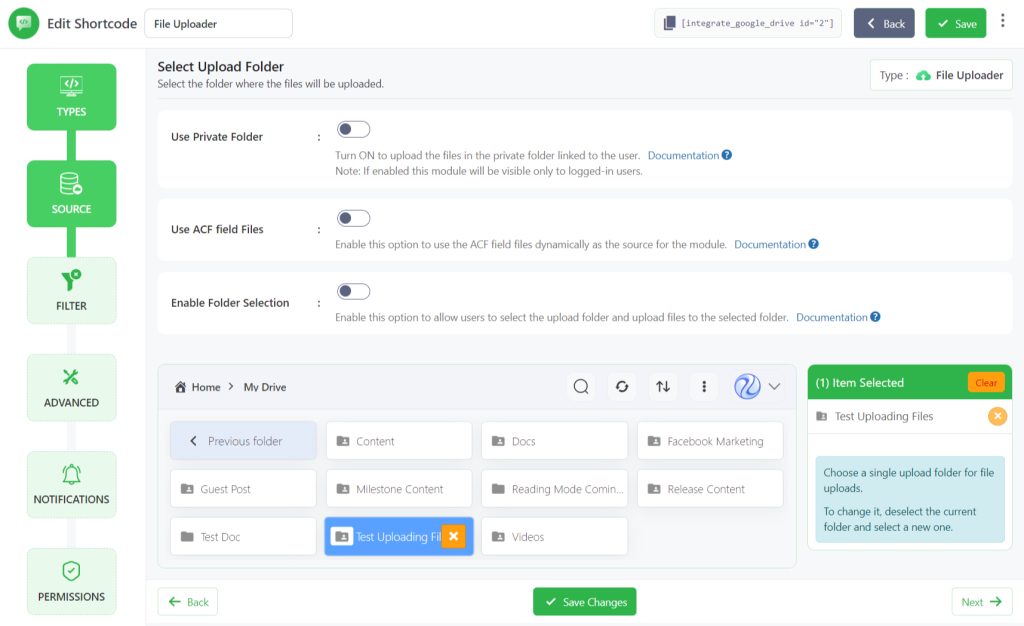
Step-2: Configure the Sources Tab
On the Sources Tab select folders where you want to permit users to upload files & folders by clicking the plus sign button. On the right side, your selected files will be displayed. You can drag them up or down to change their orders.
- Use Private Folder: Turn ON to upload the files in the private folder linked to the user. Note: If enabled this module will be visible only to logged-in users.
- Create Private Folder: Turn ON to create and link a folder automatically to the user who has not linked any folder yet while the user will view the module.
- Naming Template: Set the folder name template for the automatically created private folders.
- Parent Folder: Select the parent folder where the automatically created private folders will be created.
- Template Folder: Select the template folder that will be copied to the new private folder.
- Merge Folders: Allow merging folders if a folder with the same name already exists.
- Create Private Folder: Turn ON to create and link a folder automatically to the user who has not linked any folder yet while the user will view the module.
- Use ACF field Files: Enable this option to use the ACF field files dynamically as the source for the module. Enter the ACF field name in the ACF Field Key input box to use the files from the ACF field.
- Enable Folder Selection: Enable this option to allow users to select the upload folder and upload files to the selected folder.
- Select Default Folder: Select the default folder where the files will be uploaded if the user doesn’t select any folder.
- Folder Selection Label: Set the label for the folder selection.
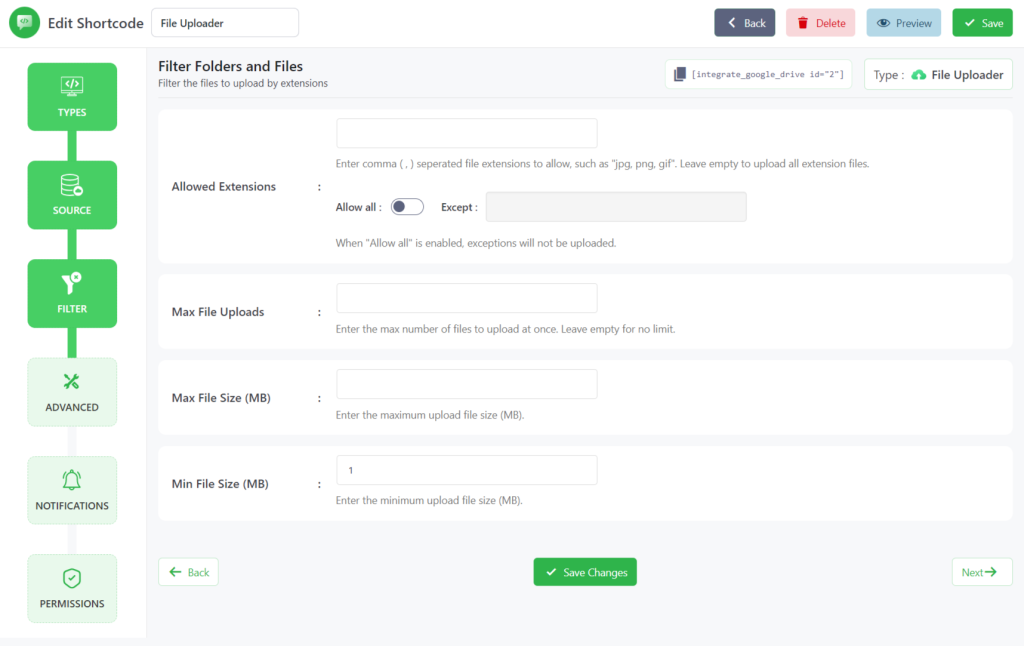
Step-3: Configure Filter Tab
Now you have taken to the Filter tab, where you can allow/ disallow files through their extensions.
With the help of the Filter tab, you can simply allow/ disallow any files with the extensions you want. For example, you want to allow/ disallow (.jpg, .png, .ppt, .doc files).
Simply type the extensions in the Allowed Extensions box and you get to go. Keep in mind that when “Allow all” is enabled, exceptions will not be uploaded.
- Allowed Extensions: Enter comma (,) separated file extensions to allow, such as “jpg, png, gif”. Leave empty to upload all extension files.
- Max File Uploads: Enter the maximum number of files you want to allow users to upload.
- Max File Size(MB): Enter the maximum file upload size in MB.
- Min File Size(MB): Enter the minimum file upload size in MB.
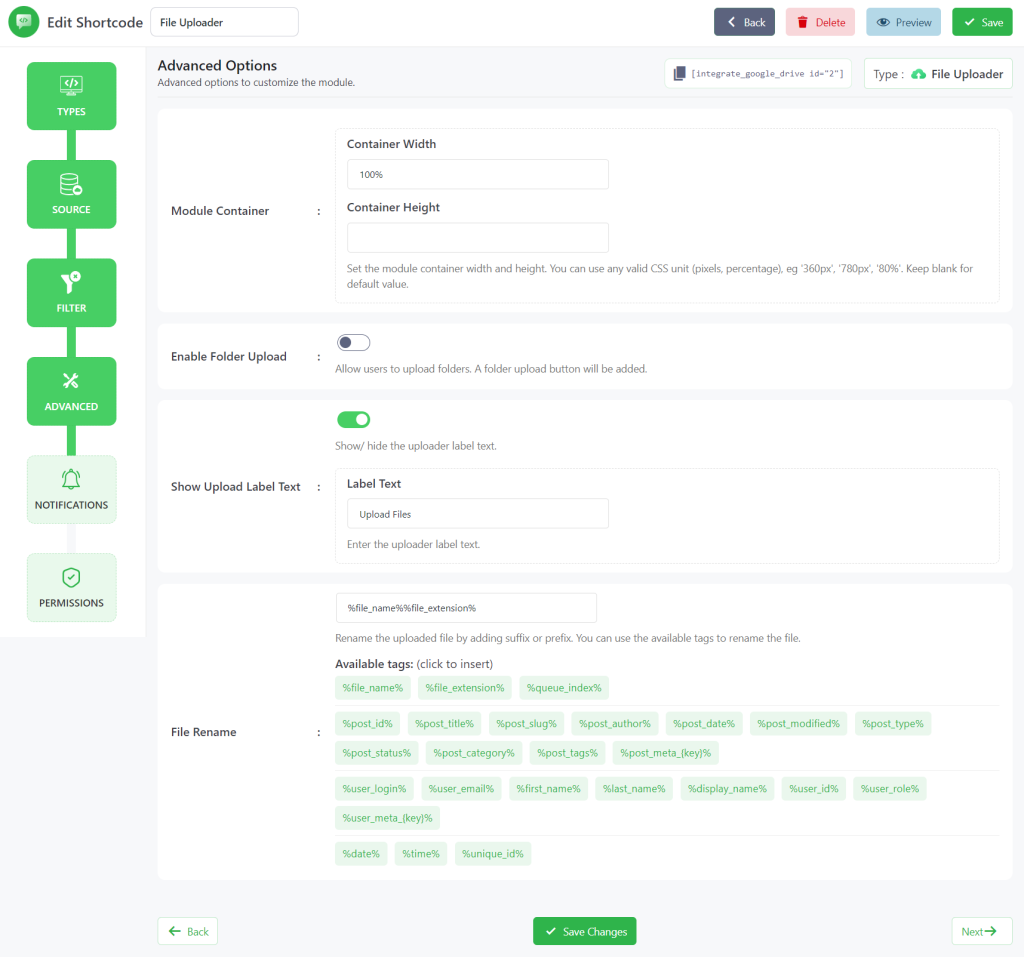
Step-4: Configure Advanced Tab
In the Advanced Tab, you can customize some advanced settings as per your requirements.
- Module Container: Set the module container width and height. You can use any valid CSS unit (pixels, percentage), eg ‘360px’, ‘780px’, ‘80%’. Keep blank for a default value.
- Overwrite Files: Enable to overwrite files with the same name.
- Enable Folder Upload: Allow users to upload folders. Click Next when done.
- Enable File Description: Allow users to add a description to the uploaded files.
- Upload Immediately: Start uploading files immediately after they are selected.
- Show Upload Label Text: Display an upload label text that will be visible under the upload button.
- File Rename: Set the file renaming option by adding prebuilt tags as suffixes or prefixes. Click Next.
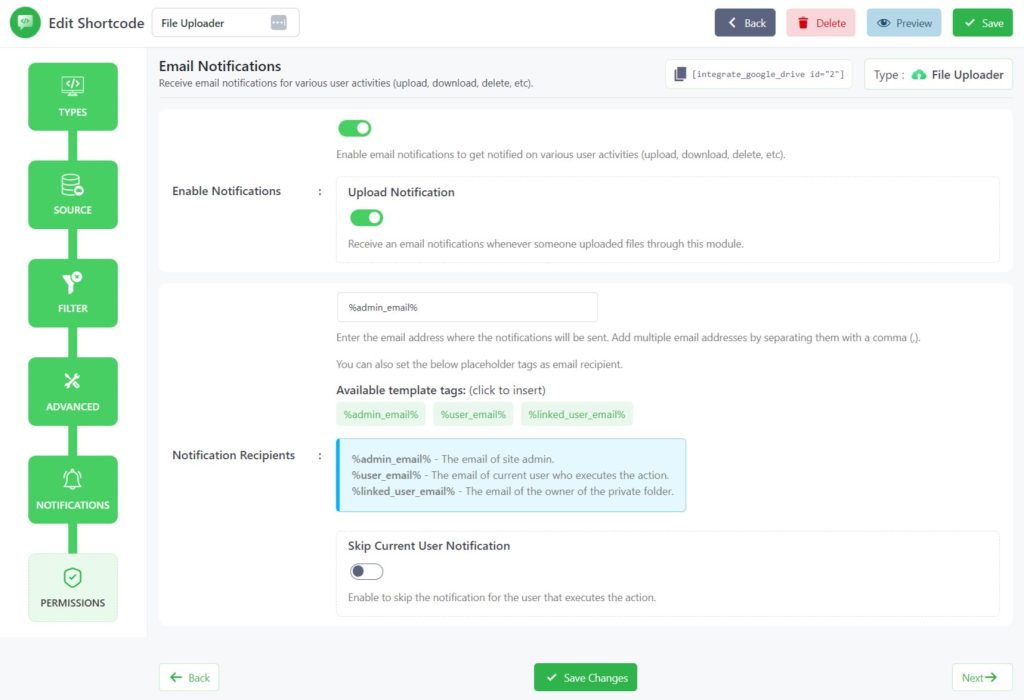
Step-5: Configure Notifications Tab
Now you will be redirected to the Notifications tab where you will customize notification settings configuration.
- Enable Notifications: Enable email notifications to get notified on various user activities (upload, download, delete, etc).
- Upload Notification: Receive an email notification whenever someone uploads files through this module.
- Notification Recipients: Enter the email address where the notifications will be sent. Add multiple email addresses by separating them with a comma (,). Placeholder example: %admin_email%, %user_email%
- Skip Current User Notification: Enable to skip the notification for the user that executes the action.
Step-6: Configure Permissions Tab
User Permissions Settings is the final step. Where you can manually allocate display options.
- Display for: Using this option you can allow permission of your files & folder to everyone and logged-in users. You can also filter manually by user roles or any specific users.
- Show Access Denied Message: Show a message to users who don’t have access to the module. You can enter a message you want to show to users who don’t have access to the module.

Click Save Changes > copy the shortcode from the shortcode builder page. Now you can use the shortcode to display the file browser module inside any posts or pages.
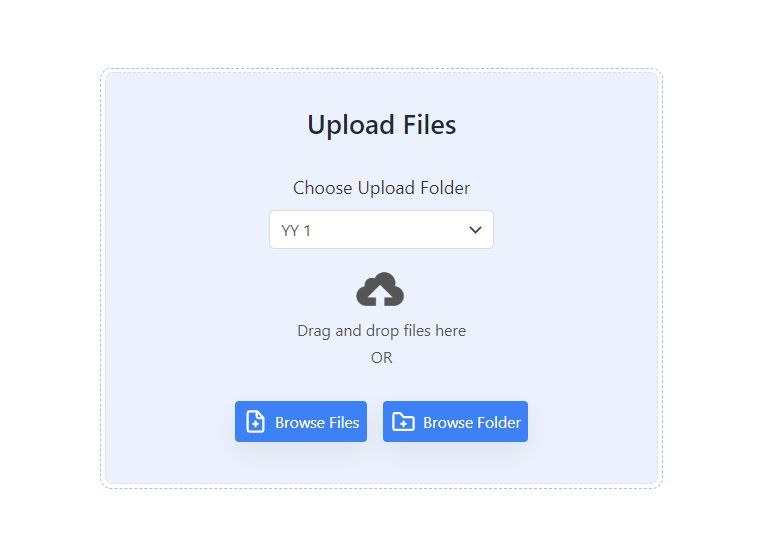
Output
This is how the uploader will look like once you embed it inside any of your pages or posts.