In the dynamic realm of WordPress, the quest for a more efficient, space-saving, and streamlined content management process is a demanding journey.
Using Google Drive files as WordPress Media can be the solution for all of them. This can be done with the Integrate Google Drive plugin with just a few clicks.
Enable Google Drive Integration
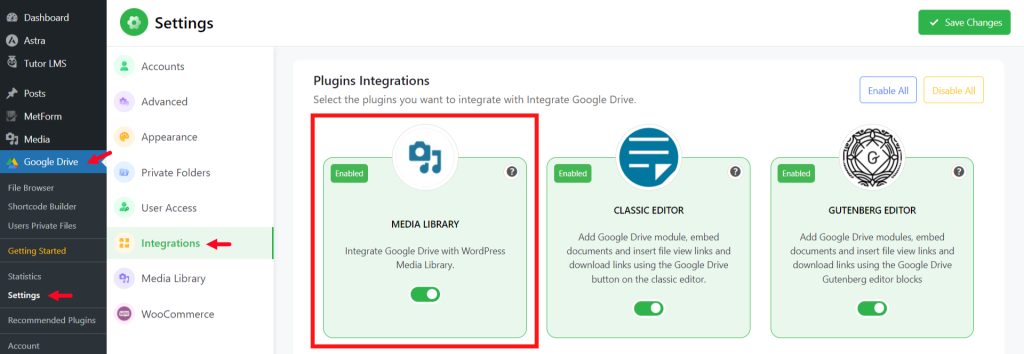
To enable Google Drive integration, navigate to Google Drive > Settings > Integrations > Enable Media Library integration.
After enabling, head over to WordPress Media Library and you will discover your Google Drive folders, files, and everything inside WordPress.
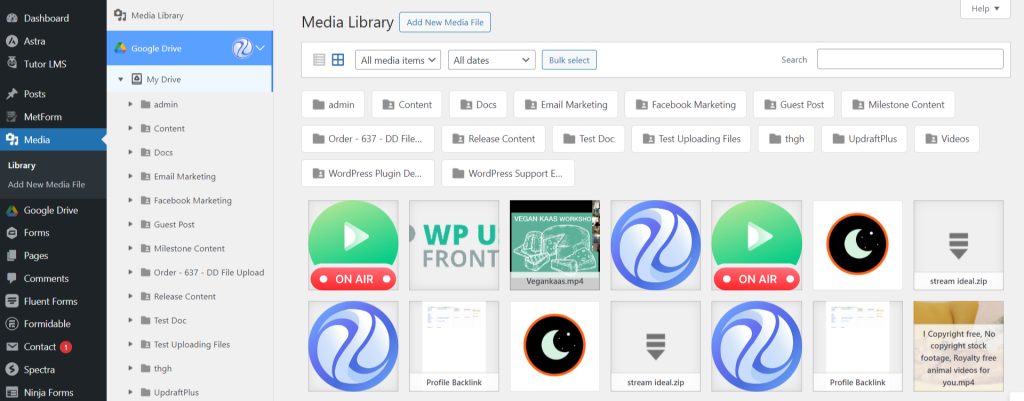
You are allowed to use media files as feature images, slider creation, embedding videos or images inside any page or post, and everything else.
Here is what you can do:
- Use Google Drive Files as WordPress Media
- Replace WordPress Media Attachments with Google Drive Files
- Upload WordPress Media Attachments to Google Drive
- Exclude/ Include Google Drive Folders from Media Library
How to Upload WordPress Media Attachments to Google Drive?
Uploading WordPress Media Attachments to Google Drive can be a handy feature. It will somewhat work like a mini backup process for your media files.
Integrate Google Drive plugin will let you do this within a matter of time. Discover how you can do that. You have to follow some simple steps to upload WordPress Media Attachments to Google Drive. Here are the steps to follow:
Select the File
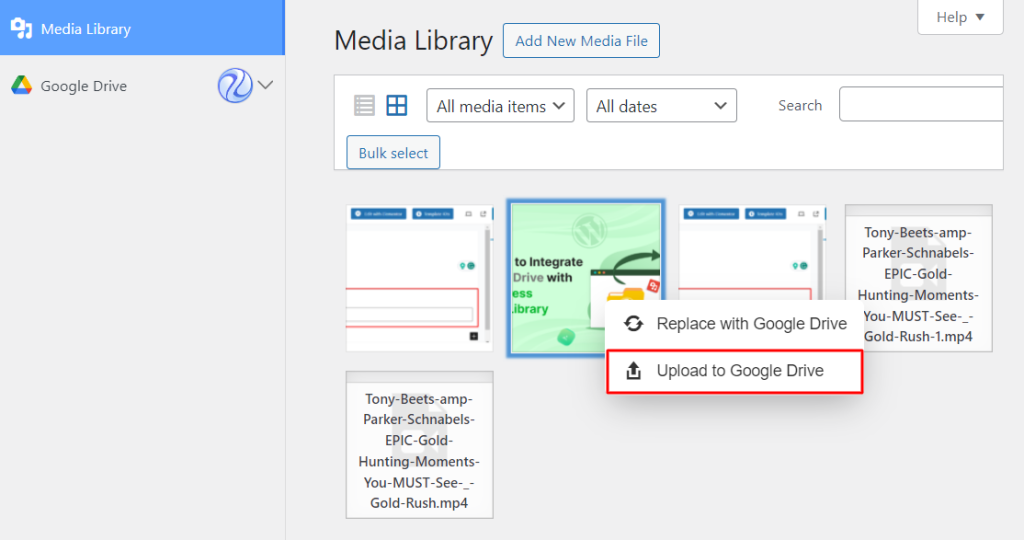
Navigate to WordPress Media Library > Right-click the attachment you want to upload to Google Drive > Click the Upload to Google Drive button.
Select Uploaded Folder
A popup will come up. Select the folder where you want to upload the file > Click on the Upload button.
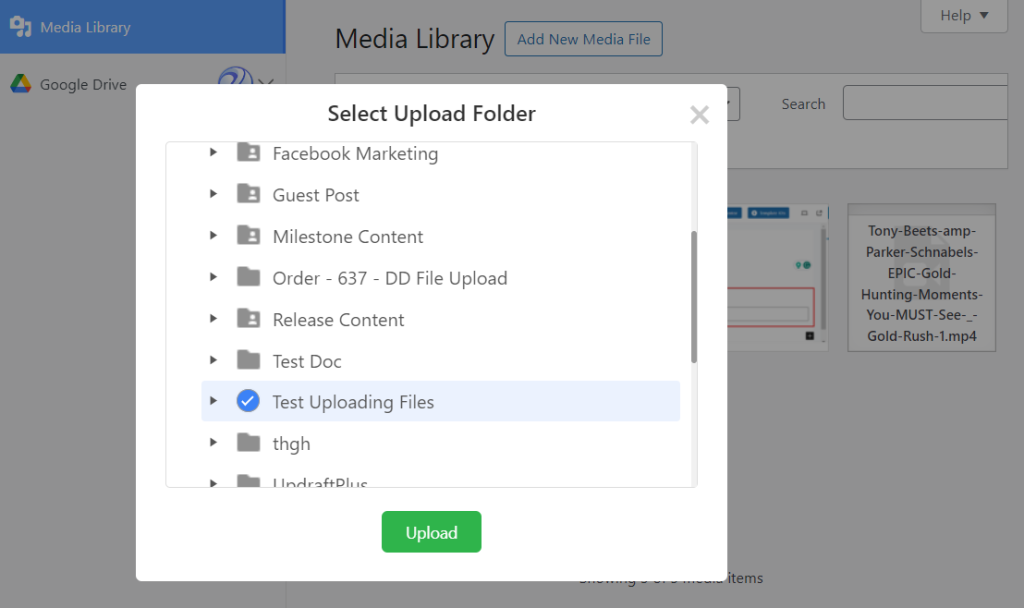
After processing, your WordPress Media Library file will be uploaded to Google Drive. You can either check them directly from your Google Drive folder or from WordPress.
How to Replace WordPress Media Files with Google Drive?
Replacing WordPress Media Files with Google Drive can sometimes be sometimes useful for various reasons. But by default, you can enjoy this feature from WordPress.
Integrate Google Drive plugin is the one that provides such a feature. Discover how you will replace WordPress media files with Google Drive.
Select the File
To replace WordPress Media Files with Google Drive, navigate to WordPress Media Library > Right-click the file you want to replace > Click the Replace with Google Drive button.
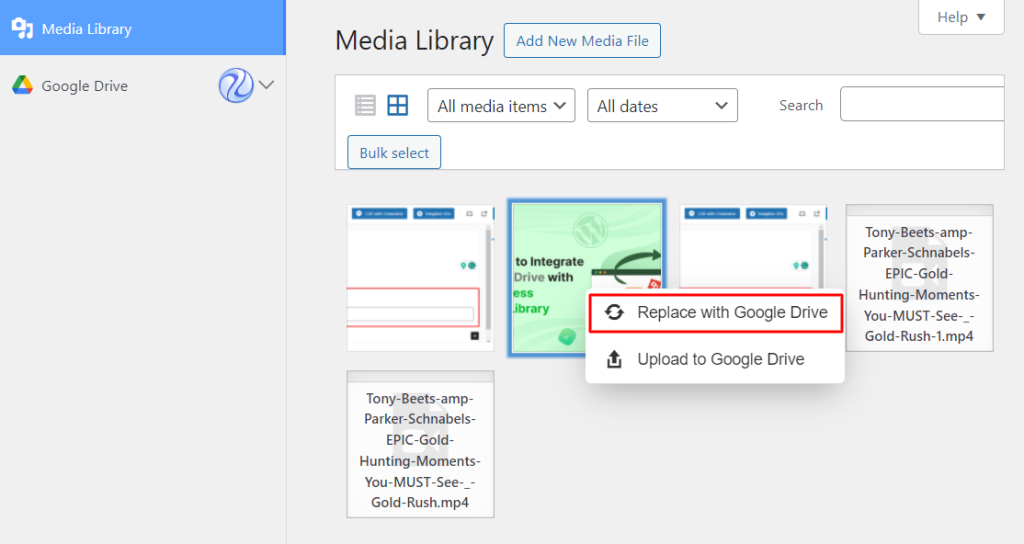
Replace the File
Now select the file you want to replace with > click the Select button. Your file will be replaced successfully.
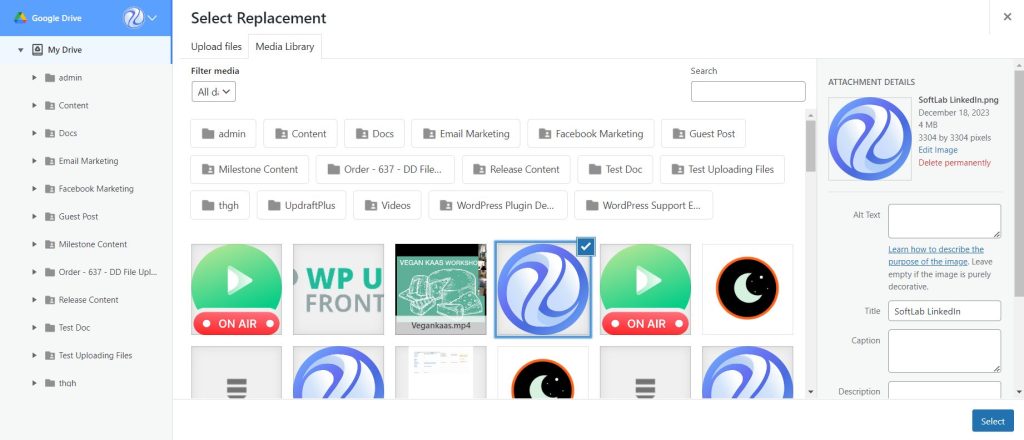
Note: You can replace any type of file that’s been allowed by Google Drive & WordPress
How to Allow Specific Files & Folders to Media Library?
You can allow specific files & folders to the media library. That will allow only selected folders to be visible inside the media library.
To do that navigate to Google Drive > Settings > Media Library > Media Library Files > Select the Files & Folders you want to allow.
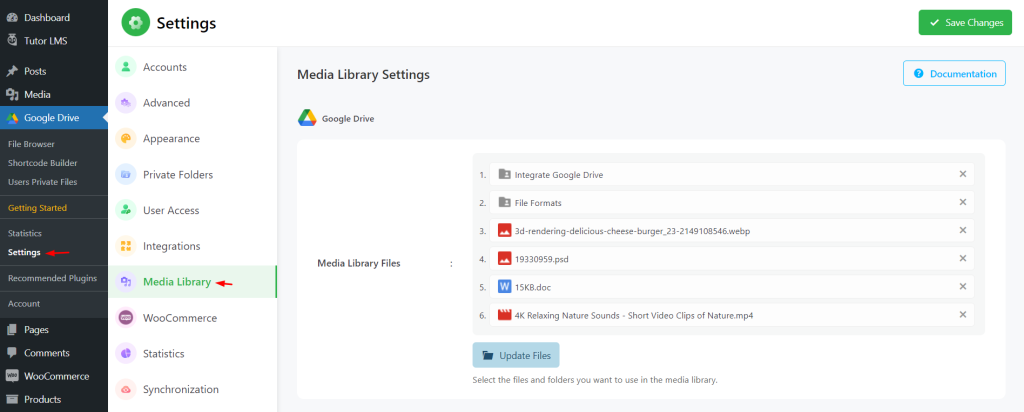
How to Exclude/ Include Google Drive Folders from Media Library?
Did you know you can exclude/ include Google Drive folders from the WordPress media library? This can be done with the Integrate Google Drive plugin. What to discover how? Keep reading:
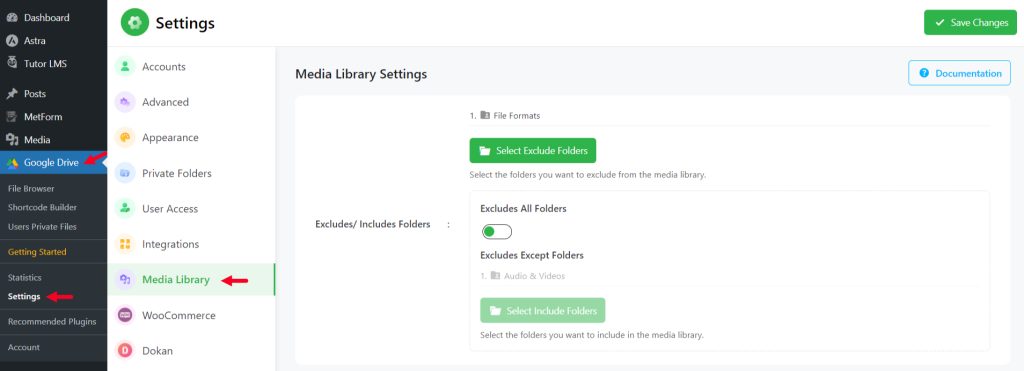
To include or exclude Google Drive folders from Media Library, navigate to Google Drive > Settings > Media Library.
- Exclude Folders: By using the exclude feature you can disallow any Google Drive folders to not be displayed in Media Library. To exclude any folder navigate to Media Library > Click Select Exclude Folders > Select the folder you want to exclude > Click Done. Selected folders will be excluded from the media library and won’t be visible.
- Include Folders: By using the include feature you can allow any Google Drive folders to be displayed in Media Library. To include any folder navigate to Media Library > Enable Excludes All Folders > Click Select Include Folders > Select the folder you want to include > Click Done. Selected folders will be included in the media library and only selected folders will be visible.
How to Allow/ Restrict Users to Access Google Drive Folders from Media Library?
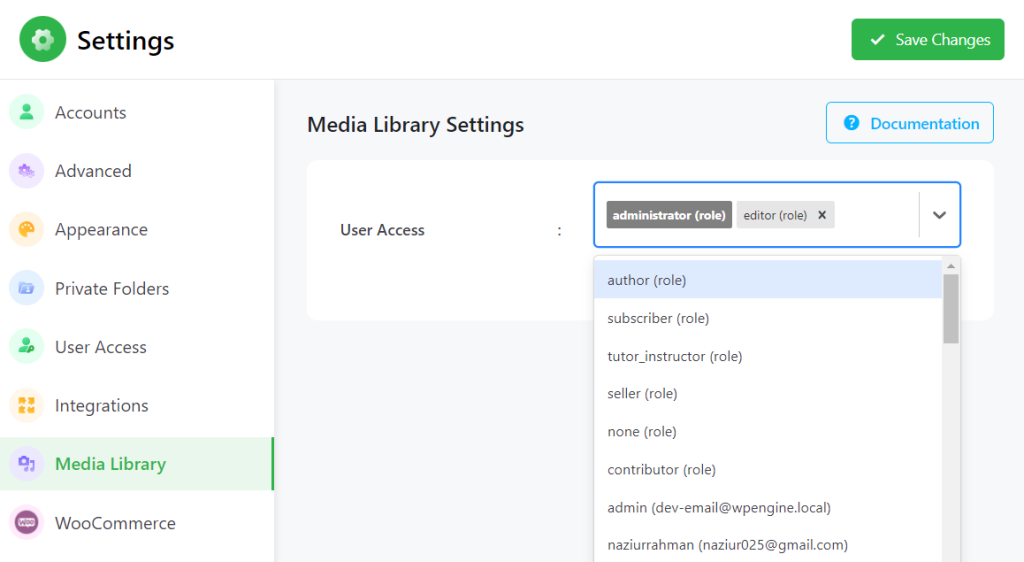
You can allow/ restrict users to access Google Drive folders from the Media Library. This feature can be useful if you want to restrict/ allow Google Drive folders from the Media Library based on user role.
To do that, Navigate to Google Drive > Settings > Media Library. From User Access settings select users by role or one by one. Selected users only will be able to access Google Drive folders in the media library.
You can select users:
- By their role (subscriber, editor, author, etc)
- By selecting single users (username/ email)
How to Clear Google Drive Attachments from Media Library?
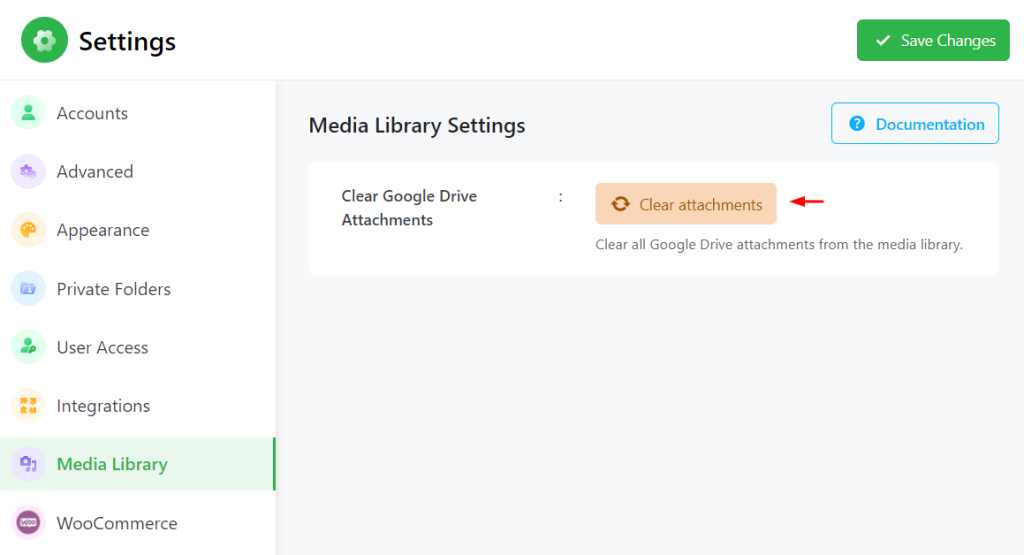
You can clear all Google Drive attachments from the Media Library with just one click. This feature can be handy if you need to clear all Google Drive attachments in a short time.
To clear all of them, navigate to Google Drive > Settings > Media Library. From Clear Google Drive Attachments settings click the button Clear Attachments. All Google Drive attachments will be deleted from the media library.
How to Delete Google Drive Cloud Files on Attachment Delete?
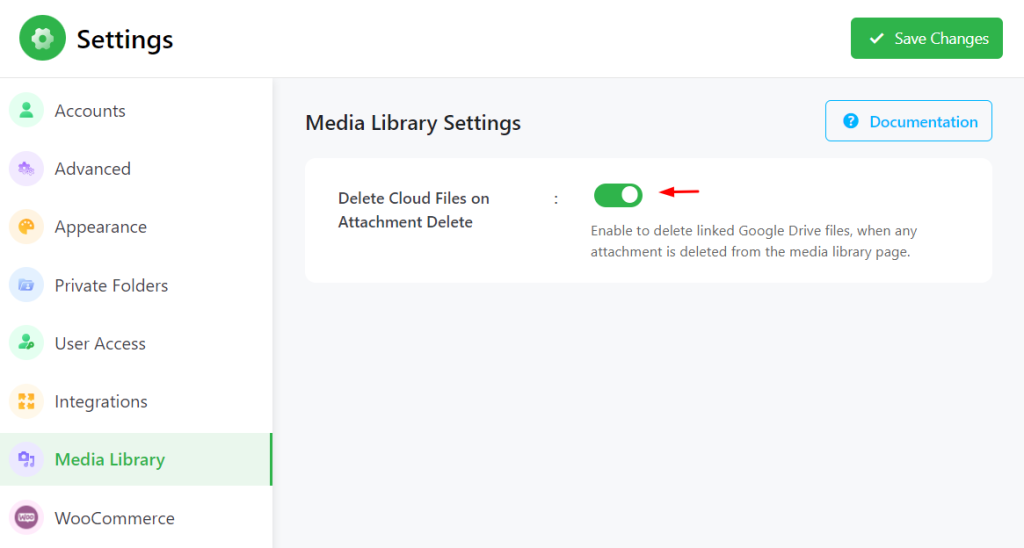
What if you want to delete Google Drive files once you delete the file from the Media Library? You can do that easily! By using Delete Cloud Files on the Attachment Delete feature you can delete Google Drive cloud files by removing attachments from the Media Library.
To do that, navigate to Google Drive > Settings > Media Library. Enable Delete Cloud Files on Attachment Delete settings. When any attachment is deleted from the media library page, it will be automatically deleted from Google Drive.
How to Synchronize Google Drive Cloud Files with Media Library?
- Auto Synchronization: Read this doc to discover how you can use Google Drive cloud files auto synchronization with WordPress Media Library.
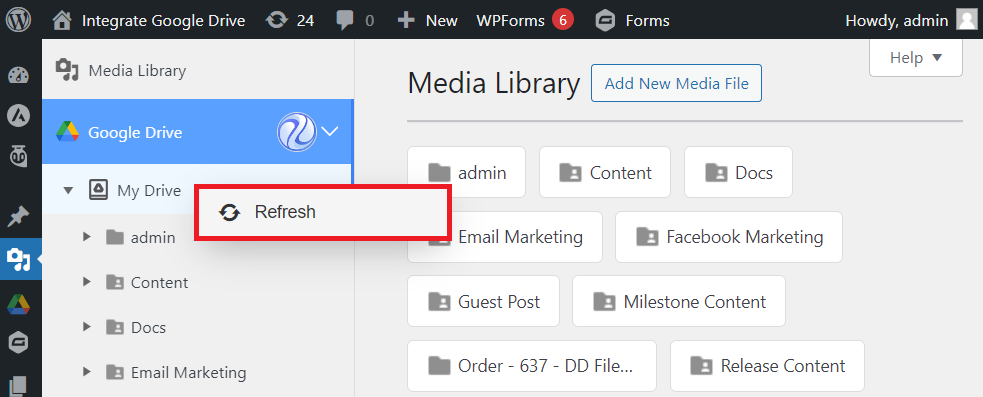
- Manual Synchronization: To do Google Drive cloud file manual synchronization with WordPress Media Library, navigate to Media Library > Google Drive > Right-click on mouse > Click Refresh button. The whole Google Drive will be manually synchronized.
