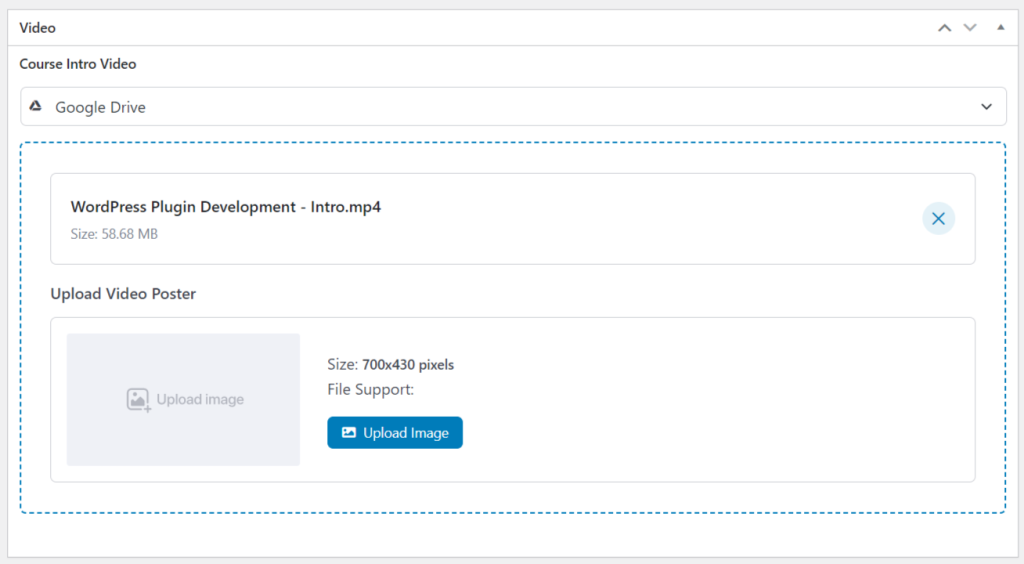
Integrating Google Drive with the Tutor LMS plugin can be a handy way if you are in the online course-selling industry. This will allow you to use Google Drive-hosted videos for your courses.
Here is the process you can follow:
Step-1: Install & Activate Necessary Plugins
To integrate Google Drive with the Tutor LMS plugin you have to Install & Activate both Integrate Google Drive & Tutor LMS plugins inside your WordPress website.
- Navigate to Plugins > Add New.
- Search for both plugins one by one.
- Click Install and then Activate them one by one.
Step-2: Enable Tutor LMS Integration
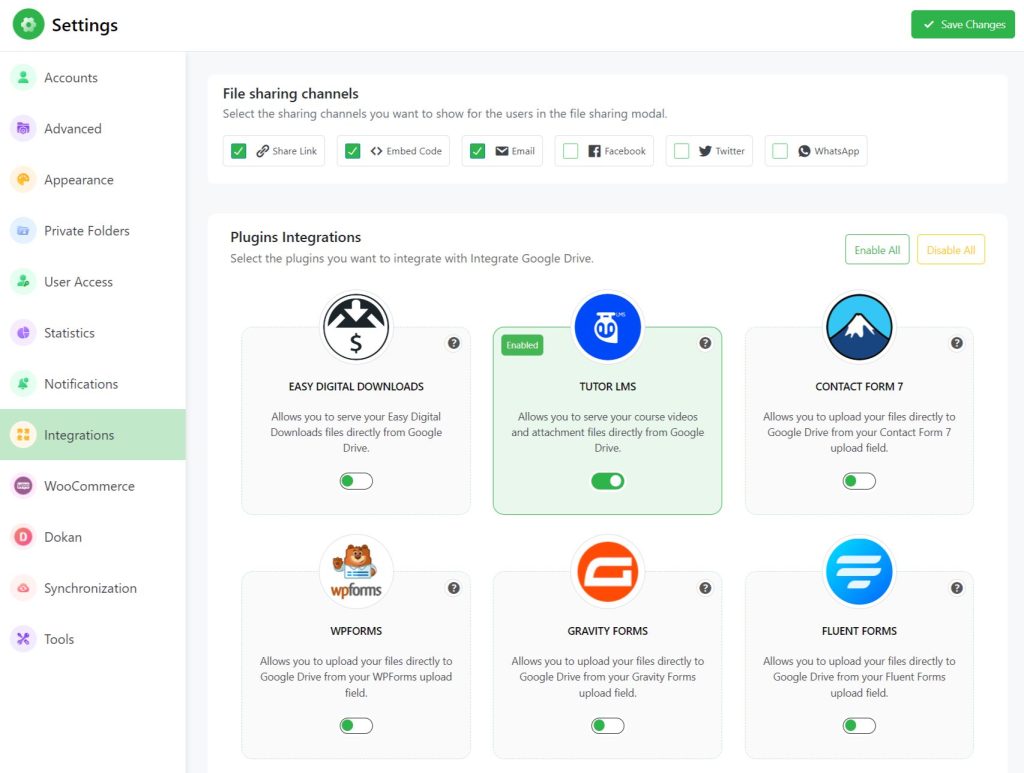
- Navigate to the Integrate Google Drive plugin from the WordPress dashboard.
- Go to Settings > Integrations.
- Enable Tutor LMS.
- Click Save Changes.
Step-3: Enable Google Drive Preferred Video Source
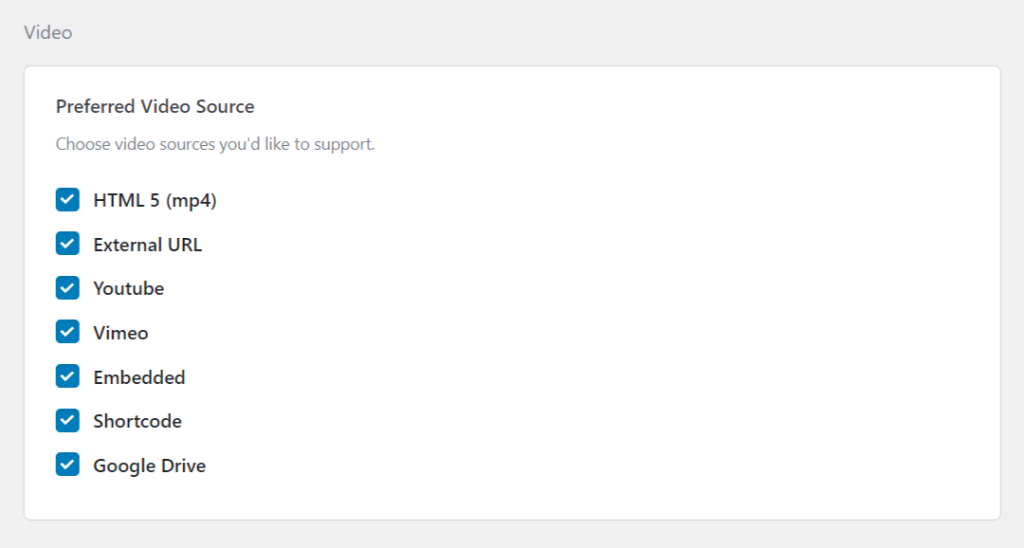
- Navigate to Tutor LMS > Settings > Course
- Tick Google Drive as the Preferred Video Source
- Save Changes.
Setup Course Using Tutor LMS v3.0
To set up & configure the course using Tutor LMS v3.0, follow the below guideline:
Step-1: Create Course Using Tutor LMS v3.0
To create a Course using Tutor LMS v3.0, follow the below guideline;
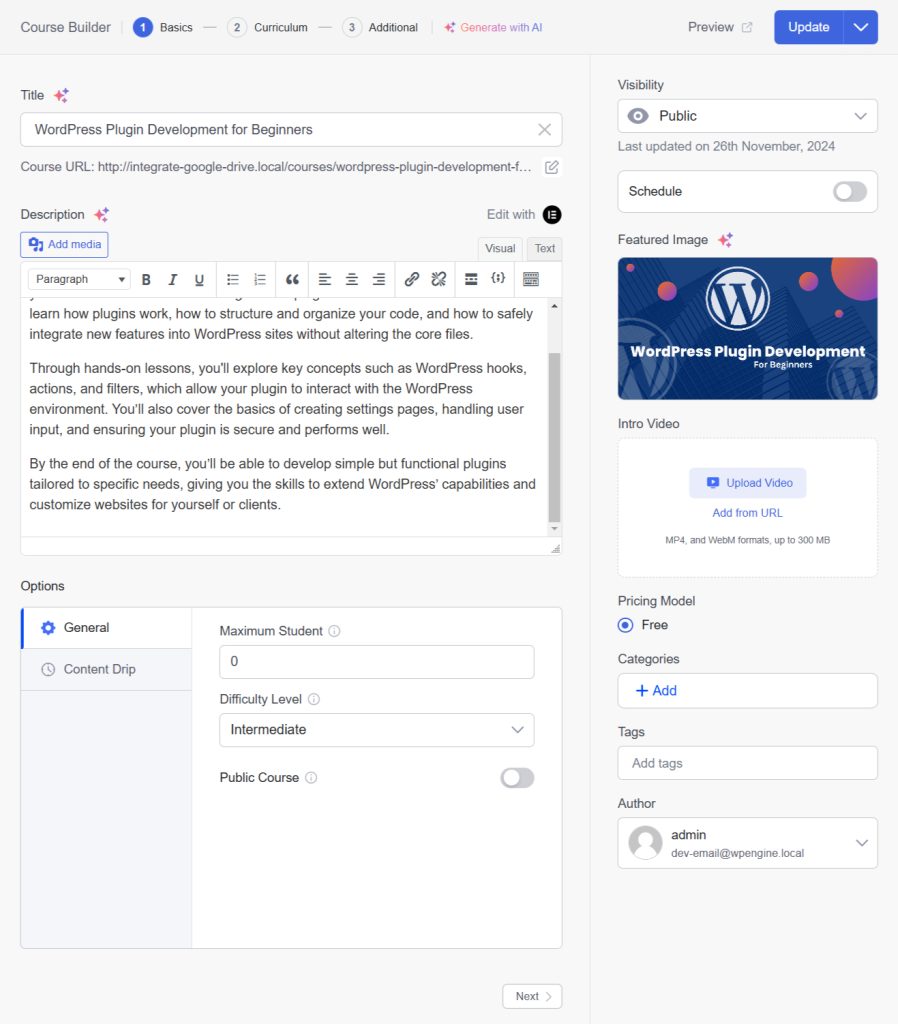
- navigate to Tutor LMS > Courses > Add New.
- Enter the course title, description, excerpt, course settings, and many others.
Step-2: Set Course Intro Video on Tutor LMS v3.0
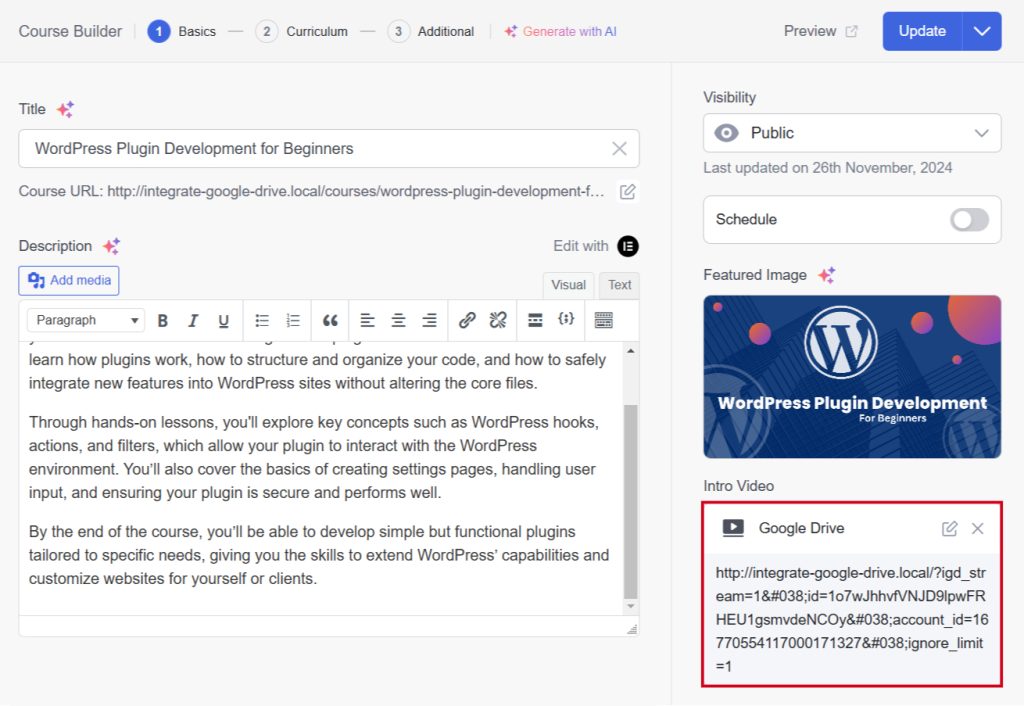
You can also add the Course Intro Video hosted on Google Drive. Follow the below guideline to set the course intro video on Tutor LMS v3.0.
- Navigate to the intro video section.
- Click Add from URL.
- Select Google Drive from the drop-down selection.
- Right-click on the video then click Direct Link.
- Select the link type whether it’s Preview Link or Download Link.
- Copy the video URL of the file.
- Paste the URL and click OK.
Step-3: Setup Course Topics & Lessons on Tutor LMS v3.0
To set course topics & Lessons on Tutor LMS v3.0 follow the below guideline:
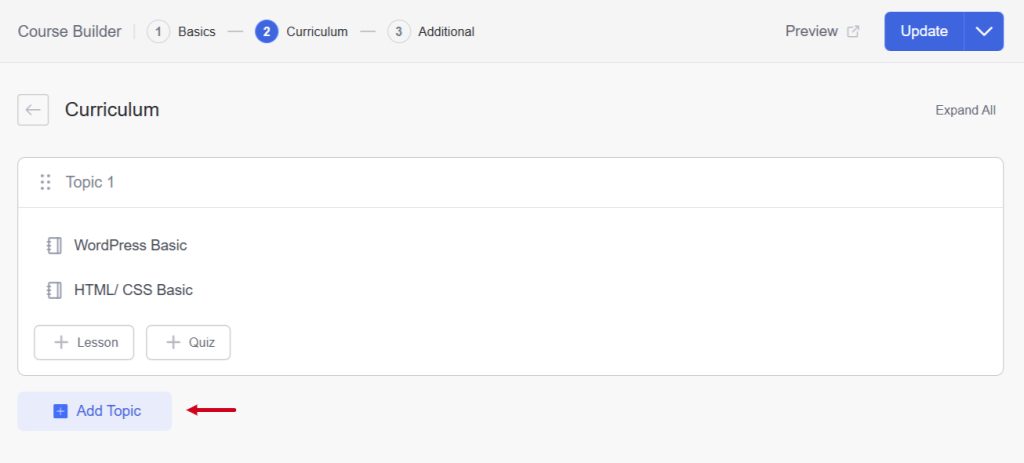
- Navigate to the Curriculum tab.
- Click on Add Topic.
- Enter Topic Name & Topic Summary.
- Click Add Topic.
- To add Lessons, click on Lesson.
- Enter Lesson Name, Content, Image, and others.
- Save changes.
Setup Course Using Tutor LMS v2.0
Follow the guidelines to setup & configure the course on Tutor LMS v2.0:
Step-1: Create Course Using Tutor LMS v2.0
To create a Course using Tutor LMS v2.0, follow the below guideline.
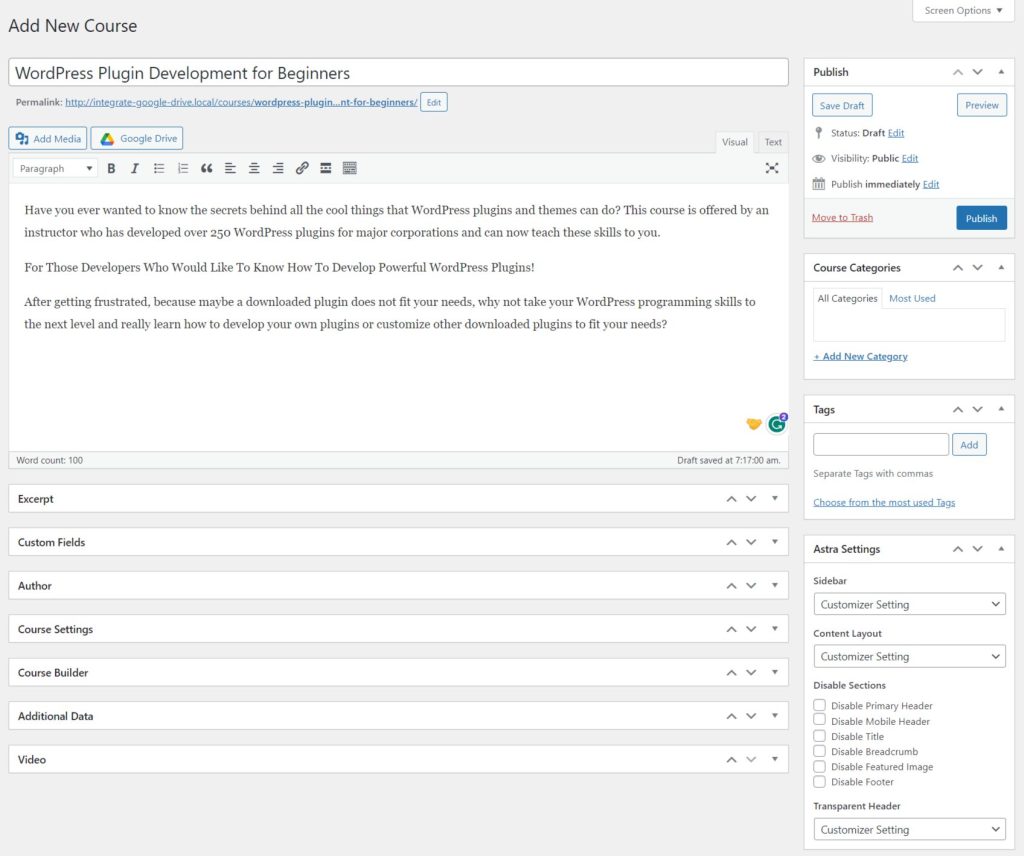
- Navigate to Tutor LMS > Courses > Add New.
- Enter the course title, description, excerpt, course settings, and many others.
Step-2: Setup Course Topics on Tutor LMS v2.0
Follow the below guideline to setup course topics on Tutor LMS v2.0:
- From the Course Builder Tab, you can build and set up your course effectively by topic.
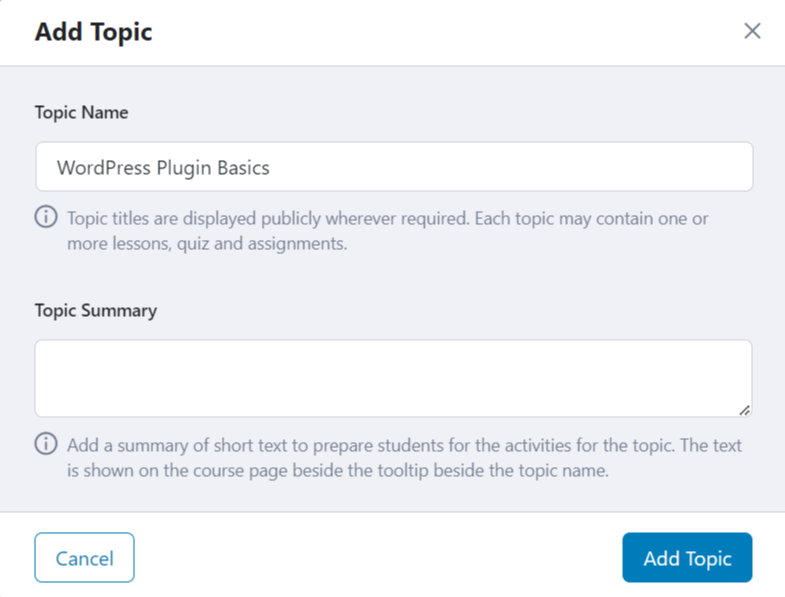
- Click on Add New Topic
- Enter Topic Name & Topic Summary
- Click Add Topic.
Step-3: Add Course Lessons on Tutor LMS v2.0
Follow the below guideline to add course lessons on Tutor LMS v2.0:
- To add Course Lessons click on Lesson
- Enter the Lesson Name, Lesson Content, Feature Image, and others.
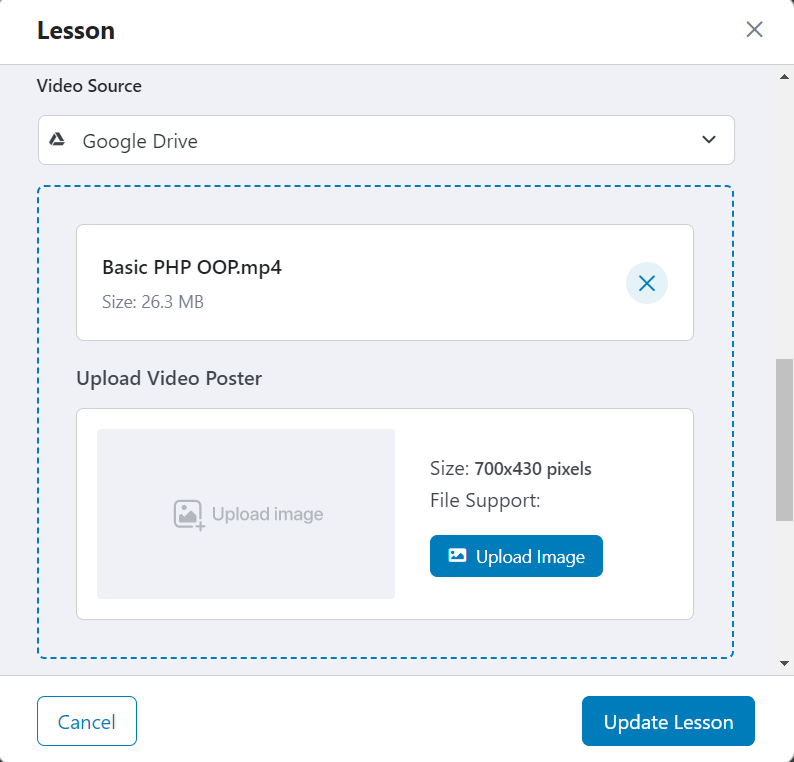
- If you want to add Google Drive-hosted video lesson select Google Drive from Video Source > Browse Video > Select your Preferred Course video from Google Drive.
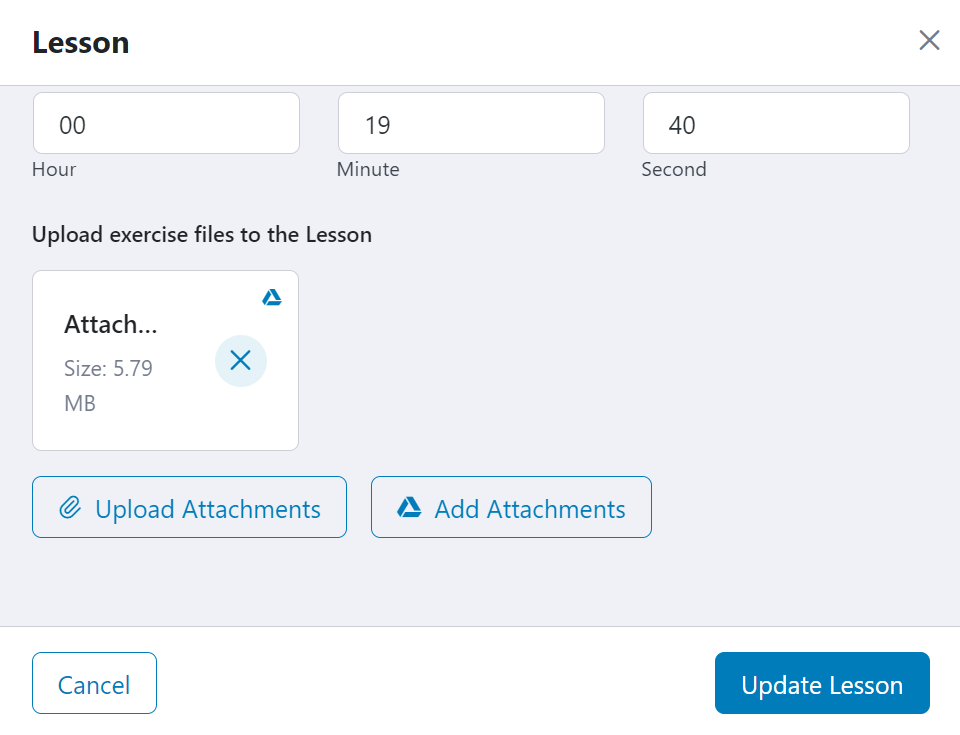
- You can also upload exercise files to the Lesson. Click on Add Attachment button (right side with Google Drive Logo)
- Select preferred exercise files > Click Done > Update Lesson.
Step-4: Set Course Intro Video on Tutor LMS v2.0
You can also add the Course Intro Video that has been hosted on Google Drive. Follow the below guidelines to to set the course intro:
- Select Google Drive as a video source from the video section
- Browse Video
- Select the Course Intro Video from your linked Google Drive account.
