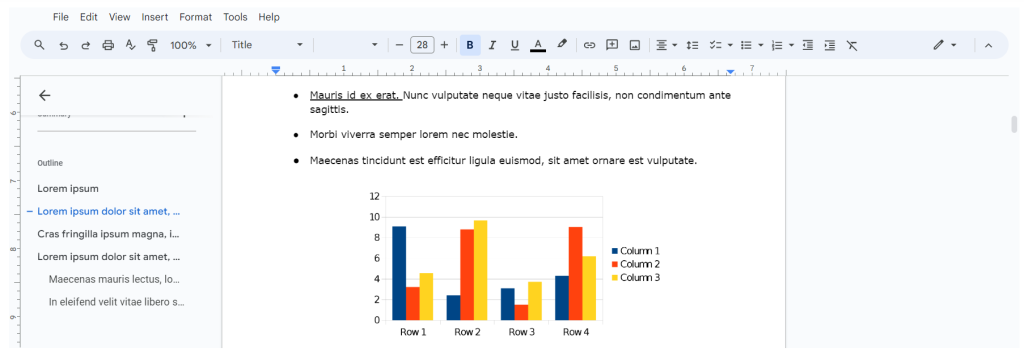
With the Embed Google Drive feature, users can easily embed various document types—including files, Google Docs, Excel sheets, PDFs, MP3s, and MP4s—into their WordPress site.
This functionality allows for both read-only and editable modes, providing flexibility in how content is shared. Visitors can view documents directly on the site without needing to download them, enhancing convenience.
This integration not only streamlines content presentation but also encourages collaboration by allowing users to interact with editable documents seamlessly.
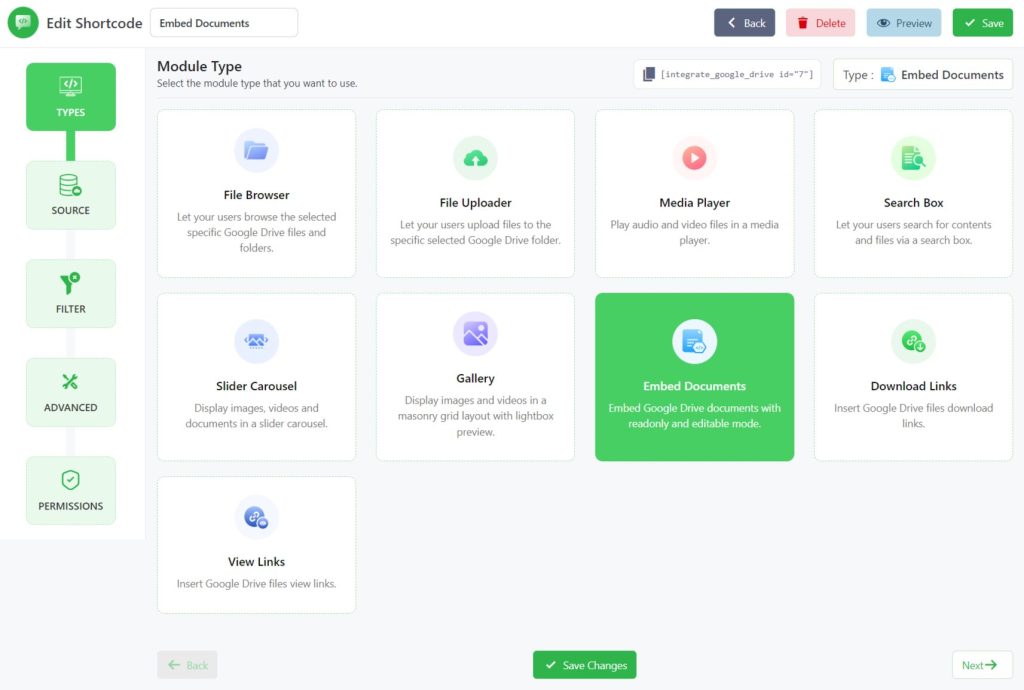
Step-1: Choose Embed Documents Module
- Click on the Shortcode Builder menu from the admin dashboard.
- Create a new Shortcode.
- Select the Embed Documents module from the Types tab.
- Rename the shortcode title from the top left side of the WordPress dashboard (based on your project type).
- Click Next.
Step-2: Configure the Source Tab
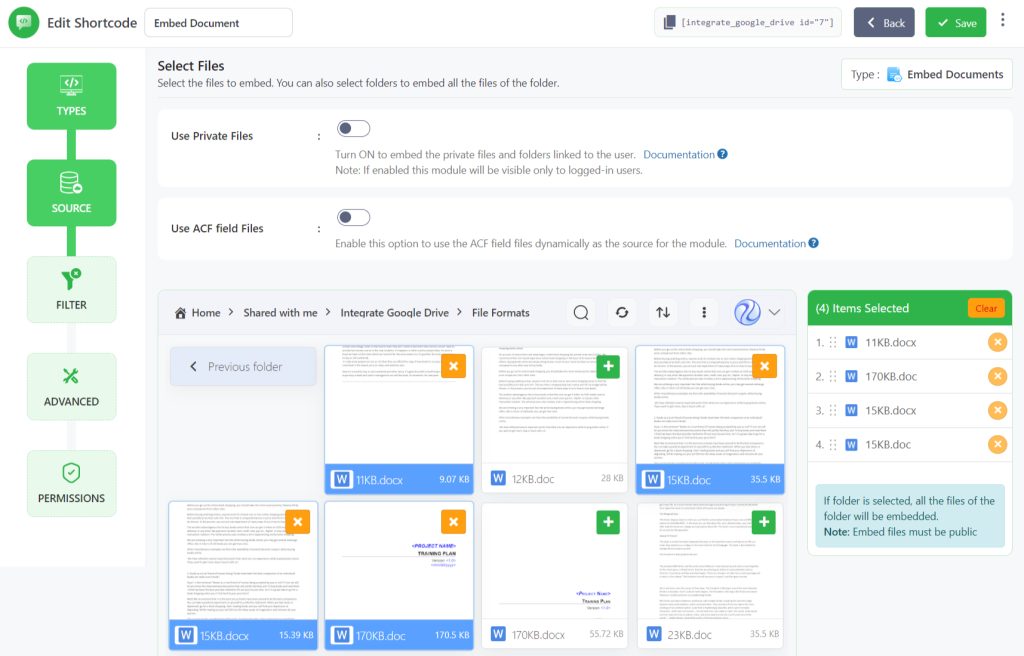
Now you will be redirected to the Source tab. Here you need to select your files & folders from your linked Google Drive. Select your files & folders by pressing the plus sign.
You will discover your selected files, in the selected files list section of your screen. You can drag them up or down to change their orders.
- Use Private Folder: Turn ON to upload the files in the private folder linked to the user. Note: If enabled this module will be visible only to logged-in users.
- Create Private Folder: Turn ON to create and link a folder automatically to the user who has not linked any folder yet while the user will view the module.
- Naming Template: Set the folder name template for the automatically created private folders.
- Parent Folder: Select the parent folder where the automatically created private folders will be created.
- Template Folder: Select the template folder that will be copied to the new private folder.
- Merge Folders: Allow merging folders if a folder with the same name already exists.
- Create Private Folder: Turn ON to create and link a folder automatically to the user who has not linked any folder yet while the user will view the module.
- Use ACF field Files: Enable this option to use the ACF field files dynamically as the source for the module. Enter the ACF field name in the ACF Field Key input box to use the files from the ACF field. Click Next.
Step-3: Configure Filter Tab
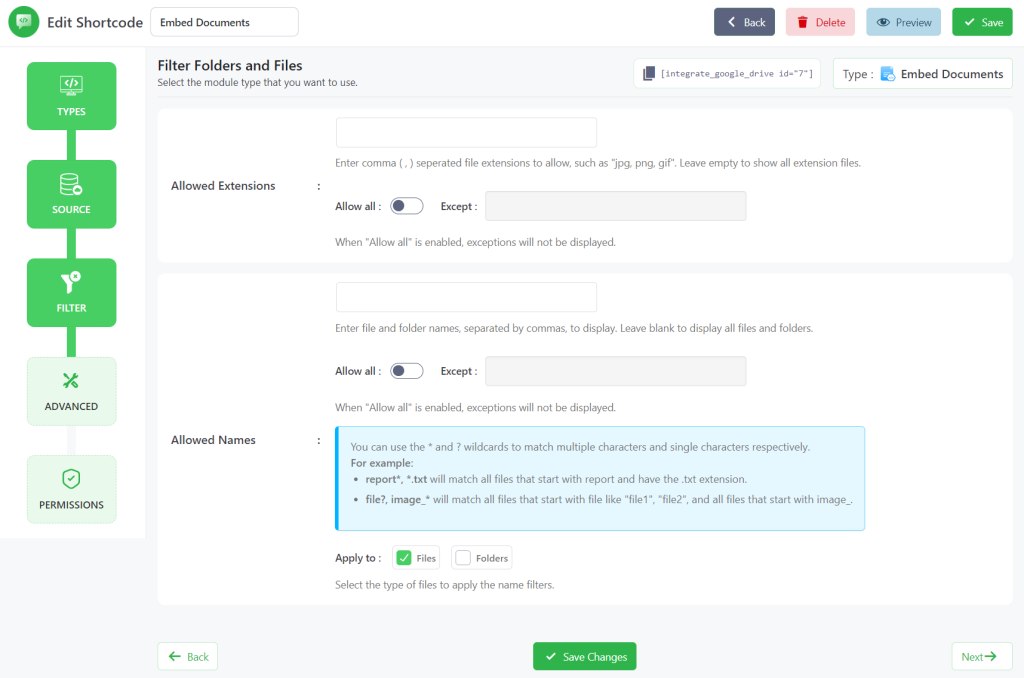
Now you will be stepped to the Filter Tab. Where you can customize every document that you want to include or exclude.
- Allowed Extensions: Enter comma (,) separated file extensions to allow, such as “jpg, png, gif”. Leave empty to show all extension files. When “Allow all” is enabled, exceptions will not be displayed.
- Allowed Names: Enter file and folder names, separated by commas, to display. Leave blank to display all files and folders. When “Allow all” is enabled, exceptions will not be displayed.
- Click Next.
Step-4: Configure Advanced Tab
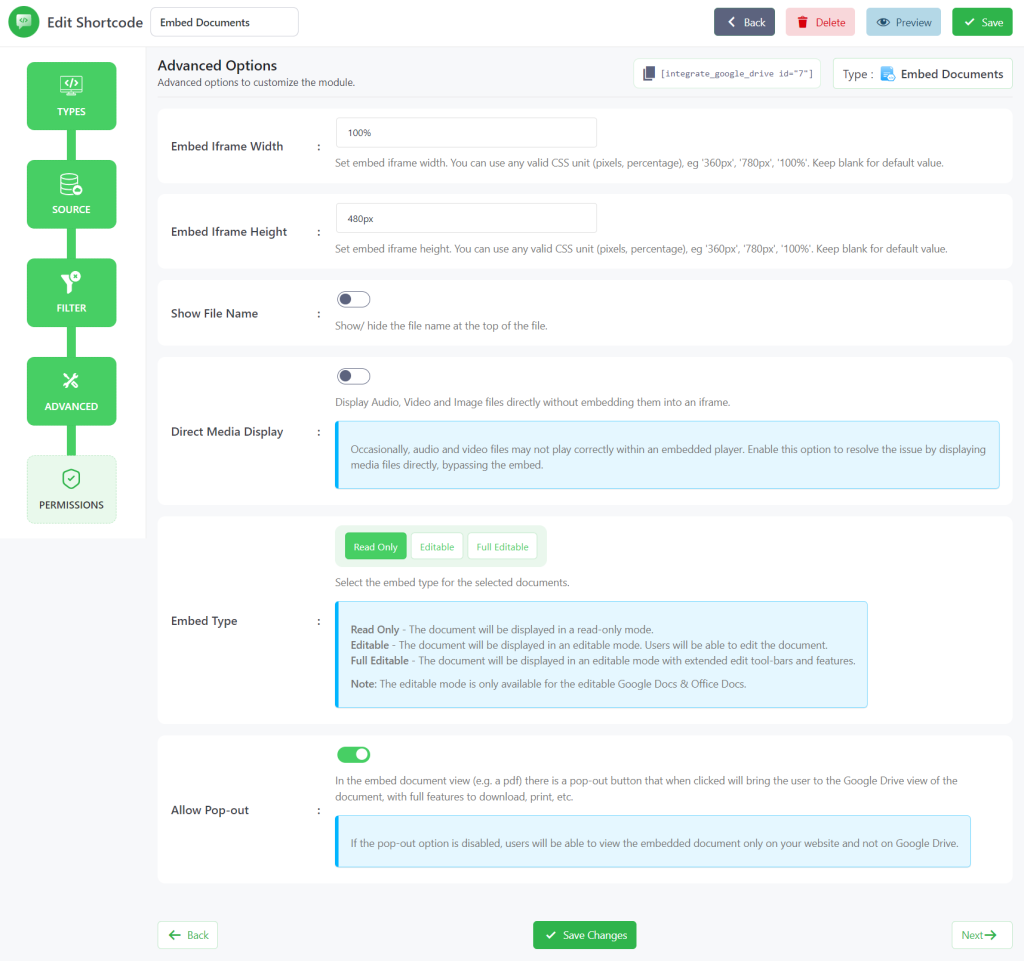
From the Advanced Settings, You can customize settings with some advanced features depending on what you are expecting.
- Embed Iframe Width: Set embed iframe width. You can use any valid CSS unit (pixels, percentage), eg ‘360px’, ‘780px’, ‘100%’. Keep blank for a default value.
- Embed Iframe Height: Set embed iframe height. You can use any valid CSS unit (pixels, percentage), eg ‘360px’, ‘780px’, ‘100%’. Keep blank for a default value.
- Show File Name: While the setting is enabled file name will be visible at the top of the file, otherwise won’t be.
- Direct Media Display: Easily display media files (images, videos, and others) directly without embedding them into an iframe when this setting is enabled.
- Embed Type: This setting helps you distribute files with different roles. Select the embed type for the selected documents.
- Read Only – The document will be displayed in a read-only mode.
- Editable – The document will be displayed in an editable mode. Users will be able to edit the document.
- Full Editable – The document will be displayed in an editable mode with extended edit toolbars and features. Note: The editable mode is only available to edit Google Docs & Office Docs.
- Allow Pop-out: In the embed document view (e.g. a pdf) there will be a pop-out button. The button will bring the user to the Google Drive view of the document when clicked. Enjoy full features to download, print, etc with the help of the button.
If the pop-out is disabled, the user will only see the embedded document on your website, not on Google Drive. Now click Next.
Step-5: Configure Permissions Tab
Now you will be taken to the Permissions tab. Here you will mostly work on permission-related tasks for your Embed Documents module.
- Display for: Using this option you can allow permission of your files to everyone and logged-in users. You can also filter manually by user roles or any specific users.
- Show Access Denied Message: Show a message to users who don’t have access to the module. You can enter a message you want to show to users who don’t have access to the module.
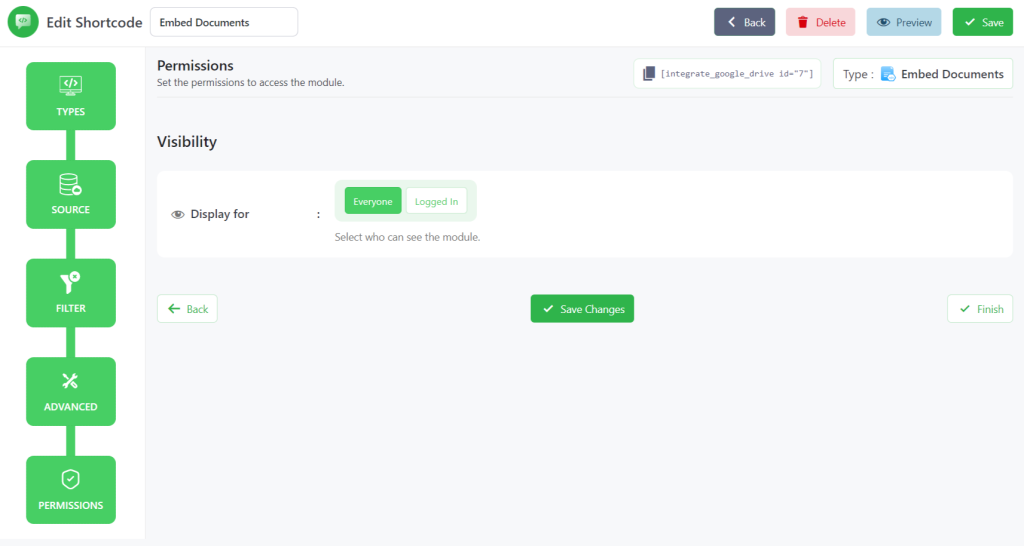
Click Save Changes and copy the shortcode from the shortcode builder page.
Now you can use the shortcode to allow users to embed Google Drive files from your WordPress Website, any posts, or pages.
Output
This is how the embed document module will look like once you embed it inside any of your pages or posts.
