To use Classic Editor while integrating your Google Drive files make sure you have installed the Classic Editor plugin in your WordPress. If you don’t have installed it, let us guide you on how to do that.
Step-1: Installing Classic Editor
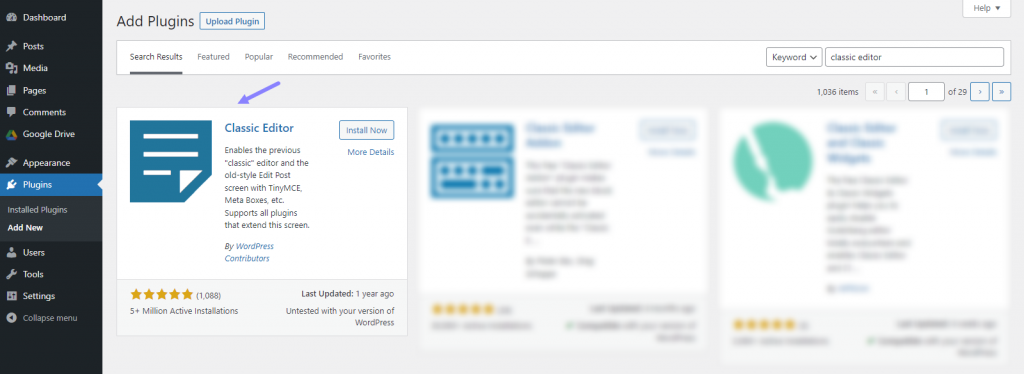
- From your WordPress left sidebar, click on Plugins.
- Click on Add New.
- Type Classic Editor in the search bar.
- Install Classic Editor by WordPress Contributors.
- Click Activate to activate the plugin.
Step-2: Enabling Classic Editor Integration
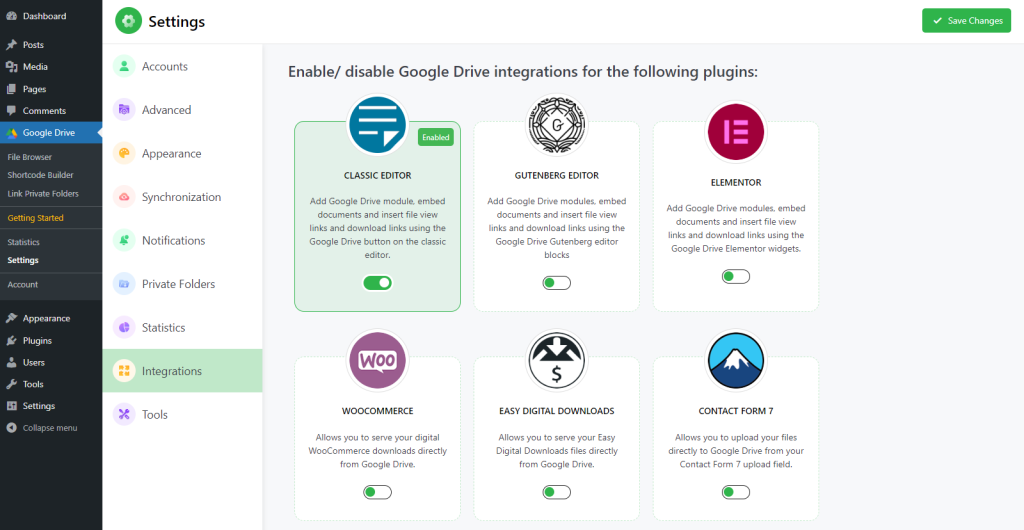
- Head over to the Integrate Google Drive Plugin Dashboard.
- Click on Settings.
- Select Integrations.
- Enable Classic Editor.
- Click Save Changes from the top right side of the settings page.
Step-3: Creating Page or Post
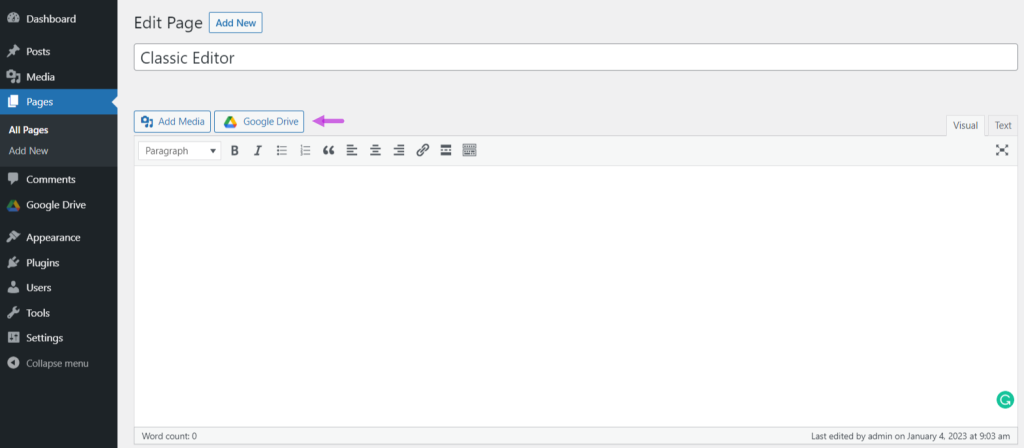
- Create a New Page/Post or head over to your Existing Post/Page where you want to display modules.
- Click on the Google Drive button.
Step-4: Select Module
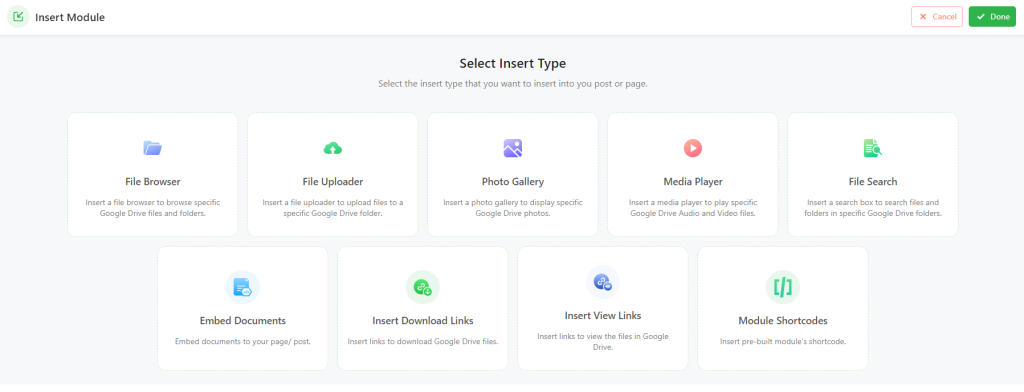
A new popup window will open. Here you can manually customize any module (File browser, File Uploader, Photo Gallery, etc).
- File Browser: Let your users browse the selected specific Google Drive files and folders.
- File Uploader: Let your users upload files to the specific selected Google Drive folder.
- Photo Gallery: Display images in a masonry grid layout with a lightbox preview.
- Media Player: Play audio and video files in a media player.
- File Search: Let your users search for files and folders in Google Drive.
- Embed Documents: Embed Google Drive documents with read-only and editable mode.
- Download Links: Insert Google Drive files download links.
- View Links: Insert Google Drive files view links.
You can also insert your previously created module using the Module Shortcodes feature.
Step-5: Configure Module
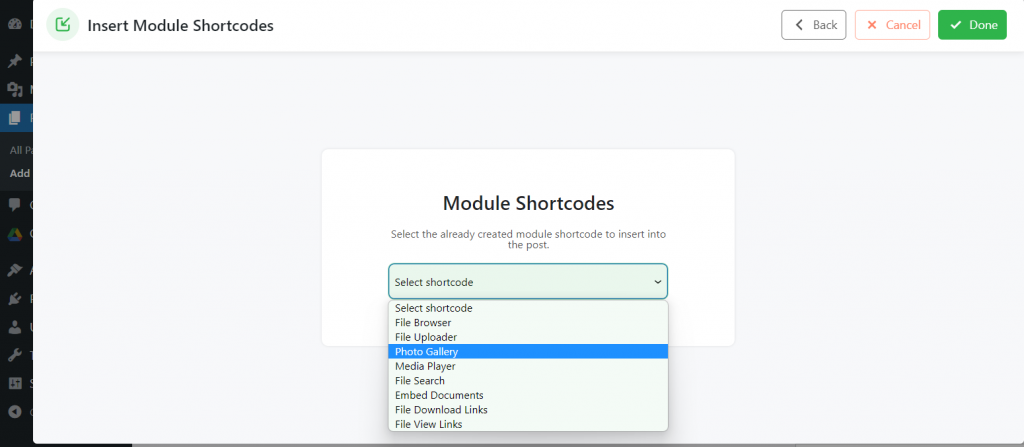
For example, We are using Module Shortcode to display modules that we have created previously using Shortcode Builder.
- Click on Module Shortcode.
- Choose the previously created module you want to display.
- Click Save.
- Now click Update or Publish.
- We used File Browser and Photo Gallery as an example basis.
